Monday, 21 November 2022

Village Assault, with Soldiers of Napoleon

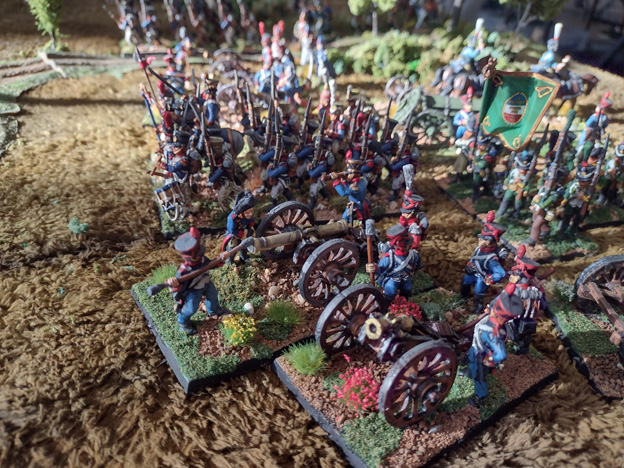
 Testing a new historical scenario, with the French Imperial Guard holdings a village and its church (let’s just call it Plancenoit) under attack from my Austrians (standing in for the Prussians). An very different sort of game, with tough, but small units holding fortified buildings (some of which where already on fire, so not much use). Two small brigades holding against three attacking ones would also be a tough ask for the defenders, down a card from Turn 1 onwards, and also badly out-shot in artillery. In all, the balance seemed about right. It would be close, and in the end very close.

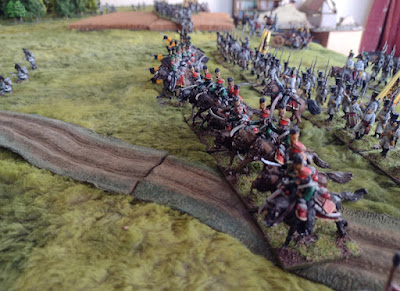
This would be an almost all infantry fight, my attackers had a single 2 stand hussar unit… so, yep, not much use in an assault into buildings, and maybe VPs waiting to happen if I got them destroyed. Best keep them out of trouble.

The 'Austrian' attack would be with three infantry brigades, with artillery support, but mostly line and some landwehr infantry.

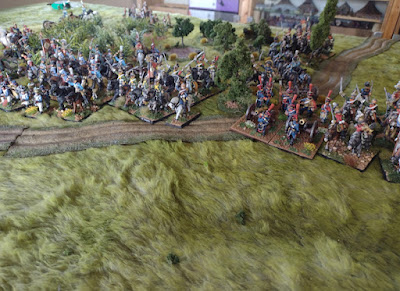
Here are shots of the progress of the game as the 'Austrians' fought their way into the village. The French defended the first line of cottages, mostly with young guard’ inside them, skirmishers deployed. The couple of old guard battalions were held back as the counter-attacking reserve. Main attack up the centre and against the closest cottage and paddock below (Austrian left).

The village and central church (and yard). Attackers will deploy from the right side of this pic.

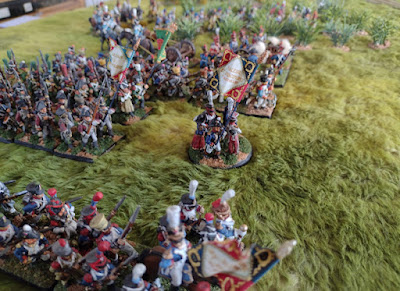
Old Guard hold the church yard, as the church is well on fire already.

More French scattered around the village.

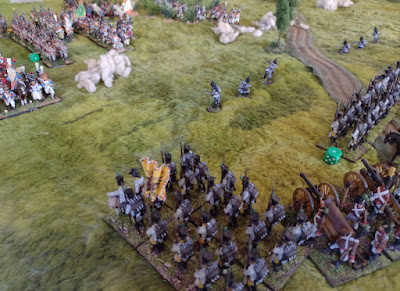
Austrian deployment, the left and centre brigades, both led by a skirmish line, carrying the attack.

Young Guard hold a small cottage and paddock with their skirmishers. It would be the scene of heavy fighting on this flank.

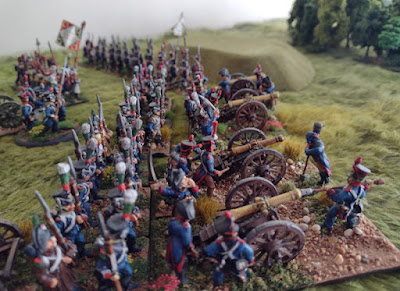
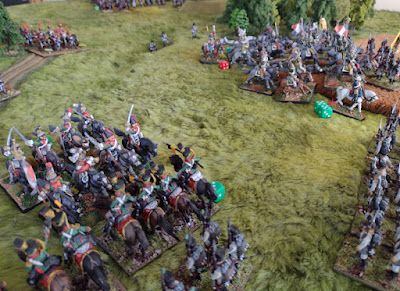
The Austrian centre moves up, skirmishers, light infantry screen and assault columns behind. Supporting fire kept the French heads down.    

Height of the assault in the centre as the French battery is overrun. Their counter-attack would then drive the Austrians back in complete disarray.

Landwehr column is peppered by skirmish fire as they try to advance on the right, but they break and run. The attack here never got going. Landwehr vs Guard in fortified positions... not much hope. Just a demonstration attack then.

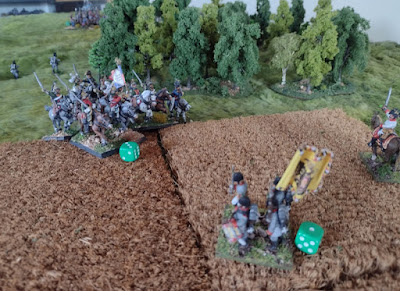
Reserve battalion, awaiting the call forwards. Maybe waited too long.

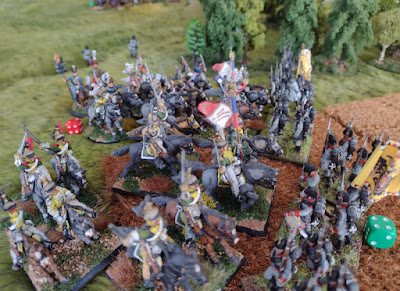
Fierce skirmishing at the paddock as the French are pushed back, Austrian hussars behind harassing the voltiguers back to their parent units (they came in handy). Howitzer fire eventually set the cottage on fire and forced the Guard out.
The assault on the right reaches the paddock and drive in those skirmishers but the assault on the cottage is thrown back, with heavy losses, before it burnt down.

Old Guard advance to counter attack in the centre, but just too late to turn the day. With both sides requiring just a few VPs to break the other the Austrians just knicked it, pulling back with a few good rallies saved them (and obscuring smoke helped). The French finding the small battalions hard to preserve (but good in those fortified cottages). French broke by -3 points, Austrians at Break Point, so a very narrow win. The village will fall. 


Saturday, 5 November 2022

Austrian Attack - with Soldiers of Napoleon

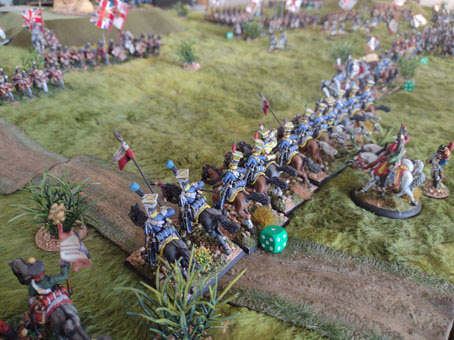
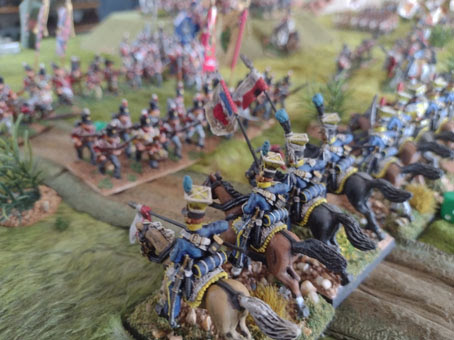
 Another Soldiers of Napoleon game, this time testing a new scenario. My Austrians would be attacking against the French on higher ground. Although the initial forces were even (ish), the Austrians had reserves, so the battle would be become tougher for the French defenders as it went on and they were outnumbered. Both sides had two mid-strength infantry brigades, my Austrians though having a lot of landwehr sprinkled with a few regular line battalions and screening Grenz unit. The French had mostly line, with a few reserve units, and one tough old veteran battalion. The French had a slight advantage in cavalry, two brigades, one of line lancers, one of chasseurs. The Austrians single light cavalry brigade was of uhlan and hussars, both sides cavalry were deployed in a screen in front of the main infantry lines.

Time to see if the Austrian attack up this slope can push the French back, or out of the way.

The initial turns did not got too well for my attack. First, the French decided that a static ‘hold the line’ plan wasn’t for them and launched a counter-attack, on their left with the lancers leading and infantry following. I met his lancers with my own, but badly outnumbered, the first cavalry melees only went one way, my uhlan’s counter-charge was thrown back with losses and they withdrew to rally and regroup, beaten, but not broken, they would return. To try and help them, my hussars raced forwards to entice the enemy chasseurs to come out and play, only for heavy cannon fire to see the hussars pulling back to rally too, my cavalry screen had not covered itself in glory.

Meanwhile, as both sides infantry marched up and deployed into columns or lines, and the first ineffective skirmish fire started, a single French column, inspired by ‘Vive L’Emperur!’ advanced at the quick and charged and routed a landwehr battalion that crumbled in the face of French bayonets. Still, that single battalion was isolated and would then pay the price of repeated volleys into the column until it was also in disorder and withdrawing to rally as fast as it could. To help save it the lancers again came forwards to threaten to charge, and using intimidate to keep the Disorder building on the Austrian infantry. When a second battalion of landwehr broke under an artillery bombardment (used as the last card play of the turn it scored 3 hits and broke the battalion, unlucky for me), the lead brigade was looking thin.

The first 3 turns had seen the French get on top and have a significant lead on VPs. But, the comeback was on… as my reserve infantry brigade marched up at the quick and began to swiftly advance past and through the ragged leading brigade to take over the front (transversing the lines I beleive). It was fresh and soon deploying into long firing lines. The French, blocking the lane that ran up the centre of the battlefield, had done likewise, but their veteran battalion was now badly outshot. It would endure a hellish ordeal.  

Now, a great infantry brawl developed, both side’s cavalry skulking behind out of the murderous volleys line of sight. The Austrians volleyed, the French replied, with a nasty withering volley had hurt and saw more rallying required. My Grenzer battalion was torn to bits, turned from 6 stands to 2… and also withdrawn to some safety. On the up-side, both French artillery batteries had now run low on ammo and their constant menace had been greatly reduced (they missed every shot for about 4 turns). The Austrian line kept up the firing, and one reservist French battalion broke and ran… and the veterans only saved by multiple rallying. The VPs were evening up. It was close. He had more, but my Break Point was higher. We both needed about 6-7 points to win it.

Final turns and it became a real to-and-fro struggle. Both side’s infantry were taking damage. The resolute French veterans were reduced to just 2 stands in the musketry duel. One landwher battalion, in column, burst forwards and charged, driving back another French battalion, and it too rallied, just holding on. I couldn’t follow-up. If both French units broke, the Austrians would have it. Then, disaster, another artillery bombards special event, on my poor skulking uhlan, broke them, they withdrew from the field. Try as I might. I just couldn’t score the last few disorder on his infantry to see them off, they somehow survived the turn (by recalling skirmishers, the command stand inspiring and 1 excellent rally roll of 4 sixes - lucky!), both battalions ended the turn equal to their stands, not over, and so did not break.  I lost 2 landwehr battalions as well, in my defence, in a 8 card hand, not one card could rally my Militia quality troops, not one! So the landwehr were doomed. Card luck deserted me…

End of Turn 6 and, as we totalled up the VPs, the French had easily broken the Austrians, the fleeing uhlan and landwehr had cost me. The Austrians had scored 22 VPs, and need 23 to break to French, 1 short. Ah, so close, but a cracker of a close fight. This one, after the initial light cavalry clash, became a real attritional grind of infantry, volleys and skirmish fire, his lancers aiding by repeatedly intimidating all my poor landwehr. In the end it was just enough to hold on despite being outnumbered and out shot when my reserve infantry marched up.  

Here are some shots of the action…

French deployment, light cavalry screen the infantry marching columns, which launched an unexpected counter-attack.

After the initial turns, the front lines looks very ragged. French column in trouble, Austrian landwehr refusing to charge to drive them away for good, attacking with militia troops is hard work!
Austrian hussars advance, taking skirmirsh and cannon fire, they soon came back.

Landwehr attack columns follow a Grenz skirmish screen
The Austrian hussar taunt the French chassuers, but they refuse to play.
Reserve brigade arrives and marches up to take over the front from the ragged lead battalions, now in disorder or routed. 
French veterans take the punishment, whilst line lancers lurk behind and intimidate the Austrian lines.

Another landwehr battalion about to break, due to lack of any usable rally cards.


Monday, 17 October 2022

Soldiers of Napoleon, demo-game, @ Other Partizan

For a full day of gaming (and some shopping) at the Other Partizan in Newark, this game was set in 1813, south of Leipzig (roughly) at 1,200 points. Both the Austrians and French had 5 brigades, 3 deployed and 2 off table in reserve, so a full-sized game, played on a 6x6 tabletop.

We randomly generated the terrain and drew/rolled a special circumstance, which saw the French pre-deployed on the tabletop, waiting the Austrian attack and already eyeing the hill on their right (my left) as a place to get some guns on.

The Austrian plan of attack was, after their last defeat defending, to launch an all-out assault on that high ground, using a forward deployed grenadier brigade of 3 strong battalions, screened by the advanced guard of Grenz and Feldjaegers, they would skirmish their way forwards and take the initial French return fire, for the grenadiers to follow-up, and charge through their extended lines to smash the French off that hill top at bayonet point.

Supporting that attack would be the cavalry brigades. First the heavies, the cuirassiers would, on arriving from reserve, launch their attack in support of the grenadiers into the French centre. Meanwhile, the light cavalry would launch a second attack on the far right, over the stream (navigating that would slow them down), this would hopefully draw his cavalry to them and leave the cuirassiers freer to rout the French. So, ‘send in the heavies’ was basically it… the other line infantry brigade was just on hold the line in the centre/right.

The French plan originally was to hold the line, and await the arrival of their powerful reserves, their own heavy cavalry and a strong Imperial Guard infantry brigade, which would counter-attack once the Austrians had been drawn on and weakened. But, the early gain of the ‘guns on high ground’ objective card resulted a reappraisal, and a fateful decision to move up for the high ground and try complete that objective.

How did it go?

Initially, well for the French, their  artillery fire did damage, especially to the feldjaegers and they towed a gun battery onto the hill, deployed it and claimed the objective VPs. Nothing the Austrians could do about it but press on. The skirmishing, aided by jaegers rifles, was going the Austrian way (for once) and the attack on the hill moved up well, except for the damage to the feldjaeger battalion, resulting in heavy losses then they rallied. With some good luck, the cuirassiers arrived at the end of Turn 2. By then, French chasseurs-a-cheval had sped across the field from their left to try and aid the defence of the hill, hoping to force the Austrians into square and stall them, or lining up an inviting looking flank charge into a grenadier battalion. A ‘stalled’ special event stopped this move and left the dithering chasseurs waiting orders, as the enemy cuirassiers, with an ‘at the gallop’ event rushed up, then deployed out into attack columns. The French light cavalry was suddenly in trouble… the cuirassiers, taking a consecutive order, sabres out and sounded the charge… and the hooves thundered.

In the infantry fight, the grenadiers had also moved ‘at the quick’ and then also charged, their columns bursting through the light infantry screen and into the French lines, it was indeed a grand assault as all hell broke loose. Cannons fired grapeshot, but the French infantry were defeated and forced back, a battery overrun whilst their cavalry as pummelled by the cuirassier’s charge. The swirling battle around the hill went to the Austrians and as Turn 2 ended they had gained over 20 VPs (won 4 melees, routed a French battery and both chasseur-a-cheval regiments, completed a grand assault, plus French rallying) in return, French close range fire had broken one grenadier battalion who stream away down the hill.

On to Turn 3, and both sides gained an extra brigade from reserve , my light cavalry rode on on the far right. The French cuirassiers arrived behind their centre.

As fire continued to be exchanged around the hill, both sides had to pull back and rally, including the cuirassiers. On the right, the light cavalry hussars and uhlans galloped past the waiting infantry marching columns and splashed through the stream (the supporting horse battery went over the bridge). They were faced by just a single hussar regiment holding the open french left. They needed help. It was not forthcoming though, the French cuirassiers were still held back (I expected them to come flying up). The hussars would have to hold alone, as best they could for now.

When the opposing hussar regiments clashed, the Austrians got the better of it and the French withdrew again to rally. The uhlans refused to charge as ordered (and I was out of command point re-rolls). It seemed the French left would be broken. Until, Turn 4 saw the final French reinforcements arrive, the Imperial Guard marched on and, drums beating, at the quick, deployed into lines. Using a consecutive order their volleys then sent my light cavalry reeling back, and routed the poor uhlans (bad day for them). The light cavalry had to withdraw again and rally as they could. The Guard had saved the flank and my remaining light cavalry would be a poor match for them.

Could the French hold on and turn the tide?

Well, in Turn 5, no… the Austrian pressure around the left hill was renewed. The last grenadiers, battle-worn now, charged on again and won the following melees, driving the French infantry (some mere reservists) off, and the cuirassiers, now back in good order, launched themselves at the newly deployed Imperial Guard infantry line that had formed up and given them a stiff volley. The guard infantry were defeated, fell back and then rallied with heavy losses to stay on the table, but the damage was enough. The French had exceeded their Break Point and would retreat from the field. The Austrians had won, small revenge for last time’s hammering… with still 9 VPs required, so a solid win.

Brilliant day, good game, nice to win one for the Habsburgers… thanks to all that game to watch, ask questions and cheer us on. We had a blast…

Here are a few pics of the action. 

Austrians deploy, light infantry screening the grenadier columns

The French opposite them, ready to quick march for the hill between the two lines.

The French centre, a weak infantry brigade.

Austrian line infantry, on the right, await orders to advance and cross the stream ahead, along with their battery and supply wagon.

French guns in the centre, a continual harassment.

Austrian guns in the centre - a rude surprise when this cottage was destroyed by French sabotage - sappers little present.

The Austrian heavy cavalry arrive a gallop on as full tilt.

Austrian grenadiers begin their assault on the hill.

Chasseurs-a-cheval rush across from the other flank, as jaegers keep up skirmish fire on the French infantry.

But, after being stalled, the Austrian cuirassiers catch them and rout them. 

Onward the grenadiers! Drive them off!

The light cavalry arrive and stream past the still waiting infantry lines.

All that can stop them... French hussars.

Form line and prepare to charge!

Having seen of the hussars, a line of Imperial Guard infantry deploy with well-drilled calm and unleash heavy volleys. Run-away!

Last of the action, the cuirassiers charge home to drive off another guard battalion, with sabres...


Thursday, 22 September 2022

South of Leipzig, a Soldiers of Napoleon AAR

A one-off pick-up game, set at 800 points and Corps-level (so 4 brigades a-side, 3 deployed, 1 in reserve) using the 1813 army lists as my Austrians once again took on Bony’s boys in blue. The plan is run a slightly larger game at the Other Partizan in October, so we had a trail game for that (and just a afternoon’s entertainment).

Here is the force I picked.

Austrians 1813

Infantry Brigade 1 (rear right)
Fusiliers        6 stands    60 pts        1MV
Landwehr        3 stands    15 pts        1MV
Artillery battery    2 6 pdrs    18 pts        2MV
Jaeger Detachments    2    12 pts        0MV
Total                    240 pts    7MV    

Infantry Brigade 2 (rear left)
Fusiliers        6 stands    60 pts        1MV
Landwehr        3 stands    15 pts        1MV
Artillery battery    2 6 pdrs    18 pts        2MV
Artillery battery    2 12 pdr    28 pts        2MV
Jaeger Detachments    2    12 pts        0MV
Total                    268 pts    9MV    

Light Cavalry Brigade (screening left)
Hussars        5 stands    75 pts        2MV
Uhlan            5 stands    60 pts        2MV
Artillery battery    2 6 pdrs    18 pts        2MV
Total                    153 pts    6MV

Reserve Grenadier Brigade
(in centre on turn 3)
Grenadiers        5 stands    70 pts        2MV
Total                    140 pts    4MV

Grand Total:  800 pts, 26 MV, 2 scouts.


And here are the enemy:

French 1813
Stalwart General    +5 pts

Infantry Brigade 1 (on right)
Reserve Infantry    6 stands    30 pts        1MV
Reserve Infantry    6 stands    30 pts        1MV    + Drillmaster
Line Infantry        6 stands    66 pts        1MV
Veteran Infantry    4 stands    68 pts        2MV + Ruthless commander
Artillery Battery    2 8 pdrs    24 pts        2MV
Total                    294 pts    8MV

Infantry Brigade 2 (on left)
Reserve Infantry    6 stands    30 pts        1MV
Reserve Infantry    6 stands    30 pts        1MV    
Veteran Infantry    3 stands    51 pts        2MV
Artillery Battery    2 8 pdrs    24 pts        2MV
Res Arty Battery    2 8 pdrs    39 pts        2MV    + Full Caissons, Expert Gunner
Total                    174 pts    8MV

Dragoon Brigade
(in centre)
Dragoons        5 stands    70 pts        2MV + Le Beau Sabre
Dragoons        4 stands    52 pts        2MV
Artillery Battery    2 4 pdrs    14 pts        2MV
Total                    206 pts    8MV

Light Cavalry Brigade (reserve, in centre on turn 1)
Hussars        5 stands    75 pts        2MV scout
Chasseurs        3 stands    33 pts        2MV
Artillery battery    2 4 pdrs    14 pts        2MV
Total                    122 pts    6MV

Grand Total: 801 pts,  30MV,  1 Scout (max)


My plan was to fight a defensive battle, dig-in one of the infantry brigades behind fieldworks and invite the French to attack it, or the other brigade, then use the light cavalry to support them and the grenadiers to come in and hold the line behind them, counter-attacking if required. This of course was based on the assumption that the French would baulk at attacking the fieldworks. I didn’t want to be entirely static, I would punch-out to counter the French, use the light cavalry aggressively, but not just to ride off and get destroyed (losing the entire brigade would be easily done and cost me the game). So, how did it go?
 

Err, not that well. First off, I failed to get any fieldworks built, which was a blow, still, the defence could still work, same plan, just no defences. I really should have included a sapper detachment for the digging-in brigade, but it’s something I need to add to my Austrians. Note to self, buy some Austrian sappers and paint them!

The French planned an infantry assault, on their right with their strong brigade, reserves out front in line, to take the punishment, with the line infantry following in columns behind that screen to rush through the make the final assault. It would be supported by the guns of his weaker infantry brigade (their job was to shoot a lot and the infantry was just to protect those batteries from the enemy, like roving light cavalry. He also had his dragoon brigade, a powerful asset and it would move up and try to co-ordinate its attack with the infantry, so if the Austrians formed square, then his infantry could blast them into bloody ruins. Behind, his own light cavalry had it’s own mission, the hussars were insurance, to get a fourth cavalry charge (looking to complete the ‘grand assault’ objective) with the chasseurs only being used for driving-in Austrian skirmishers (those pesky jaegers).

We both deployed, French with flanks forwards (both infantry) and the dragoons in the centre, being further back wasn’t a issue for them, one ‘at the quick’ move would catch-up. The Austrians had a screen, the light cavalry in front of the left flank. The right (French left) was something of an issue, as in randomly generating the terrain I had rolled up a large, dense wood, which was an big obstacle. I couldn’t leave it undefended, otherwise his light cavalry could gallop round and either flank me or quickly complete the ‘advance through enemy lines’ objective. Still, it was clear to both commanders no major attack would come that way, so the fight would in the centre and on the Austrian left.

Added to this issue, pre-game everything was working like a well-oiled machine for the French, whilst I had 1 command point, they rolled 3, for a total of 5!. His reserves would also arrive on Turn 1, mine on Turn 3 (quick for infantry though). The French won the tactical advantage and so chose table edges and I deployed first, so hey, it couldn’t go much better for Bony’s men before shot was fired in anger.

So, Turn 1 and the French began their attack against my left, infantry lines, columns behind moving up slowly, and taking fire from the deployed jaegers and the artillery. The Austrian centred moved up across the cornfield and formed firing lines here, awaiting the cavalry and prepared to jump into square if/when the dragoons got too close. On my left the infantry line also moved up, as the light cavalry pulled back through their lines (1 disruption all round) but they were in place to charge back through (just taking that disruption) and punch out if his infantry approached. At the end of the first turn, a bit of damage done, but nothing dramatic, mainly we were finding artillery lines of sight and ranges were poor, so not much doing from the gunners yet. In the end phase, continuing the French run of good rolling, their light cavalry arrived in the centre in columns of march to advance in support of the infantry attack.

As predicted, nothing was happening on my right, so back to the French attack. The cavalry first moved up, but a ‘stalled’ dragoon regiment stopped the entire brigade, willing to wait to move together. The light cavalry were soon behind the infantry and deploying into line. The chasseurs sent out a harassing squadron and drove in my jaeger skirmishers. The lines were then close enough to exchange volleys, both sides raking the other and the French flinched first, after 2 volleys the reserves withdrew back out of range and rallied off the damage, costing a few bases. As they did, the Swiss battalion-column behind burst through and charged my forward horse battery, overrunning it. They then paid the price for such boldness, counter charged by my waiting hussars and an infantry battalion, beaten twice, then shot-up, the Swiss fell back, rallied and removed all but 1 stands to remain in the fight (well, not really, just still there). Carnage, and a big pile of Swiss dead. The Austrian line was holding well, as the hussars came back to position again, but only after being bombardment by artillery and taking more damage, they needed to rally too and lost a stand. On their left the French limbered up a battery and moved it off, heading up the small hillock, which I could nothing about. If the French got the ‘guns on high ground’ battlefield objective then it was easy VPs. The random terrain generator had favoured the French here. A bit more skirmish fire saw out the turn.

The third turn would see more skirmish fighting and rallying on the Austrian left, and the dragoons moved up, but with one regiment under accurate artillery fire and in disorder they had to stop again and rally-off the disruption. They were finding it hard to just get forwards. With more cannon fire into the French infantry they too could not press their attack either and so it was stalemate for a turn, fine by me on the defensive. We were holding them off, and the VPs were pretty even, slight advantage to the French. In the end phase, my grenadiers marched in to reinforce the centre, expecting that looming cavalry attack soon. If the infantry broke, which seemed unlikely in square (which I had to get into this turn), then the grenadiers would be their to hold the line and their volleys into the dragons would hurt. Speaking of which, I had (just) completed the ‘hold the line’ objective. All VPs help (and I rolled a 1 of course - eye-roll!).

Turn 4 would be decisive, and not in a good way. The French launched their grand assault attempted, with a lethal combination of special events and orders. First, the dragoons used a ‘at the gallop’ to race up and, with a second play, immediately charged my infantry lines. Oh no, my next play was to form square, nooo! Too late now! 2 dragoons regiments ploughed in and smashed up the lines, both falling back in disarray and with a lot of disruption. It got worse. I had to rally, but the dragoons followed up and charged again, in a repeat and saw both infantry regiments ridden down. The third dragoon regiment had also raced up (using at the quick) and they moved through and attacked my reserve landwehr, also caught not in square and torn apart too. A mess. My centre had been cut to ribbons under dragoon sabres. As I rallied again to try and save something, the French hussars joined the heavy cavalry and charged, to be counter-charged by my lancers which rode through the infantry line ahead to meet them, and defeat the French, sending the hussars riding back where they had come from and needing to rally, but so many cards had already been used, they couldn’t and were routed… but their charge had completed the fourth unit needed for the ‘grand assault’. The French also, by fortune, held the ‘guns on high ground’ objective… and could claim it. Drat!

Well, that turned into a disaster, the Austrian centre had been smashed open by the dragoons and the French VP total raced up to 40! The Austrians had just 14, so not even half the French total. A decisive victory for France, and 20+ VPs in a turn. The Dragoons were in a bit of mess, but no units had broken, only losing the hussars (in a continuation of our theme that hussars rarely seem to do very well). Bony will be pleased with that report.

The lesson here, wait too long to form square at your peril, because the special events can throw out all your planning… still, it was a fun 3 hours of gaming, even if it ended in a kicking. I cannot stop the French dragoons… maybe I just need my own to counter them, add a new Austrian dragoon regiment to the shopping list (it's growing).
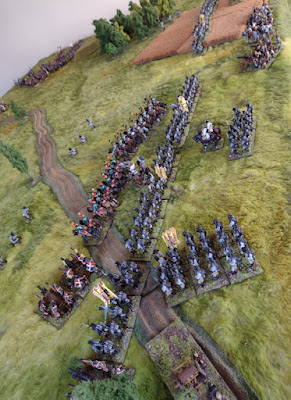
Austrian left and light cavalry screen.

The centre in the cornfield.

Hussars and uhlan, the counter-attack force.

Sound the pas de charge! The attack columns.

French gunners, found with few targets or out of range. Note the hillock behind, handy for high ground, screened off by the large, dense woods.

Austrian guns, the forward horse battery was lost, but the foot battery 6 pdrs did good work on the flank.

Smoke, as the game started in morning mist (it soon lifted). Austrain counter-attacking column waits to go in against the reserves. 

French cavalry in the centre, deploying their 4 pdr battery.


Grenadiers arrive in the centre, but block the 12 pdrs line of sight.

Uhlan meet French hussars and drive them off, but behind, the dragoons are tearing through the cornfield.

Charge! and Charge! again, the dragoons catch the Austrians in line and destroy them. Here, the poor landwehr are hit.

All that is left in the cornfield, 1 stand of the landwehr and the 'at risk' command stand. Two battalions  shattered and gone.


Saturday, 10 September 2022

Colborne’s Doom at Albuera - with Soldiers of Napoleon

Continuing a series of historical re-fights, testing scenarios and ideas of how they might work, as well taking away the player’s ability to choose their own force, this would be a scenario from the Battle of Albuera in the Peninsula. Not the entire battle, that isn’t what SoN seeks to recreate, instead an hour or two, this time on the far right flank of the Allied line, as the French launched their first flanking attack, taking the ‘southern knoll’ high ground and attacking the Spanish line holding the ‘northern knoll’, and to include the fateful arrival of Colborne’s British brigade in a counter-attack that turned into a disaster as it was caught by surprise by the French cavalry in the one of the battle’s most famous events. Having worked out the forces, made a simple map of the battlefield and added a few extra special rules to help recreate the action (like the heavy rain storms that blew through on the day), it was time to crack-on. This time, for a change, flipping a coin, I got the French.

The first turns would see my two infantry brigades advance on the Spanish lines, and having deployed my columns, they attacked en masse, whilst the guns deployed onto the southern knoll’s high ground and opened fire with some effect on the Irlanda (Irish) volunteer battalion. It seemed, give the weakness of the Spanish line, especially on their left (with just 2 militia battalions and 1 4 pdr gun), the French would overwhelm them. Not so. As my columns closed in, sending out skirmishers to harass the Spanish, who could do little back, a sudden withering volley from the Spanish line turned two battalions into a bloody mess, including my best (the combined grenadier battalion leading the attack on my right). Reeling back to rally, the French were suddenly in disorder and losing stands. Even the militia battalions in line (with some good rolls) blasted my columns into a mess. My voltiguers had done good work, but the Spanish had rallied as well and completed their ‘hold the line’ objective. Nowhere did the French reach the Spanish and in response a few of my line battalions formed into lines to try and respond with their own volleys… the Spanish were fighting hard and well ahead on VPs.

On turn 3, the British reserve brigade arrived on the Spanish right, Colborne’s 4 line infantry battalions and their 6 pdr guns, these pressed forwards to counter-attack and it looked like they might flank the French attack and threaten the guns on the knoll. I had 1 reserve infantry battalion to throw in their way.

That was, until the French light cavalry arrived, the full Vistula lancers regiment and 2 small hussar units rode in, in columns of march for speed but with a ‘well drilled’ special event, raced forwards and smoothly deployed into lines, ready to attack. The British were sitting ducks, no time to form square before the lances were lowered and the charge! sounded. In the French cavalry crashed, predictably, through the British in lines, winning both melees and causing a lot of disorder (they weren’t lucky enough to capture the colours though, but it was close).  As the British pulled back and rallied to save themselves, a quick rally on the professional and elite cavalry saw them back in good order again. Using a consecutive order (sometimes its worth taking the hit, for the gain), they charged again, into 2 different British battalions and again, it was carnage (well, the hussars just won, by dint of being better quality troops than line infantry). Still, 2 more melees won and the British had to rally again, the cavalry attacks had earned 10 VPs in a turn and the French had turned round the earlier Spanish lead on VPs.

On the right, after much difficulty, and another Spanish withering volley, two of my infantry columns finally charged. One was defeated and pushed back, the other, the doughty grenadiers won and pressed on victorious, the Spanish militia that had flayed them with repeated volleys now running for their lives.  

By the end of turn 5 it was very close, but the French had just broken the Spanish (a good ‘How Goes the Day’ rolled also helped). The Allied break point  was 20, the French had 22 VPs. The French break point was 20, the Allies had 20 VPs… so a very marginal win to the French.

The game had played out very close to the actual day, the French infantry attack floundered against unexpectedly tough Spanish resistance, but Colborne’s counter-attack had been shredded by the lancers and hussars… still, with a bit more luck or maybe just not bad roll at the end, it could have been different. Great fun. 

French guns are dragged up onto the southern knoll. Target rich environment ahead.

Vielande's brigade advance on the French right, confident of a swift victory.

Brayer's brigade in the centre, 6 battalions in attack column (have are 'bis' troops though).

Vielande's attack approaches the hillock, held by 2 Spanish militia battalions and 1 4 pdr gun.

French fire support.

The weak Allied left needs reinforcements, the reserve Navarre volunteers are on the march to their aid.

On the Allied right, Colbornes 4 battalions arrive at the march.

The French winning the skirmishing duel in the centre. But closing the gap into musket range hurts a lot, from the Irlanda and Patria battalions.

To counter the British counter-attack, the French cavalry, led by the mighty Vistula lancers, gallop on at top speed.

Well disciplined, they form line to attack. Hussars cover their right flank.

Back on the hillock, the Spanish militia have held out and driven back Veilande's columns with withering volleys.

The Irlanda battalion, disordered but fighting on and holding back the French columns as well.

Charge! The lancers go in, and tear Colborne's redcoats to shreds. A second charge saw all 4 British battalions withdrawing in disorder and needing several rally cards. Guard lancers (treated as here), are very good troops.