Sunday, 8 January 2023

Barbarossa to Berlin, Game 3 with BG Stalingrad - Red October

The third in our series of Ostfront BG games, a diversion into Stalingrad for a urban fight using all the Stalingrad rules and the Stadtkampf scenario at 650 points per side.

As before, we play straight up pick-up games, select forces, scenario, generate terrain etc and see what we get. My Russian forces here were, in brief, a remnant platoon with support from a 50mm mortar, marksman, anti-tank rifle team and anti-tank gun, a extra remnant squad, a reserve platoon, sapper squad with flamethrower, FHQ, NKVD officer, off-table 122mm howitzers across the Volga, ace sniper and observer, infantry foot patrol, and defences in an arty spotter bunker, a tunnel access for the sapper squad and a reinforced building (which was the main workhall). No tanks, no vehicles at all in fact. An all infantry force.

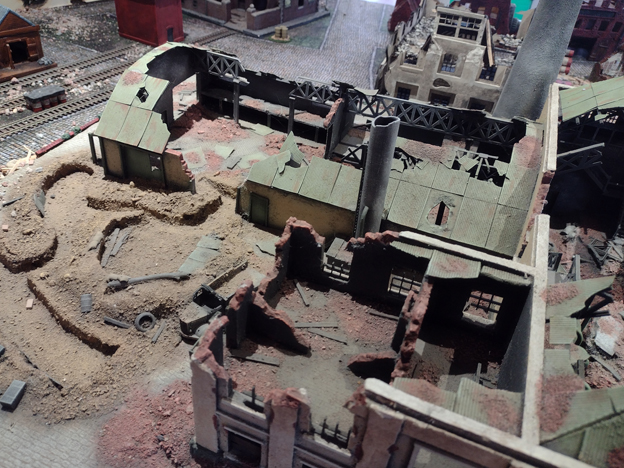
Having randomly set-up the terrain we had various factory buildings and ruins, some railway tracks etc, which we just rolled to place around the table in remaining spaces, staring with the largest buildings and then filling in gaps with smaller ones, we added rubble and rolled for which buildings were on fire, and got this. The flaming buildings were in right awkward places, blocking two covered routes to get to the enemy. 

Germans on nearest edge, Russians far side, holding the central workhall and marshalling yard (with crane). Admin building on German left.


The Russian chose to hold the factory area with the marshalling yard to their left and workshop and admin building on the right, with the Germans opposite. Both deployed our defences and units, including scouts, set timed strikes and ammo’d up AFVs (not me). Time to let battle commence.

The initial turns were cagey. Neither side came out of their positions as they awaited extra reinforcements which are slow to arrive. Patients was required as both sides flung some artillery to little effect beyond a few pins. My plan was to launch small spoiling attacks forwards, like the sappers in their tunnel, but mostly to hang on to the workhall and the objectives I had (again 5 were present). I had 3 quickly, the Germans 2. They started to get their StuG support onto the table and two squads used tunnels to get into the admin block and seize it. The fighting was sporadic, shot traded here and there, a bit of pinning, the odd sniper round, but as yet no major push from either side and a lot of units waiting on ambush fire for the action to kick-off. My sappers found their own tunnel had been collapsed and so couldn’t deploy forwards.

The German attack moved in steadily, a timed 105 strike on the workhall initiating the advance, StuG fire at the workhall did little (thanks to the reinforced save) and return anti-tank rifle fire pinned one, good shooting. My reinforcements had been slowly deploying, reserve platoon on the right, and the firefight between the workshop and admin building was intense, both sides becoming well pinned, my sniper ace doing good work here too. When a StuG appeared to help, that seemed like it would gain the Germans the upper hand, with no anti-tank weapon to shoot back, instead a veteran squad moved up against it and used anti-tank grenades, twice failing, but the StuG pulled back after its infantry support, an MG team, was wiped out by PPsH fire. Ammo was a consideration here too, StuG running low I guessed.

Artillery fire still fell, my 122s doing useful work in pinning, and killing a German sniper. His 105, on-table and firing at a PRTP on the workhall, was annoying, but I couldn’t stop it. A direct hit wiped out my anti-tank rifle team. We were 6-7 turns in and the counters stack was even(ish), no clear leader as yet.

Things started to move the German’s way as the StuGs opened fire on the workhall and their infantry and MG teams worked into place to try an assault. A flaming building blocked the main route, and an assault over open ground was suicidal, so there was only one way, which was currently covered by a remnant squad’s PPsHs waiting on ambush fire, trying to get them pinned was a task the Germans were finding hard. Meanwhile, the 122 shells pinned a StuG and immobilised the StuH-33, broken track, but that didn’t stop it launching 150mm shells into the workhall, where the casualty count was increasing despite the 3+ cover save. I sent fresh reserve squads in, and the 50mm mortar was keeping Germans heads down until StuG fire did for it too… more counters.

The Germans were on top now, so time for a counter-attack. My Sappers had been waiting on reserve move and now moved up through the marshalling yards’ station. The German trench was no longer on ambush fire, they fired into the workhall to try and get the assault going. My sappers now rushed the open ground and, whoosh! Unleashed their flamethrower attack, wiping out the rifle squad and causing 2 counters for the Germans (I didn’t know it then but they drew a 4 and a 5 - ouch!). The Germans pressed for the workhall, one squad braving PPsH ambush fire to try and assault, that failed and it too was wiped out, another counter. They had support though and the second squad wiped out my sub-machine gunners in turn as the fighting got close and personal. That counter was a 4, with only 3 BR left, the Russians were defeated. But not by much, the late Russian rally had the Germans just 2 from their total BR… so very close. 1 more counter would have done it (or a better roll for my 'Bled White' special rule). Great game, very different from the last 2, and close, so close, again.

It is now 2-1 to the Germans in wins (narrow ones), with our next game a 1943 Kursk tank-fest again. Let’s see if the Reds can even it up. 


Admin building, the German tunneled in and took it.

Marshalling yard and crane, home to a sniper.

Main workhall, the left-front was a reinforced building.

First StuG sneaks on, with some infantry support.

Sniper ace waiting... waiting...

German occupied trench on their left, a blocking position, mostly on ambush fire.

More landsers infiltrate forwards, heading for the workhall.

105 at the back, hitting their PRTP, on the workhall - constant, accurate, harassment.

Reserves for the workhall meatgrinder.

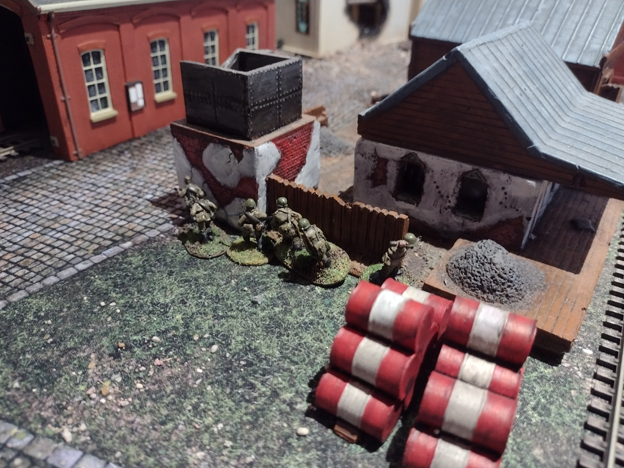
Sneaking up through the marshalling yard's station buildings (and water tower)

Firing down from the admin building, a protracted firefight with the workshop ahead. Smoking T-34 marks an objective. 

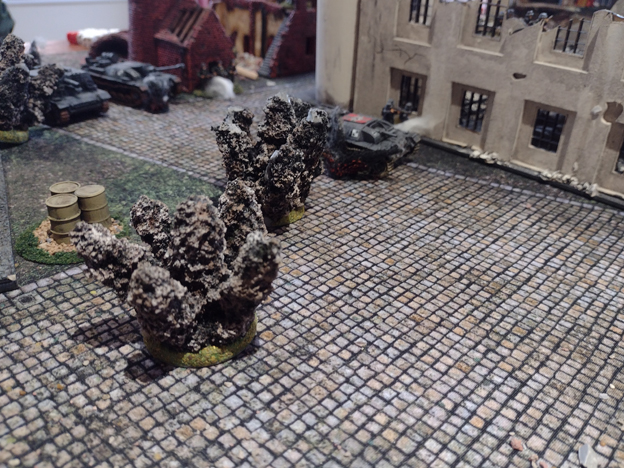
StuG arrives to aid the fight here.

Whilst the others line up the workhall.

Inside, NKVD squad (foot patrol) hold the objective marker, as the 50mm mortar returns fire (doesn't really seem fair that).

Urrah! Timed 105 strike hammers the workhall.

Remnant squad hunts the lone StuG with their AT grenades, they fail, but it pulls back anyway.

122 shells falling around the StuGs in the centre.

FAMO arrives to try and fix the immobilised StuH-33B, working under fire.

German infantry sneak up to the workhall, the buildings behind is on fire and cannot be entered.

Inside the workhall again, reserve giving (and taking) fire from the admin building. Stalemate here.

Reserves risk a rush across the marshalling yard for the workhall, and get pinned by incoming. Pinned in the open, not good!

45mm AT gun taking long range pot-shots at the 33B, always an optimist! 2 hits, 2 glances... they tried.


Friday, 30 December 2022

Barbarossa to Berlin, game 2 with BG Stalingrad - Encounter near the Don.

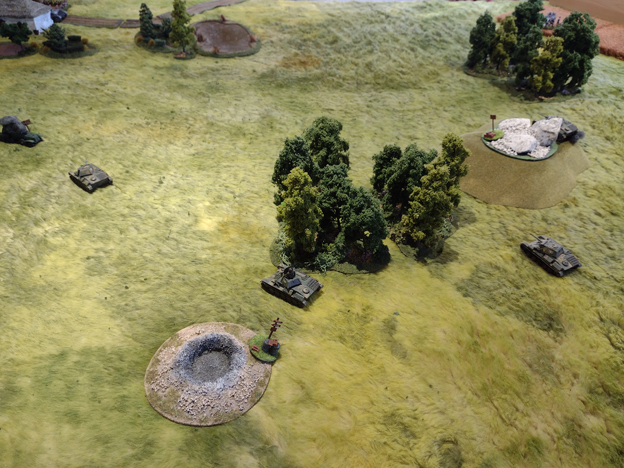
This would be our second game from a series of six planned, set in 1942 during the German advance along the Don. Another meeting engagement, this time the random scenario was Flank Attack. The terrain was randomly generated, with a few small hills (hillocks), two copses, an area of marshy ground and a single farm. That was pretty much it, so open steppes for another Panzer Division vs Tank Corps clash.

Part of the point of these ‘pick-up’ games is to use models that see little action, so I went with all my T-70s, six of them, which rarely get tabletop time and then built from there, with another six T-34s and tank riders, a battery of on-table 120mm mortars and, for recce, a BA-10 and the PO-2 (very useful mortar spotter). They would face panzer forces of a Pz-II platoon, a Pz-IV platoon and 1 extra Pz-III (lang) with a kradschutzen platoon as infantry and other bits a pieces, including off-table mortars, a StuG (same one that had been a pain in the last game) and a 20mm AA half-track (unlucky for the PO-2).

We got going, with my basic plan being to throw my T-70s forwards in a reckless attack, to cause damage, confusion and attraction attention, and quickly grab any available objectives for easy counters. Behind them, the T-34s, tank riders and mortars (once set-up), would follow in the main attack, going fast and hard at where ever seemed weak and had some cover from incoming anti-tank guns (those copses). Time to go.

As per ‘the plan’, the T-70 all arrived first and sped across the steps, getting to 4 objectives (woo-hoo) and running over and machine gunning a German recce command team, that was to be his main mortar spotter, but were now dead… excellent start as the Germans were slow to arrive and found their first tanks, Pz -IIs, not much of a match for my T-70s in the light tank duel, as 20mm cannon rounds kept glancing off.

The T-34s, each with a tank riding squad arrived and waited for the T-70 to complete their work, as the mortars then got set-up and started to pound away at the farm, where the Germans were still arriving. Long ranged fire proved mostly ineffective and the AA half-track was pinned by mortar fire, so the PO-2 could swoop about and fire the mortars at anything without being shot at every turn. The Germans meanwhile couldn’t get their mortars going, comms issues.

After the initial engagement it was time for the T-34s to move up and join the fight. I had lost 2 T-70s to anti-tank fire, but the others were still fighting, but low on ammo (no ammo truck) or down to a single MG. My T-34s would push right, using the copses as some cover and they dismounted their infantry here, only to encounter dismounted kradschutzen in what became an extended infantry fight, both sides pinning the other in turn and unable to move into or through the woods to assault the other. The German StuG, at it again, recaptured one objectives when the T-70 holding it was destroyed and then the BA-10 raced up to try to hold it was pinned, then destroyed. The Germans had started a fight back, and their AA, unpinned, hit and damaged the PO-2. I needed to unpin it and withdraw it, but didn’t due to lack of orders and next turn, it was shot down in hail of 20mm flak fire… 2 counters as it crashed and burned. Two poor orders rolls on the trot meant the Russian’s advance had ground to halt. A timed IL-2 airstrike helped out though, scoring 4 pins with its bombs... flak missed it... phew!

The tank fight was heating up, but remained at longer ranges, the T-34s banging away to little effect (I hit and failed to penetrate German steel on 6 consecutive attempts!). The 120mm mortars were still doing good work though, although my FHQ was doing the spotting work now (always worth having back-up spotter or two).

The Germans were struggling too, low on ammo, the Pz-IIs unable to do much and reduced to trying to pin T-34s (not much luck). Short on big anti-tank guns to take on my armour, the loss of his Pz-III lang hurt even more. The Russians were getting the upper hand and so, the Germans, fearing the loss of their infantry at the copse (now 2 squads and 2 MG teams, mostly pinned), if I could ever get my inexperienced infantry to close assault when ordered (failed 3 times), sent his last reserve, veteran panzer grenadiers in a 251 on reserve move, it raced up and dismounted the men, who then tore into the Russian infantry, assaulting one rifle squad and wiping it out. His Panzerjaeger-I scored hit and kill on a T-70 and my counter stack was building worryingly. But the bold counter-attack was at a cost. A T-34 shell destroyed the exposed 251 and more machine guns wiped out his MG team. When more mortar fire destroyed his AA half-track, back the farm, that was the Germans done. The Russians had won, with 7 BR still left, so 2-3 counters in the tank. I’ll take that. So, 1-all in games in the series so far.

The next game, we decided, would be a change, off to Stalingrad itself for a game that wasn’t a tank duel. Make for a nice change before moving on to 1943 and Kursk.

Photos of the action. 

T-70s lead the way, scattering towards objectives (the crater, KO'd BA-10, rocks on hillock) before the Germans could get moving.

They encounter a skulking German recce spotter team, and give him some MG fire...

Don steppe, Russians from lower left, Germans at the farm, top right.

PO-2 circles above... waiting the 120mm battery to deploy.

T-34s and tank riders arrive and wait a few turns.

Panzer IIs lead the way for the Germans, under watchful eye of big brother, Pz-IV lang...

FHQ watches from hillock as the 120mm mortars arrive.

More T-34s, the main punch, the smoking one is a wreck marking an objective.

Busy at the farm, but hemmed in by the marsh.

Resupply truck needed already.

AA cover, very handy.

Timed strike, well placed, but the bombing is all pinning, but effective pinning...

T-34s move up on the right towards the hotly contested copse.

... and in the centre.

StuG moves to take the objective back, wrecking the T-70 holding it.

BA-10 moves in, hits and... pins, again! That StuG will not die!

Infantry at close quarters at the copse, and all rapidly pinned. Who can get an assault off? Neither side it turned out.

BA-10 is caught in the 75mm crossfire.

Urrah! More infantry to support the battle at the copse.

T-70 (no ammo now) vs Pz-II, bouncing 20mm shells...

20mm Flak gets its target, down in flames for the PO-2... should have withdrawn it once damaged.


Friday, 2 December 2022

Barbarossa to Berlin, Game 1 – The Bridge at Borozyna

The meeting engagement scenario randomly rolled for our Barbarossa game was a Bridgehead Breakout, with the Russians at the bridge and the advancing panzer vanguard, (sometime in the first week of Operation Barbarossa, somewhere in the Ukraine), trying to take the bridge over and area of wetland marshes and ponds.

First we needed some terrain, so we used the Kursk book to randomly generate some. It threw up, as well as the bridge and marshes, a small wood, a farm, a large hill, on which was placed a large building, a monastery ‘Borozyna Monastery’, a village (the monastery’s community), several cornfields, and small hillock ‘kurgan’ burial mound topped by rocks (fallen dolmen, etc) and another small hill. There were also 5 (max) objectives. One at the bridge, both small hillocks, the wood and the road junction up by the village, so well spread across the tabletop. Here is the table after terrain set-up. The Germans would enter from the far end and have the village, the Russians would have to cross the bridge or the marsh. 

The tabletop, village, road junction, farm complex,  small hillock, large hill with monastery on top on the left (German right). Russian end is the marshy ground and bridge.


Next for the army’s deployment. First, note down timed strikes, any PRTP and ammo up are armoured vehicles The Germans would place just 2 units, both their recce vehicles. The Russian 6 (max), so 3 armoured cars and, just to get them on the board early, the 3 82mm mortar battery. Once that was done it was time to get going, turn 1, with the Germans wining the roll off to go first.


The first turn, with just the recce stuff on, were quick, units getting onto ambush fire to await the main event. Time for the troops to arrive, with the panzer marsch seeing 8 German units move on on turn 2. In return, the Russians rolled a 1, ah, so that was the FHQ, to lurk and try to stop that happening again (he did). Here they come…the panzers rolling up through the village and along the road to the bridge, claiming the road junction objective as they came.

The Russians started by getting some infantry on, too often its too easy to leave these behind, but it seemed obvious there would be a fight for the monastery on its dominant hill, so the trucks moved on and the troops loaded. The pan was get those trucks back off again, but in the end, tight on orders meant it did not happen. The first turns saw little actual shooting, a few long range suppressing HE rounds, until the spotters were in place and the German field artillery opened up, targeting, not unreasonable, the bridge. The first salvo saw a BA-10 take a direct hit and be flipped through the air, so first blood to the Germans. On turn 3, the Russians responded, the timed Katyusha barrage shrieking down onto the road junction, returning the favour by KO a 222 armoured car holding the objective and pinning various trucks and tows, including the radio half track. Job done.

The Germans moved on through the village and towards the monastery, panzer grenadiers riding on Pz IIIs, until one was pinned by a 37mm HE shot from the BA-27. The StuG arrived along with a riding squad and FO team moved to the farm on their left. The Germans claimed the next objective, the small hillock, that was also the Russian PRTP and soon found heavy incoming mortar fire all around them. One bomb KO’d a Pz-II, then a BA-10 on ambush fire in the wood’s edge hit and KO’d a Panzer III… and with 3 objectives held as well, the Russians had a significant lead on counters. The early turns had gone their way. 

Mortar battery, ready for a busy day.


Sukharlov arrives to observe the field and get his units moving. The Germans are coming.

First German panzers arrive, claiming the road junction objective.

Lurking BA-10 is pinned by early artillery fire around the bridge.

The other is blown sky-high.

Russian Katyusha strike back harder. 222 is KO'd and trucks on the edge of the edge the village are pinned. Useful harassing bombardment.

Russian motor rifles deploy and head for the cornfield.

Another squad unloads and takes the burial mound objective.

Turn 4 and, thanks to a re-roll from Sukharlov, a full BT-7 platoon arrived and crashed through the marshes, past the copse and moved at speed (and what speed) towards the weaker German flank, HE suppressing fire flying. A Panzerjaeger I was waiting and its ambush fire missed, only for incoming mortar rounds to hit it and KO it, suddenly that flank looked very weak. The Germans turned to their 105mm guns and called in urgent fire, only for it go wild and miss everything. The German artillery support would have a poor day, firing wildly three times, the BA-10 would be it’s only kill all game, and not much was pinned either. The Russians charged on, assisted a few turns later by the arrival of the second tank platoon, which moved up the other flank, but ran into waiting Panzer IIs (even 20mm cannon fire hurts BTs) and Panzer IIIs, which scored a first kill and then a mine-strike scored a second, then a breakdown a third - yep, that charge was rapidly ineffective and costly in counters. A timed Stuka attack on the bridge added another two counters when its bombs blew up an idling truck (no orders spare to get them off the table was an issue, easy counters waiting to happen).

The battle around the monastery had started, the German panzer grenadiers occupying it in force, getting their medium and a heavy MGs set-up, even as Russian mortars and the two infantry guns began to hammer at the building, causing some pinning. Small arms fire was traded, and mostly the Germans were pinned down, forcing them to take 2 counters to unpin everything.

Next, a break for lunch and over a cup of tea it seemed bleak for the Germans, they had lost more vehicles and taken more counters, the tide was behind the Russians. 

Panzerjaeger one is KO'd by a mortar bomb.

The Panzer-IIs reach the monastery hill on the German far left.

Dive-bomber incoming... target, the bridge! That truck did not survive the Stuka air strike.

BT-7s (and reserve rifle squad) arrive, altogether, to launch the counter-attack.

Germans claim the hillock objective, and get blastered in mortar fire.

Sta! Stal! Stal! BT platoon moves up on the right.

The StuG and tank riders makes for the farm complex, in harry with lots the BT already incoming.

The full table as the battle heats up.

So to it remained, the BT-7s charging on and claimed the hillock objective, a 4th out of the five. The ambushing StuG did good work in destroying on BT-7 as it approached the farm complex, but the German FO team, calling in the inaccurate 105 fire was lost, a HE shell killing one man and the other, pinned, running for it. The German commander now took over those duties, but didn’t have much of a line of sight from way back in the village. Another blow. How long could the Germans hold on for? Not much longer, I thought. 

The finale of the battle, and the BT-7s raced on, on reaching the rear objective at the road junction and claiming it. No unpinned Germans within 10” and the lone BT-7 had the last objective. Meanwhile, the others were taking a hammering, Pz-III fire destroyed another, then 20mm Pz-II flanking fire scored a kill. The light tanks were costing me. The German infantry, now unpinned in the monastery, started firing those machine guns and in a blaze of good dice, first one rifle squad in the cornfield was wiped out, then the SU-12 was riddled with MG-34 fire from the HMG team and left smoking, ouch, five counters taken this turn and suddenly the Russian force was close to breaking, the Germans had fought back.

But it would be for nought, because the Russian had 5 of 5 objectives. That BT-7 would win the day unless he could kill it and claim the objective back. All efforts were now expended, first a Pz-II turned it turret and opened fire, missing. Then the 20mm flank half-track, waiting in ambush fire, abandoned that task and moved round to open fire on the BT. It hit, but the 20mm shells glanced off the armour, phew! Only 1 chance left, the StuG at the farm, with just 1 AP round remaining, turned through 180 to get a single shot up the BT’s jacksy. It needed a 5+ to-hit… tension… tumbling die….

BT-7 reachs the hillock objective and claims it, as the German infantry are pinned by mortar fire.

Infantry guns deploy and open fire on the monastery with repeated suppressing HE shots.

Nazi panzers lurk behind the monastery hill, the Russians are coming to them.

Next BT platoon rushes forwards and rapid loses all three of these tanks.

The other platoon, joined by the BA-10 (hell, why not, all in!), have little to stop them.

Except the ambushing StuG at the farm, claiming a close range kill as one BT drive past.

Crazy Ivan's tank rush almost reaches the village, bit of panic back there now. 

… and rolled a 6! Boom, the BT detonated in flames and smoke and the Germans send a truck and staff car to claim the objective. I drew the counter, a 4, and that broke the Russians. The counter-attack was spent.

The Germans were on 44 lost BR against a break point of 46, 1 more BR counter away (probably). So, so, close, I had almost won it on counters and ‘all objectives secured’. Damn that StuG…

Brilliant game, such fun with the Germans badly on the ropes for much of the game, but fighting back to scrape the closest of close wins.

OK, so in our short 5 game series, it is 1 marginal win to the Germans, let’s see if I can get that back in 1942, somewhere in the Don bend, in a few weeks time. 

BT takes the last objective, if it can survive the German turn, it is all over! That truck is 12" away. Turret turned as it fired to suppress the StuG behind, failing that would come back to bite it in the ass, almost literally.

End game, the destruction along the Borozyna road.


Tuesday, 29 November 2022

BARBAROSSA TO BERLIN – SUKHARLOV’S TIN-FOIL ARMY


Returning to some Battlegroup WWII gaming after a few months away, we’ve decided to play a series of Ostfront games, starting in 1941 with BG Barbarossa and play 1 game for each year, using each book (and also early work for the 1944 army lists when we get to that year, a useful tester). The first game for 1941 is coming up soon and I need to prep an army list. The game will be a meeting engagement at 650 points each. I’m the Russians (I have no ‘grey’ panzer forces - I did once, a very nice one, but I sold it as I got so fed-up fighting the French and getting repeatedly hammered - this was way back using the RF rules, the German panzers seeming stood no hope of winning in 1940!). I sat down to write my army list (pen and notepad, no Apps required), and, given the models I have to fight this battle, christened it ‘Sukharlov’s Tin-Foil Army’.

Here is my force, and why I picked it, and the plan for Game 1 of ‘Barbarossa to Berlin’. The AAR for the actual game will follow soon.

First, the motivation behind these games, as it will inform decision-making. The reason we agreed to do this was get some under-used models out to play with. When we wanted to play a WWII game, the first question was, which army (we have multiple) haven’t you used for longest, which needs some tabletop time? The answer was ‘grey’ panzers, so we went with early war. In that spirit, my first choices would be use models that haven’t seen much gaming of late, or that I finished painting and still haven’t seen in action… which for my Russians is mostly new trucks (whoa!, easy on the power-gaming there!).

First choice then, fulfilling two criteria (minimum infantry and new models) is a Motorised Rifle Platoon all in trucks. Add to this are a full four support choices; a Maxim MG team, AT Rifle team, Infantry gun and truck tow (gets another one on the tabletop) and DshK AA HMG team, also given a truck (to keep up). That AA MG will be handy, because let’s face it – Stukas will be coming.

Next is simple, for armour, and for 1941 I have my two BT-7 platoons, so both are in. It’s what I have, no other option (no KVs or even early T-34s here). Just lots of light tanks.

Now for some more tactical considerations (I am trying to win here, I’m not super competitive about it and I’m not honing a tournament army force to maximise the chance of victory, but I don’t play to lose either, I’d like to give the Nazi’s a kicking!).

So, infantry and armour sorted, on to the artillery. As a mechanised corps the options are limited, but one unit I have and have never actually used is a full 3 tube battery of 82mm mortars and loaders teams. That is mucho IDF firepower, so I included it, time to see some action for the medium mortar battery (my 120’s though have seen much).  The battery needs a dedicated spotter so a FOO team is add as well. His job is to keep those mortars hammering away. But, as he can’t be solely relied upon, and a stray shell could cause his sudden demise at any moment (too much of a risk), I add a Pre-Registered Target Point. That will go up the German end and mean I can always fire the mortars, even for harassing fire, even if I do lose the spotter.

Artillery sorted, how about HQ? A comms team is going to be needed to aid the FOO, so a radio truck, because the ‘communications breakdown’ at 4+ comms tests is going to need re-rolls. The forward HQ too, Sukharlov in his staff car, a useful (if needed) second mortar spotter, and his other benefits too, but mostly a re-roll for reserves arrival. As a meeting engagement (which exact scenario will be randomly generated on the day), and with the ‘Panzer Marsch’ rule opposite me, I don’t want to be rapidly outgunned by the faster arriving panzers. This gives me a chance of matching(ish) the Germans in getting my forces into the game. He’ll be an early priority to have on the table just for that re-roll (I must remember that, Sukharlov leads the way!).

Ok, that all the main force assets, on to the support stuff.

Recce. I go with 3 armoured cars, 2 BA-10s and my new BA-27 (stats of a BA-6 but with a French 37mmL17 pop-gun). First run out for that model. That is 3 scouts, I might add a sniper later, to try and out-scout the Germans, we’ll see, points allowing. 3 armoured cars should be enough, even if we roll a recce screen scenario.

Give the unreliable nature of the BT-7s, I add a repair truck from Engineers (another new truck model). This might be busy. From Specialist Support, an SU-12, I made (converted it) and it needs some game-time, and it looks cool. It is defo in, as extra infantry HE support (on a vulnerable soft-skin, so best try and hide at the back and lob out some suppressing HE fire).

Final few points to spend, and it won’t buy me much. I decide to drop the loader teams from the mortars and used the saved points to get a big hitter, a timed Katyusha strike. I want to disrupt the mass German arrival and slow them down. I might use it early doors and as a harassing barrage to just get many pins. That’ll help buy time to get my forces in place and get to objectives etc, before the Germans do. My big fear (as you can tell) is half my army isn’t here as the panzers roll over me.

Ok, in all, that is 646 points, 43 BR, 3 scouts and 0 officers, with ‘command chaos’ providing the extra D3… let’s hope it is enough. Game AAR will follow soon(ish).