Tuesday, 14 February 2023

The Horns of Hammad, 1179 - with Soldiers of God

This would be a large field battle, over the twin rugged desert hills, the ‘Horns of Hammad’, as the Saracens troops of the Ayyubid Caliphate lined up against the muster of the crusader Kingdom of Jerusalem.

Having selected our forces, both had gone for similar battle plans. The Saracens would 'Hold and Harass', with twin flanks of horse archers whilst the centre held the line, backed by archers, ghulam and ballista. The Crusaders would 'Harry and Harass', matching the mobile flanks with their own turcopoles horse archers on their right and skirmishing archers, with crossbowmen, war engines and men-at-arms on the left to repel the horse archer waves. Their centre was their strike force, two units of knights and a third of the Holy Order of the Hospital of St John. Once all were deployed, it looked like an even fight. The Marshal of Jerusalem was wary enough not to have weak flanks against the horse archer threat and to have plenty to shoot back with, both flanks would likely be fierce archery duels. In the centre, well the Saracen’s line of levy infantry screened their own archers and ghulam (all bow-armed). The heavy cavalry would charge and try to break them, a simple battle plan really, go hard and fast with the heavies straight up the centre whilst the flanks hold back the enemy light cavalry. Mine was the opposite, attack hard on both flanks, whilst the centre holds on and tries to shoots those knights to ruin. Let the bloodshed commence…

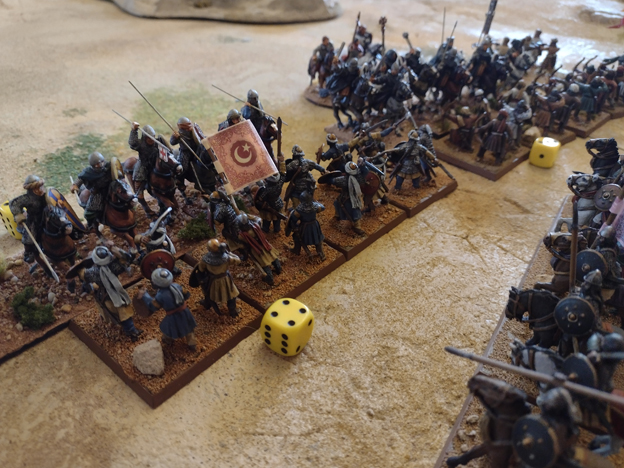
Saracen right flank, horse archers in open order, reserve ghulam behind.

The lines in the centre, archers and dismounted ghulam behind a levy screen of 'expendables'. Mounted ghulam wait at the rear again. Each 'battle' had one of these units, a alst reserve to counter-attack. 

Horse archers on the left, with arab light cavalry behind. I thought I might send these on a flank march, but never got the card. Instead, they joined the horse archer' advance.

Crusader right, skirmishing archer lines to match the horse archers and crossbowmen.
Meet fire with fire...


And it did, from the first card play the knights advanced, and the horse archers on my left set out at a gallop for the enemy lines, eager to get the arrow storm underway. The knights followed with a fierce charge and clashed, at a gallop themselves, into the unit of horse archers, lances levelled. By fortune, I had a Skirmishers Move card and those horse archers immediately wheeled away from the melee and retreated, to then regroup and avoid being destroyed in the first clash. They’d recover and continue to harass those knights with arrows for turns to come. A lucky early escape.

On the left, the Crusader’s turcopoles also advanced and loosed the first arrow volley, and so it started, my horse archers returned fire and Disruption began to mount, but as yet neither side routed. This would a close, tit-for-tat exchange.

On the opposite end, with cards in demand elsewhere, the crusader’s skirmish archer line advanced, but the horse archers didn’t respond, they’d wait to counter when the cards suited them better. No messing around in turn 1 then. One unit knights was already almost upon my line, the others following on across the central valley’s floor.

Turn 2 continued it, the knights advanced again, closing in, moving faster in open order but they held onto a Manoeuvre card (from turn 1) for use later, when the charge card turned up, they’d be able to close-up and quickly spur-in. My archery was largely ineffective in the centre and, on the right, the turcopoles had a great turn, hammering my horse archers before withdrawing, and causing me to have to Rally them. Hmmm… my horse archers where getting their own medicine here, and losing so far. Still, rallied, they’d stand and behind them the supporting ghulam moved up, they’d charge if the card came up and see off the turcopoles with lance and scimitar. I had the that option, but the turcopoles didn’t.

Turn 3 saw the knights charge (they got the card), and all three units smashed into the front rank of my infantry line, an expendable screen of ahdath levy that would die, and I had no qualms about loosing all my archers into those melees as well. The ahdath just had to hold, a turn or two (all they can do really), and let me get more shots in. It would have worked if my archers could hit anything, a hail of short range arrows resulted in more damage to my units that to the enemy. 

Horse archer duel about to commence as the turcopoles advance to meet them.

Knights close in on the centre's front line.


Bit of skirmishing archery, back and forth on my right. 

Combat all along the centre's front, as the levy infantry take a beating.


On the right the horse archer duel continued and we traded shots, but a extra Loose card gave the turcopoles the edge and I had to expend a few cards to prevent losing a unit, and then a deserters card saw 1 stand flee anyway. Still, my counter-attack, of ghulam and supporting tribal arabs cavalry was in place, and I held a Charge card in hand. If I could get a March card, I could storm forwards, through the horse archers, and slam into line at full gallop. My plan was to destroy this flank, it was his weakest and I had the edge in troops (if not the rolls and cards, so far). If the centre held, I could win it here.

The left remained quite, a few skirmishing archers shots was all, so far I hadn’t committed to the advance. It would come, and the horse archers would inflict heavy damage on those pesky archers in return. But it is hard to be busy with all three ‘battles’ across the table, cards get sucked up elsewhere. Still, that is the ebb and flow of the battle, quiet here whilst all hell was breaking loose in the centre and on the left.

That centre was creaking, the knights keeping up the slaughter of levy, breaking one unit, the first lost so far. In return, a levy panic card saw the crusader’s armed pilgrims flee without a shot being fired at them… best try a pilgrimage to somewhere else. I send my ghulam storming forwards, but found his turcopoles quickly pulling back after another flurry of arrows, then another (he had an extra Advance, Loose and Retire card, and it hurt). My ghulam were shot to destruction, dying in a bloody massacre under the arrow storm. Arghh, best laid plans and all that… but that meant I wouldn’t win a melee battle so I had to out shoot him. This I did, the last play being my horse archers ripped off volleys into his turcopoles and two units broke as the laws of probability snapped back into place and they failed most of his resolves tests. The flank was in big trouble, only 1 unit left (and the command stand). Kill them, kill them all!

Whist his flank had cracked and could only now try and retreat and fight a last stand action, beset by horse archers and javelin throwing Arabs, his knights carved blood ruin into the centre, my ahdath were all routed and he had another Charge card (no!) in hand. The knights slammed into my line of archers next, they would not stand long. Only the ghulam , still shooting into the melees would be left. It was a race, flank against centre.

Except, now I launched the right flank forwards, time to give the crusaders new problems and extra pressure on their cards. In another missile duel his archer-skirmishers broke and fled as the horse archers pressed into range. Behind them, their own supporting ghulam turned and moved back towards the centre, they be needed as a emergency reinforcements. If only I got the cards to move them quickly enough. I didn’t, and they didn’t manage to intervene, but the threat was enough to turn some of his knights to face them, after breaking the archers and killing the centre’s command stand as well.

By now the victory points had really added up and, I was just 2 points from breaking. In return, the crusaders were also 2 points from breaking. It was close, so very close. This would the last turn surely. We dealt cards and pondered our options hard.

As it played out, more shooting on the right left his crossbowmen about to break, by 1 point and they could be saved by expending a card, but that card was a Challenge, that could allow the knights to break the dismounted ghulam in the centre. Was the loss worth the gain? A tight call again, given that his flanks command stand was also being defeated in combat, and could go out in the blaze of glory, taking the Arab cavalry with them. In the end, the knights issues a challenge, boldly going for the win in heroic 1-to-1 combat (saving the crossbowmen would have made it a draw, we worked it out). The knights then lost the final challenge as the ghulam champion rolled a lucky 6, and the extra Disruption broke the knights instead, a freakish result.  That left the VPs total heavily in the Saracen’s favour, my force broken by 1 point, the Crusaders by 10… but the plaudits are for going for it and not taking the safe option of a draw for chance to win it. Very tight, tension on those dice rolls, a great game, so close to the end and the cards made for hard tactical choices through-out.  I real fun wargame, hard fought down to the very last dice roll. 

The levy hang on, whilst being mercilessly shot by their own side.


The flank light cavalry swarms about to meet, who could out shoot the other?
The crusader army is capable of matching horse archer firepower with their own, if they include these often over-looked troops.

Dismounted ghulam's turn to hold the knights for a few turns, and die trying.

The crusader's right is turned, at a cost, but very costly in VPs.


The Arab cavalry finish off the crusaders right flank command stand.
 
The last reserve of the centre, ghulam about to face the relentless charge.
 
The old foes fight it out, with not much left in the Saracen's centre, slaughtered,
but expended to buy the victory.

Friday, 10 February 2023

Barbarossa to Berlin - Game 6 with BG Fall of the Reich - Roadblock on FreidhoffstraBe

The final engagement of our series of Ostfront games – game 6 in 1945 would be an Attack/Defence, with the Germans defending, naturally. The random scenario rolled was ‘End of the Rat Race’, with the Germans as the roadblock force across FreidhoffstraBe, en route to Berlin. They started dug-in behind their road block (at the farm), with panzer reinforcements due. There were just 2 objectives, one at the farmhouse, the other where the road exited the German table edge. They held both to start with.

Here's the Russian force:

Rifle Company    188    16-i    
(3 x platoons + Company HQ)    

SU-76M Battery    75    6-r    

SU-100 Battery    156    6-r    

ISU-152 Battery    145    6-r

2 x 82mm mortars    44    2-i

PRTP            10    0

2 supply trucks    16    1-i

Repair truck        12    2-i

Total            646    39 BR,    7 officers


The Russian would start in column on the road and move on from the road (or just either side of it). The first vehicles were deployed lined up one behind the other, led by  ISU-152s  (I figured these had the best chance of surviving the first ambush shots).

The first turns saw the Russian arriving in good numbers, but with so much foot-slogging infantry (a full company), it would take time to get into the thick of the action (even using Ura! rule). The initial trading of long range fire didn’t do much damage, a timed 80mm mortar strike pinned a few of my squads and the SU-100 tank killers move left to the wood, to await targets. The first of these to arrive was a King Tiger, and both traded missed shots at maximum range.

With little in the way of IDF (two on-table 82mm mortars), I as relying on my SU-76s and ISU-152s for direct suppressing HE fire for my infantry, but these soon started to run low on ammo, notably did the ISU-152s (ammo 2!). The resupply trucks, two of them, got busy, and would be heavily overworked all game, I needed three really.

The infantry moved up, under suppressing HE fire from a dug-in 105mm howitzer and 75mm infantry gun, which caused regular pinning, and I was taking counter to unpin early. First success was getting the German infantry in the farmhouse pinned down by SU-76s fire and get moving up to assault the house and wipe-out the squad in it, thus taking a objective too.

Still, the Germans had had the better of the first turns, 6 counters to just 3…

But the red horde was large, and I rolled well for command and control, so it was coming fast. The German reinforcements were desperately needed and these fed into the large house (call it the hotel) in their corner and got their MGs onto ambush fire to with. Also, a Panther rolled in, which the waiting SU-100 missed, only for return fire to hit and destroy it… damn! But no worry, a repair heavy truck was on the way to try and fix it. Taking the counter, it was an Air Attack, and it arrived, a bomb-armed IL-2 buzzed down and, immediately got driven-off in hail of 20mm flak fire, and damaged. The pilot would circle around for another run at it. When he did, the same happened (good flak gunners) and damaged it again, it was getting shot to bits… but I’d defo risk a third run though, which then managed to pin the King Tiger before the IL-2, out of bombs, headed home full of holes, before being shot-down.

The main attack, up my centre/right with 3 infantry platoons pressed on (Ura!). Around the farm and towards the farm lane. MG fire and DPs traded shots and casualties mounted for the Russians. The tank fight saw the Tiger score its first hit (it had to come) and brew-up an ISU-152, even at long range. Then the Panther scored another kill on an SU-76… I was losing that fight as my SU-100 emptied its ammo bins to score zero hits… the resupply truck head off across the field, under incoming HE fire to re-bomb it. The repair truck was also at work, but failed to fix the SU-100 three times and so gave it up as a right-off.

A third German tank had arrived from reserve, along the road it came, a mighty Panzer I (dragged from a  training depot, no doubt). It survived mortar fire to machine gun more of my infantry… obviously machine guns are never obsolete.

After all the hard fighting, my counter stack had grown rather, but the Germans were worried, the hotel was under a lot of fire (including my mortars now) and only weakly held by MG teams and the Forward HQ. The 105mm howitzer crew broke and ran under small arms fire and 75mm infantry gun was destroyed by a SU-76s HE shot that totalled the gun behind its wall. But the Il-2 leaving left the flak gun free to lower its sights and blaze away across the fields at the infantry. I lost 2 squads here to the combined MG fire and those counters put me close to breaking. How could I inflict maximum damage? Well, with infantry now facing the Panzer I and the King Tiger which had joined it (put was pinned by 152mm HE fire from the last ISU), it was tough. My SU’s were reloading and so I had little HE support. Mortar fire did wipe-out a 50mm mortar team in its foxhole, but with just 1 counter inflicted the Germans were well in the lead.

Their last turn of firing saw another infantry squad, holding the farm house, wiped out by MGs (that damned Pz I!), and that chit was it for the Russians. Broken, we’d pull back from FreidhoffstaBe and shell into next month before trying again… a solid win for the defenders, their tanks were tough and my sniping SU-100s had failed to hit even one of them (one job to do!)… the Germans were still 9 BR from breaking, so 3-4 counters on average, so a solid win.

That concludes this little sequence of Ost-front gaming, the Germans with a 4-2 result, but all had been excellent games and fun to get different models out and use them. We might do it again, but from Omaha to the Ruhr, or in the desert, from Tobruk to Tunis maybe. 

Russian moves in red, German positions blocking FriedhoffstraBe, in blue.

Russian columns deploys along the road, with tank riding first platoon.

Volkssturm dug-in across the fields, soon to be aided by the King Tiger.

105mm gun in gun-pit, effective HE pinning, notably against the Sukas. behind the stone wall, a 75mm infantry gun adds to the HE fire.

Next wave of Russian vehicles arrive, the SU-76s. Ahead, 80mm mortar shells rains in, in a timed strike.
SU-100 gets round the copse and lines up the King Tiger, hunting big game.


Call up the resupply truck, first of many re-arming jobs today.

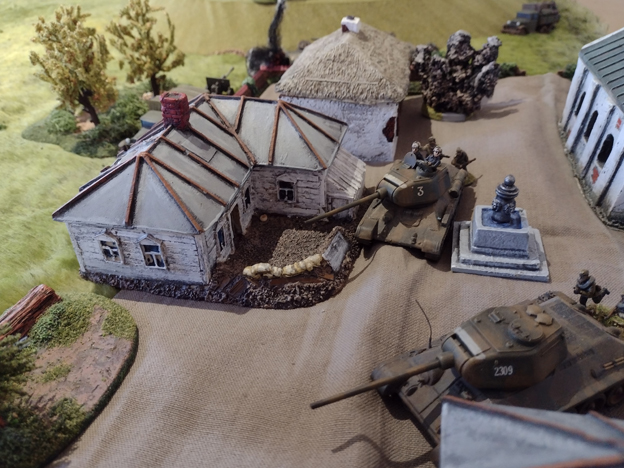
Infantry move up to assault the farm house.

Tiger needs re-arming too... horse and wagon resupply... old school.

IL-2 arrives, hurrah! Into a storm of accurate 20mm flak though.

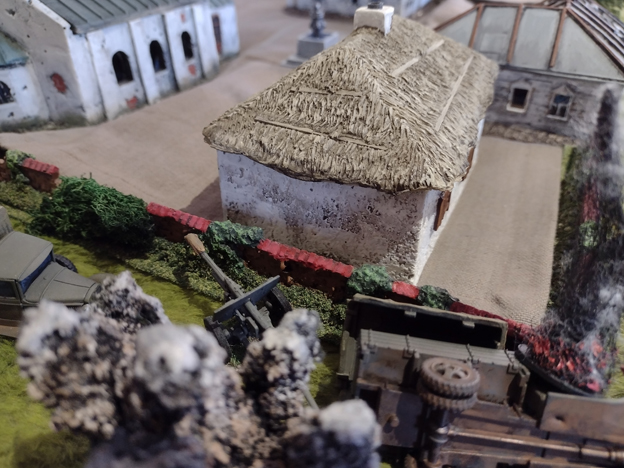
Two infantry platoons lead the way up and then past the farm house, heavy HE support from the ISU's, when not reloading. The burning BA-64 is terrain... part of the scenario.

Panther joins the fray, and first shot, nails the distant SU-100.

Infantry briefly pause from running across the fields, at the hedge, before making the next bound.

Repair heavy truck gets to the smoking SU-100, but the 6s needed to fix it alluded me... of course!

Two mortar teams lurk at the back as the rest of the attack presses on, with HE fire whistling overhead, in both directions.

The lead infantry platoon reach the pond, and take-out an auxiliary kreigsmarine squad dug-in by the lane. They had already pinned themselves.

SU-76s in need of more HE shells.

Unharmed Volkssturm (and pinned sniper), as the Pz I clanks up the road, proving itself still useful.


Monday, 23 January 2023

Barbarossa to Berlin Game 5, with BG Bagration - Engagement at Okolovo

For our fifth game in the series, it was another meeting engagement, a Recce Screen scenario, with 4 turns of recce-ing only (which went quick with not much happening, a few mortars fired, and my recce Valentine moved up and captured an objective, whilst a German sniper boldly did the same in the centre of the table. A few counters taken (3-all in scouts, so no counter there), and the game got going with the first reinforcements arriving. The Germans rolled in, with a Grille (!), odd-one, but it just hung back and launched big suppressing HE up the tabletop, supply truck always close by, because, well, that tactic won’t last long without one.

The Russians got their 120mm mortar battery and other support on, comms team, FHQ etc, to get set-up on or behind the hill for the coming fight. Next to arrive were the Zis 3 guns, to get into place, and cover, at the village. All this was to be ready for when the armour and tank-riding infantry showed up. They were the last to show, after the SU-85s had arrived and started their long range (and largely fruitless) duel.

The Germans had rolled-in to, but soon found themselves under galling 120mm mortar fire, spotted by the lurking BA-64. A direct hit KO’d their Pz-IV - good shot. But they also got their rude surprise in place, two Tigers! Eek… well this is unusual, lots of points in those beast, but it made for a different game, as we both rarely go for such ‘big ticket’ items. It was obvious, both sides had long guns and would be happier sitting back and snipe, both had supply vehicles at hand. So, Tigers matching up with the T34/85s and SU-85s, let's see how a 85mm AP shells fares against that good Krupp steel. The first loss to a Tiger was my poor Valentine, which had the audacity (or idiocy) to open its ambush fire on the Tiger with its 2 pdr gun. The return fire (having failed to pin it), was 1 shot, 1 kill, boom! One Valentine in bits… and the German infantry could nip forwards and retake that objective with ease, which they did.  

After about 6 turns of mortaring by both sides, one 80mm shell having hit and wrecked my Zis 3 towing truck, losing the gun crew too, so 2 counters… we both had unpinned from the suppression a few times. I was behind on counters, but everything was now in place to open fire. Both sides had also drawn and rolled for an Air Attack. Mine was a mere fighter (Air Cobra), the Germans got Stuka support (37mm cannon-armed). The first air attacks both missed, then the Air Cobra chased the Stuka and pinned and damaged it. Rare dog-fight action, but fun. The SU-85s, fired away, missed or glanced off, then the last Zis-3 pinned a Tiger with HE - hurrah! The next shot, from a T-34/85 smashed through the Tiger’s armour and killed it, shocker! That is my first ever confirmed Tiger kill in a BG game (I don’t face them much though). The Germans were in trouble, down to just 1 tank left and I had all of mine (5).

Well I did, until the next turn when a mine strike counter saw a T-34/85 brew-up, then an 88 round smashed another one. Mortar fire pinned both SU-85s too, and suddenly I didn’t have much to shoot back with.

By now the counters had built up quickly, so the decision to tactically co-ordinate to get an SU shot at the Tiger’s flank probably wasn’t the best. It failed the BtCoD test anyway (aargh!)… Good grief. From being on top, this game turned fast.

Could I kill that last Tiger? If so, he was in trouble, but as it turned out, no. Its Krupp armour prove strong and ace crew were not for pinning. Mean beast. I had sent my resupply truck rushing round the hill to re-bomb the SU-85s, now low on ammo, and when it was hit by another mortar bomb (for a single German 80mm mortar it never seemed to miss), it was blown up and the final counter broke the Russians. That mortar crew need a medal, 6 direct hits, 4 kills.

Oh well, that didn’t go so well. The Germans were still 10 BR from their total, so a solid win. The Tigers had halted our advance on Minsk at Okolovo.   It is now 3-2 to the Germans with just Fall of the Reich to go. That’s next, very soon… then back to playing something else for a bit. First, to smash my way to Berlin...

The battlefield, Germans enter top right, Russian bottom left, by the village.

Okolovo village and church

Big cat rolls in carrying some infantry support, also 'Panzer Ace'.

Making short work of the recce Valentine, oh well, that fight lasted about 5 seconds...

 
Mortar bombs wreck a Zis 3 tow and the gun.

They the FHQs scout car wagon... but the chit is an Air Attack.

Mortars pin the German support elements.

Zis 3 battery on tow, arrives to get deployed,

At the back, 120mm mortar battery and forward comms team.

First red armour arrives... long guns to duke it out at range

The VVS flies in, Air Cobra strafing run...

Occupying Okolovo in force.

Timed IL-2 strike, missing wildly... it hit nothing!

Air Cobra distracted by the arrival of an enemy Stuka, he gets on its tail and pins and damages it. Rare air-to-air combat.

German big cat roams the fields, looking for targets.

Here they are waiting, open fire!

120mm mortars wreck at Pz IV...

SU-85s arrive and line up that Tiger, if only they could hit.

Last Zis-3 lurks in woods, opens fire and pins the Tiger... yes!

Then a 85mm tank shell defeats the Krupp steel... Tiger kill... confirmed Tiger kill...

SU sniping away at long range...

whilst one closes in for a flank shot, only to be pinned by 50mm HE fire...

Grille's dedicated ammo truck blows up from a mortar hit - big bang! Grille with 1 ammo left...

Followed by an Tiger's 88 round smashing up its first Russian T-34/85. Lost that duel.

Pak38 keeps pinning my SU-85, and survived a 37mm cannon strafing run untouched... lucky day.