Friday, 12 May 2023

Second Assault on Aderklaa @ Wagram, scenario 5 with Soldiers of Napoleon

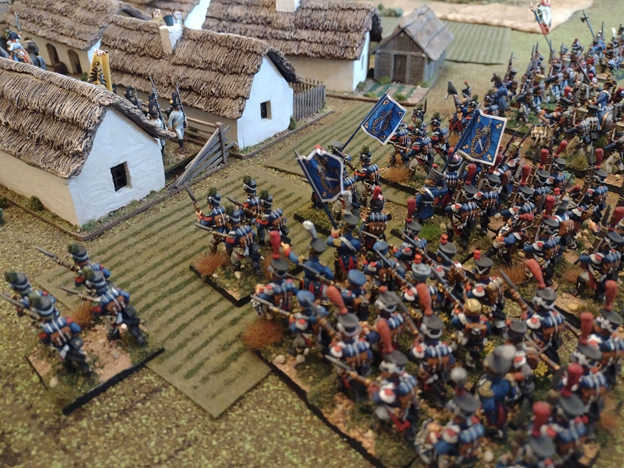
The fifth of our Wagram scenario series, as the French attack again at Aderklaa, mid-morning, with the rest of St Cyr’s division, including a big brigade of Hesse- Darmstadt infantry (looking suspiciously French) and with some Saxons (on their left). The Austrian defenders are the grenadiers holding the village itself, with infantry (lots of it) on the left and the cuirassiers still stationed on the right rear after the last time (but suitably reduced in numbers after their terrible losses in game 4).

With the French launching an all out assault, my plan was to hold firm in the centre for as long as possible and counter-attack on the left and right, infantry and cavalry. No sitting back, I’d go forward and get stuck in to aid the grenadiers who could hopefully be relied upon to hold on to the houses for long enough.

The field of battle, Aderklaa in the centre, Austrians will deploy on the left, French and allies to the right.


The French didn’t waste any time in moving up, the Germans racing up, four assault columns behind a screen of two fusilier battalions and the skirmishing fire began, which was bad for my ‘skirmish shirking’ grenadiers, the disruption quickly mounted on them. My infantry marched up and deployed their own skirmishers too, whilst the cuirassiers advanced but slowly, because for some reason I’d unthinkingly put them in a line instead of march column for speed, and so they trotted up, whilst taking French/German cannon fire, which forced me to rally them too, all far too slow from them. Oops, my bad!

In the centre, with my grenadiers under heavy pressure, two German columns charged through their screening fusiliers to press the assault, only to both be thrown back by tough old grenadiers invoking the power of big moustaches and bigger bayonets. Hurrah, but one battalion did then break. Still, I had another to feed in to the buildings and try to stop the French from claiming their ‘Take a Strongpoint’ objective. My infantry counter attack did well to start with, routing a Hessian fusilier battalion with musketry and a swift column charge… so far so good, losses on both sides, it was even(ish).

Then it turned, the French allies, having failed to break into the houses sat back and shot them up, and the repeated skirmish and volley fire, despite rally’s broke both my grenadier units, leaving the village empty and a simple advance claimed the first buildings, the mighty moustaches had failed me! A timely whither volley also smashed one of my infantry battalions to iddy-bits and my counter attack on the left was faltering and needed to rally too. The cuirassiers were still struggling to get forwards and didn’t want to face another withering volley, so I held them back. They charge next turn, but by then the French infantry on his left would no doubt quickly form square.

The French scored big in VPs and the Austrians were really up against it. My infantry on the left scored a few more musket hits but refused to counter-charge and get those buildings back. The French on their left, in line, didn’t form square in time and my cuirassiers gleefully charged home, and as the French line tried to run it was ridden down with total carnage, a gory massacre of the battalion from my heavy horse, doing their thing well… hurrah!… the second battalion quick did form square but then almost broke from intimidation anyway. They needed an emergency rally to avoid just running as well. It was all a turn too late though… because the Hesse-Darmstadt Lieb-Guard battalion had advanced clean through the village and emerged to jump my artillery battery by surprise, routing it and taking the guns as prizes. That was it for the poor Kaiserlichs… the French VPs reached 32 against my Break Point of 31 and the Austrians had lost (again - this is becoming repetitive). I had scored just 15 VPs from the French Break Point of 32, so it was a Decisive French win at Aderklaa. It is now 8-0 on battle victory points to the French, who are winning at Wagram unless I can mount a serious comeback, oh dear!

Tbf, a few mistakes by me and some timely cards from the French saved him, plus maximum VPs for the Strongpoint objective (again). My cuirassiers should have done more, and I could have saved the grenadiers with another rally and fallen back, but I didn’t want to let him have the buildings, so stayed and fought and thus exposed them to too much fire (then lost the buildings anyway). A fallback, regroup and counter-attack would have been better in the house-to-house fighting… lesson learnt, because losing 3 grenadier battalions and their guns really cost me the game. For the French (and Germans) it was well played, even if the Saxons did nothing all game, beyond a few long range cannonades. It also didn’t help than in Turn 1 two of my gun batteries were low on ammo, so my cannon fire was very weak throughout…  bring more powder and shot next time.

On to game 6 next, and the third Aderklaa assault (in reality St Cyr was pulled back by Massena after heavy losses and Molitor’s division took over the very hot fighting for the village, that’s the next scenario). Archduke Charles need a win badly. Damn these Frenchmen fight hard… 


Austrian right, the cuirassiers, but with a long way to travel to reach the French lines.

Austrian left, a lot of infantry, mostly in column for the counter-attack.

French attack columns on their left (with starting Disruption due to earlier fighting).

First French voltiguers investigate the village and open fire.


The centre, Hesse-Darmstadt allies will go in, screened by their fusilier battalions in extended line. Beyond are the white-coat Saxons (the lazy fellows).

A massive attack... six German battalions close in, facing just two in the buildings.


The assault breaks in to the village and takes the first houses, again... led by the Lieb-Guard battalion.


Austrian infantry counter-attack under way to the left of the village. Pressure on the French mounts.


At last, the cuirassiers arrive, crushing one battalion in a bloody rout and threatening the next, which must hastily form square and then almost runs anyway.

The enemy have Aderklaa... and the grenadier's command stand is in danger of being captured. He needs to get out of there... swarming with Germans...

Lesson learnt, the French are now in square, but face multiple intimidation checks, which almost break them anyway. A lot of wobbly knee'd Frenchmen...

They have cleared the village and control it, not much left for me to try and retake it.

The Austrian infantry counter attack as stalled, fought to standstill in heavy musketry, both sides with heavy losses, but a stalemate isn't good enough for the Austrians.

The Lieb-Guards' attack burst through the village and overrun the Austrian supporting cannon battery behind. All seems lost. All is lost!


Friday, 5 May 2023

Fantasy Battle... Soldiers of "something"... a play-test.

A longer term plan is to write a fantasy battles version of Soldiers of God (or Soldiers of Rome), using the same basic rules and card-driven turn sequence, and have a set a rules I like for my old WFB armies. I have a large High Elf force, which I've added to with a few command stands, and a dark Elf army to match them, a classic WFB match-up of hated foes. I also have Daemons of Khorne, but not enough, so these are now summoned Dark Elf allies, using their vile, dark sorcery (and many sacrifices no doubt).

As with other Soldiers of, the armies had 3 'companies' a left, centre and right and these each had their own part in the battle plan. Here, by random choice, both commanders chose to attack on their right, holding on their left, with the Dark Elves supporting attack in the centre against the holding High Elves on their hill. 

The Dark Elf attack was powerful, led by their lord on his black wyvern, with heavy knights (riding lizards), demons, a giant hydra and fanatical witch elves... eek! Their infantry and crossbows were in the centre and left. The High Elves met this with a skirmishing left flank of light cavalry and rangers, all very good archers (Elves!), a solid centre of bolt throwers on the hill with spear-armed infantry to defend them and attacking elite infantry led by their lord on his griffon. Both also had a single sorcerer and a pool and spell dice to spend throughout the battle. 

As battle began, cards being played to March, Manoeuvre, Loose! and Charge! etc. as would be familiar to 'Soldiers of' players, it worked well, and the Dark Elf attack was taking a lot of hits from good Elven archery, but they rallied it off and the mighty hydra regenerated, so the attack still looked strong as it closed in. A characterful 'impetuous charge' special event saw the witch elves rush in before the knights could charge, thwarting them, but the witch elves still cut down the Elven infantry in a bloodbath. Meanwhile, the demons were waning in power fast (their Resolve drops each turn) and struggling... targetted by bolt thowers one unit was routed (well, banished back to the spirit plane). 

Magic had its effect, the Dark Elf sorceress using most of her spell dice to summon a greater demon, and sending it off to attack the hill. As it was about to charge, the Elven sorcerer did likewise and countered it with a summoned dragon (I'm going to change this to a Phoenix I think, and get a model). These two mighty beast fought it out for several turns, before killing each other in a stalemate. 

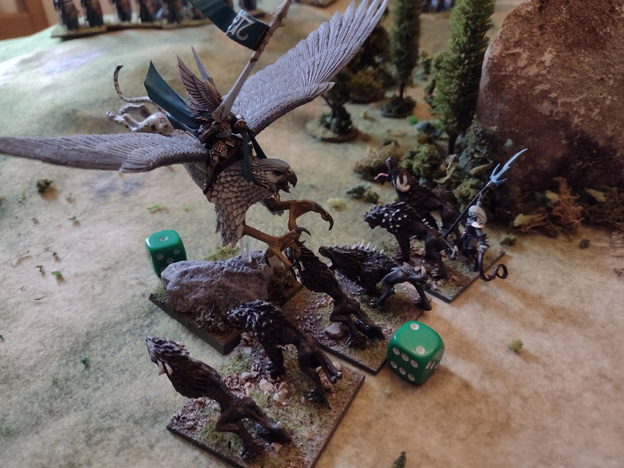
Hero the day was the Elven Prince on his griffon, who swooped in to rout the hunting hounds(not biggy for them, cheap expendable troops) and then targeted the war alter which was drawing in more magical power for the sorceress. His attack against its guardians and priestess was another prolonged fight, but when he won it, slaying the evil priestess, the battle was won for the forces of light... a solid High Elf victory...

That scratched an old Warhammer itch, and moved the rule's development along a bit, with a new magic system I really enjoyed and some revised stats of the monsters and how they work, including special events that allow them to rampage about and make 'death blow' mega-attacks against other monsters (Godzilla style). Flying things, as always are a pain and very powerful... need to up the points for flying... all still very much WIP.


Pre-deployment, random terrain generation: a hill, 3 rocks (1 was the magical menhir) and a small wood, that is it.

The Dark Elves have come to tap the magical power of the menhir, and use it to summon more demons to their aid.

The Dark Elf left, their main strike force ready to charge.

Facing them, the light-weight left right. Horse archers, rangers (all excellent archers) and solid infantry.

In the centre, on the hill, the bolt throwers and more infantry (which will move to clear the line of sight)
Dark Elf battle lines, their leader aloft on his wyvern, to lead right flank attack. 


Prince Ithilmar and his griffon make mince-meat of the hunting hounds sent out to harry the bolt throwers. The first casualties of the day are the hounds, no match for an enraged griffon


The Dark Elf lord is soon countered by the two giant eagles which swoop in to begin a protracted fight with the wyvern, high above the battle below. In the end, the eagles brought him down.

The evil attack closes in, as the Elven light horse pepper them with arrows and retreat.


The Dark Elf left, crossbows and the war alter of bloody carnage... a fearsome magical artifact drawing more magical power to it.

Enemy approaching as the light cavalry seek shelter behind the infantry. They have fallen back as far as they can go. They must stand and fight now.


The bold Elven hero charges on his griffon, overcoming the altar's terror to try and destroy it.

Demons charge in and hack down the Elven cavalry, with each passing turn their power is waning.  The Dark Elf attack does damage as the infantry are also routed, but not quickly enough... 

The Dark Elf sorcerers spent all her power to summon a great demon to her bidding, and it flew in to attack the elven centre from behind, only to be denied its prize by the Elves sorcerer summoning a dragon! An epic fight resulted as both summoned creatures tore into each other, and both died in the struggle. Not sure on the dragon, might be too much. I'm going to change it to a Phoenix, which seems more characterful, big burning bird. 


Friday, 21 April 2023

First Assault on Aderklaa @ Wagram, scenario 4 with Soldiers of Napoleon

The fourth of our Wagram scenario series, this time the French launch their first assault to take Aderklaa, a small village in the centre of the battlefield that they had held the night before, but Saxon troops withdrew and the Austrians moved in in the morning. Napoleon, furious, wanted it retaken and the task fell to St Cyr’s division (of Massena’s Corps). This game recreates that action, in the morning, of St Cyr’s first attempt.

The village is held by troops of von Stutterheim’s advanced guard, which found the village all but empty, including jaegers and the Vincent chevau-leger. Behind them, moving up are Clary’s infantry brigade, two big Austrian infantry regiments. They faced two infantry brigades of St Cyr’s division, with the 24th Light’s three battalions being given the task of the direct assault on the village. They were screened by Marulaz’ light cavalry brigade which became heavily engaged when they spied Austrian guns and boldly tried to take them. It was all chasseurs.

Our refight started similarly. The French light cavalry, including their allied German, Baden and Hesse, chevau-leger came forwards and forced the Austria light cavalry to ride out to meet them, whilst behind the Austrians formed up and the guns deployed from limber, and got busy. French artillery took its toll, with a lot of accurate fire, but the Austrians guns were, for once, a match (it seemed both sides could barely miss in the first 3 turns).

Meanwhile, the 24th Light Infantry began their advance and the 1st battalion led the charge. They came under skirmish fire and took losses, but still managed a bayonet charge into the village, to find the 4th battalion of the Karl Legion fighting hard and driving the French veterans back. At the end of the turn, Austrian jaeger fire broke that battalion, but 2nd battalion was not far behind to try again.

The battle inside Aderklaa resumed with the French forcing a charge home and driving the Karl Legion back, with more heavy skirmish firing, the French were wavering. The Austrians, after a  rally counter-charged, but found the French resolve too great and couldn’t kick them out of the buildings. They held, just, and  were close to breaking, but survived long enough to claim the ‘Take a Strongpoint’ objective, and rolled a max VP score!

The cavalry engagement had also continued, the French charging and driving back the Austrian light cavalry, which withdrew and rallied to come back for a second go, after the Austrian guns and a solid volley left the French cavalry reeling back as well, and also rallying. One chasseur regiment was reduced to a single stand. Austrian guns would continue to punish them. They had though managed four units charging in the turn and claimed their Grand Assault objective, scoring a maximum again! Ouch! In response to the French cavalry raid, the Austrians released their own cavalry to match it, as on the day, and the proud Kronprinz cuirassiers arrived and galloped on to the tabletop, turning the tables in the cavalry duel. The French light cavalry were no match for Austria’s finest! Behind them, a turn later, more cuirassiers and a chevau-leger regiment would arrive and the Austrians could launch their own cavalry counter-attack. So far, the French were ahead on VPs, even though the Austrians claimed their ‘hold the line’ objective, scoring 1 point… good grief! Oh well…

The French now saw a chance to complete their third objective, breakthrough enemy lines, and their light cavalry led by the Baden and Hesse chevau-leger galloped around the right of the Austrian lines made for the table edge. At top speed, they didn’t quiet make it though, but surely would next turn.

Back on the French table edge their second infantry brigade, Dalesne’s, was deploying, as well as a second small light cavalry brigade, in a wall of blue coats. My own infantry continued their steady (slow) advance up the centre. In the village, the Austrians did push the 24th Light’s 2nd battalion out the buildings in another close melee, and broke them. They routed, leaving only 3rd battalion facing the village, but unwilling to be their third battalion into the grinder here. Austria still held Aderklaa, and the jaegers continued their handy skirmish firing from the buildings.

With their good VP rolls for objectives, the French had the lead, but it was not insurmountable. Time for my cavalry to strike back, and they did, due to a useful ‘at the gallop’ special event. The second cuirassier arrived, swung round at the gallop and then immediately charged the Baden and Hesse light cavalry in the flank, with predictable results, the German allies were scattered and utterly routed, right on the Austrian table edge, thus saving them from the ‘breakthrough enemy lines’.

Meanwhile, the other cavalry rode on towards the French lines, which had not formed square, but line. Hoping a killing volley, I think not! My prize cuirassiers were in line and at full gallop, scenting blood. If I turned a few battalions here into bloody ruin, then I’d save the day and most likely do enough damage to win. Which would have been nice, until the ‘withering volleys’ special event was played, explaining why the French infantry had formed line not square, 2 full, impeccable battalions loosed muskets into the Kronprinz cuirassiers and it was carnage. After the required rally, only 1 stand of 6 remained… the cream of the Austrian cavalry had just been scythed down in the blink of an eye. Following that a ‘commander wounded’ card saw my commander collapse (I think a heart-attack seeing what had just happened and having to explain to the Kronprinz where his glorious regiment had gone!). That was enough for the Austrian army, broken, with a solid victory for the French. That makes it 3-0 in Battle Victory Points for the campaign so far…

A great game, to-and-fro, hard fighting, cavalry and infantry action and the most deadly withering volley I have ever seen (on my best cavalry!). The French had gained 15 VPs from completing objectives, and the difference at the end was 14 VPs, so it made a big impact. Having a big light cavalry brigade really helps complete the Grand Assault… but Marulaz’s chasseurs paid a heavy cost for it, there was not much left of that brigade by the end.

Here are some shots of the action at Aderklaa. Game 5 will be the second assault on the village, as the French and Saxons try a gain, an hour later. By then, I’ll have my grenadiers up in defence of the village.

Austrians deploy around Aderklaa, the chevau-leger already taking accurate artillery hits...

The 'road' to Aderklaa divides the sides, Marulaz's light cavalry massed in the French centre.

They start the battle with a swift advance

Into the waiting Austrian lines, which would punish their boldness...

Advance of the 24th Leger towards Aderklaa, held by skirmishers at the moment. Infantry quickly moving in behind.

A grand sight, the massed charge of the light cavalry.

House to house in Aderklaa, jaegers as ever proving their use in this close fighting.

Vincent chevau-leger in trouble, but putting up a good fight. Need to Rally, soon. Well, now really.

Jaegers see-off Voltiguers on the outskirts of the village.

2nd battalion succeed where 1st battalion failed, and get into the buildings.

Dalesme's brigade match on from reserve, a lot of Frenchmen.

The German light cavalry make an end-run for the table edge and almost make it.

But, out of nowhere come the Austrian cuirassiers, at the gallop, and rout them off the table edge.

The Austrian cavalry counter-attack moves up and forms line, ready for the charge to crush the French infantry and win the day... except....

The Austrian infantry centre is still strong, but the loss of their cavalry and their commander sees them fall back. French score the win... 

Thursday, 30 March 2023

Dawn Attack at Grosshofen @ Wagram – scenario 3 with Soldiers of Napoleon

At dawn on July 6th Rosenburg’s Corps of the Austrian Hauptarmee launched an attack (it was supposed to be part of a general offensive). In command confusion and due to late orders, the others Austrian Corps failed to get going, so Rosenberg’s columns attacked alone. This scenario is for one of those columns attacking at the French held village of Grosshofen, near Marksgrafneusiedl, held by men of Davout’s Corps – Puthod’s division. The Austrian objective is the capture the village and drive the French lines back, the French are just holding the line here, but (scenario special rule) the Austrians will be recalled from the attack after a random number of turns, so to win it, there is time pressure on the attacker otherwise, it peters out into a draw as the Austrians withdraw… (as happened on the day).

My force was the advanced guard and a large (huge and unwieldy) infantry brigade following on. The French had two ‘medium’-sized infantry brigades, one on the left and one on the right, holding the village itself. With the Austrians holding the initiative, we dealt our first hand of action cards and got stuck-in.

Grosshofen. Austrians attacking from the top, where the Russbach stream just curves onto the tabletop. The rest is flat farm fields.

Austrian deployment zones, Advanced Guard at the front (obvs), infantry brigade behind.

First up, my divisional commander, General Radetsky on the day, must have had a bad bratwurst for breakfast, as he was taken ill and left the field on a ‘Commander Wounded’ event. Damn, that left me an action card down, but I sent an instant message to fetch General Rosenberg to the field to replace him with a ‘Senior Officer Arrives’ event, and unfortunate rolled badly and he didn’t show either (maybe he had the bratwurst for breakfast too!). Drat! Bad start, but my infantry moved up, as did the Ferdinand Hussars of the advanced guard on my far right. The French had no cavalry to match them so formed square and targeted them with accurate cannon fire. Still, they rode on through the smoke and shell across the cornfield towards the enemy lines. The French deployed a lot, mostly all, their voltiguers to form a thick skirmish screen ahead of their lines, across the entire board. That forced my infantry to do likewise, although the advanced guard had the 4th Moravian Volunteer Jaegers to do that work, and they closed in on the village first, infantry assault columns behind to follow-up in a push to clear the houses of Grosshofen, which were thick with blue-coated infantry.

Cannons roared and the disruption mounted, especially in Grosshofen, until a handy ‘Stand Fast’ event saw the reserve infantry inside rally. The first turn ended with a draw in VPs.

Next turn, by good luck, I held a ‘Fierce Cavalry Charge’ card, allowing my hussars to have a crack at a French square. In true hussar spirit they launched themselves at the square and won the melee, driving the French back and almost taking their banner (almost!). They rallied, but then a ‘Wavering’ event saw them break, the officer's efforts to regroup the now mob failing. In return, the French artillery gave the hussars a whiff of grapeshot, twice, and they wheeled away to rally and regroup, leaving dead men and horses behind. Bloodied, but they’d be back!

The battle around Grosshofen was full of skirmishers, my jaegers with their rifles doing excellent work and the French largely missing! I knew I couldn’t hang around, but had to pause to rally as the artillery fire was hurting my infantry, and I had to drag my out-ranged 6 pdr guns forwards. This all took cards, and I was still low on them. It was not the swift strike I hoped for. Oh, and Napoleon arrived to have a look over General Puthod’s lines… and all seemed well enough to the Emperor, and he rode off.

Turn 3, and still the withdraw order hadn’t reached the Austrians (quite who they’d tell I have no idea as Radetsky was still up-chucking in a bush). The French rushed a reinforcing reserve battalion into the village, as my jaegers continued a galling rifle fire on the defenders, and my assault column was ordered it, which they refused. Argh! On well, I was at least winning the skirmish fight. My hussars turned about and came back for those guns, charging them and taking revenge for the earlier canister fire, the gunners were cut down or running for their lives, but more skirmish fire again meant I needed to rally them, and lose another stand, leaving just 3 stands of my excellent cavalry left (from 7 to start with). Their fight was done and they withdrew, horses blown, but it had been good work from the Ferdinand hussars on the far right flank. In Grosshofen, one defending French battalion broke and ran after, saving their last rally card, they lost it to a 'command confusion' event… wait too long at your peril! Accurate return artillery fire did break one of my infantry battalion columns. The French scored well in VPs, but the Austrians were still just ahead, thanks to the hussars heroic efforts. Could I get into the village and claim my ‘Take a Strongpoint’ objective. Time was running out. The expected order to withdraw received, I had 1 more turn to break the French or call it a day and take the draw.

So, it was all in at Grosshofen, but my infantry column again refuse to charge, so my jaegers went in and claimed the empty first building – now to fight off the counter-attack as the French reservist piled through the streets and unleashed a ragged volley, to no effect! Phew! My return fire was again good, skirmishing jaegers are excellent at this work! Over on the right, there had been an exchange of skirmish fire and artillery and I now tried to close for the charge. But twice my columns refused to charge and volley fired instead – 4 failed attempts on the trot, argh, no aggressive spirit in these troops! The French then tried to counter charge and also failed, but the resulting volley did break one of my columns. We were down to the last card play each, I used ‘wavering’ again on his disordered column, but rolled a 1, the column did not break this time. He played ‘artillery bombards’ and suddenly shells hammered my poor retreating hussars, scoring enough hits to break them. That was it. Game over.

We added up the VPs. The Austrians had taken a 'strongpoint' and gained the maximum 6 VPs, which left the French 2 from breaking. In return, the Austrians were broken though, the costly loss of the hussars had cost us 5 VPs and so the French VP total was 22, over the Austrian Break Point of 20… time to give up on Grosshofen. Another marginal French win then, and again 0 Campaign VPs for that, so after three scenario it is still, remarkably 0-0. Maybe in scenario 4 (which will be the French’s first assault on Aderklaa, a mighty scrap in the centre), someone will actually gain some VPs towards winning this day's battle.

Quick game this one. Only 2 brigades aside, 4 turns and 2.5 hours of playing. Fun 2.5 hours though… if only my hussars had survived… damn those French gunners (they are usually alarmingly accurate). My own artillery was utter rubbish this game, barely hit a thing… on to Aderklaa in a few weeks.

Austrians deployed in attack columns, ready to begin...

The French lines deployed to hold Grosshofen. Gunners are ready, with their usual horrible accuracy.

A lot of voltiguers deployed to harass the Austria advance.

The Ferdinand Hussars after their fierce charge, and shattering a square!

Reserve French battalion marching into Grosshofen.

Bonjour L'Empereur... the biggest boss came to check-up that the line was holding, no need to send in the Imperial Guard here...

Austrian columns come on, in a very French sort of way...

Moravian Jaegers skirmish and volley into Grosshofen, before dash for the first cottages. Infantry column behind, the refuseniks... leave it to the jaegers then boys!...