Tuesday, 23 August 2022

‘Das Heu Heilige’ - Soldiers of Napoleon scenario

I’m currently working a series of scenarios for SoN, all historical re-fights linked across a major battle, in this case Waterloo. Here, we tested out the La Haye St scenario, but with the Austrians defending it, so ‘Das Heu Heilige’ (maybe?).

It was a good scrap, the French in all out attack with the Grand Assault and Take a Strongpoint objectives, the Austrians defending with Hold the Line. The defender’s forces, with 3 heavy cavalry regiments in reserve had the better Breakpoint, and it looked a tough ask for the French, given the excellent troops holding the farm buildings, reinforced by riflemen (jaegers) and more feldjaegers in the nearby ‘sandpit’ quarry.

With such forward positioned units, the fight was on from turn 1, the French having reached the farm’s southern orchard and skirmish firing from both sides. The French manoeuvred to get the first charge in, taking fire, when a handy ‘Stalled’ event brought their plan to unleash the ‘Vive L’Empereur ‘ card on turn 1 to an end (phew!), the veteran light infantry in the farm held on, but after a ‘withering volley’ from the French lines outside, it took 2 rallies to keep them in the fight. In the process, they withdrew from the barn (far too hot), to the farm house. As per history, I send a landwehr battalion marching towards the farm to aid them… but they didn’t get that far (as per history).

The French cavalry came forwards in columns, at the quick, galloping hard and, in turn 2, before I had moved my landwehr, used a fierce charge event to thunder into and over them… the landwehr, caught in line, where ridden down and routed. Meanwhile, back the farm, more skirmish fire was exchanged and the rifle’s skirmishers were hurting the French again, but the return fire, from voltiguers that had reached the barn also forced the defenders to use a ‘stand firm’ event, they were still there, but no aid was coming. On an up-note, the Austrian gunners were having  field day, their fire broke one infantry battalion with repeated accurate bombardments, and the cuirassiers got a whiff of grapeshot too, blasting them, but they rallied, and lost 2 stands to regroup.

Turn 3, and it was no holds barred. The cuirassiers, rather than be caught again in front of the guns, charged them and cut down the gunners, in another fierce cavalry charge (sometimes you just get the right special event). The 1st Cuirassiers were running riot. My infantry were forced to form square as the second regiments moved up to threat and intimidate them. At the farm, the desperate stand of the defenders was coming to an end, too many French skirmishers were now surrounding them, and so, after a heroic effort they broke. The farm was now empty. The French were on top, well ahead in VPs. I need my cavalry now – bring up the heavies!

No, not yet, they were late, and so I had to endure a fifth turn without them. The French occupied the farm and could claim their ‘Take a Strongpoint’ objective, meanwhile the last of the 1st Cuirassiers swung away, circling the farm and attacked the riflemen in the sand pit from the flank. They scored a narrow win, by 1 point, and pushed the jaegers out of their cover, but skirmish fire from them would break the rampaging regiment in return, but the damage done. They had earned the French 9 VPs…

Finale of turn 5, and my heavy cavalry arrived, but too late to save the day. The capture of the farm strongpoint mean the French had amassed 22 VPs, equaling the Austrian breakpoint. A win. The Austrians had amassed 12 VPs, needing 18 to break the French, so a solid win for old Bony’s boys.

That was a pretty good recreation of the day's action, except the result. The key here is holding that farm and without reinforcements, those few (but tough) defenders are in trouble.  With hindsight, I should have sent more men to help, but with those very aggressive cuirassiers roaming about, it is risky to advance. The earlier arrival of my own ‘big boots’ would have helped swing things (maybe), but such are the vagaries of war… waiting for that cavalry adds a nice tension to the game for the defenders.

Shots of the action… 


The battlefield around the central farm

French skirmishers in the orchard south of the farm, facing Austrian skirmishers and attached jaegers

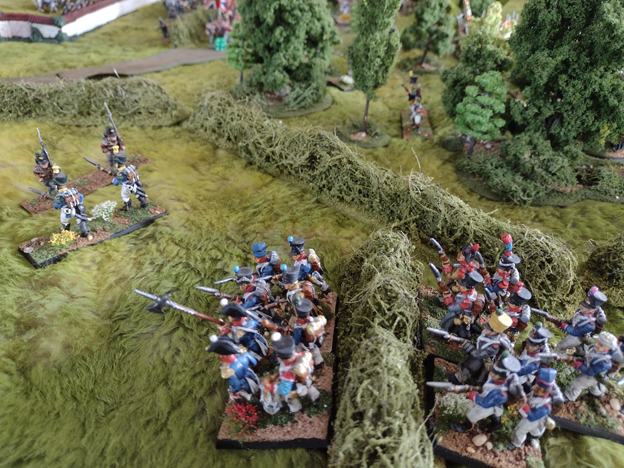
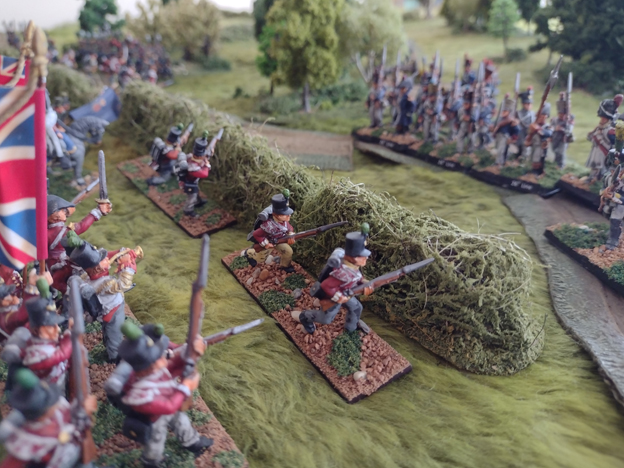
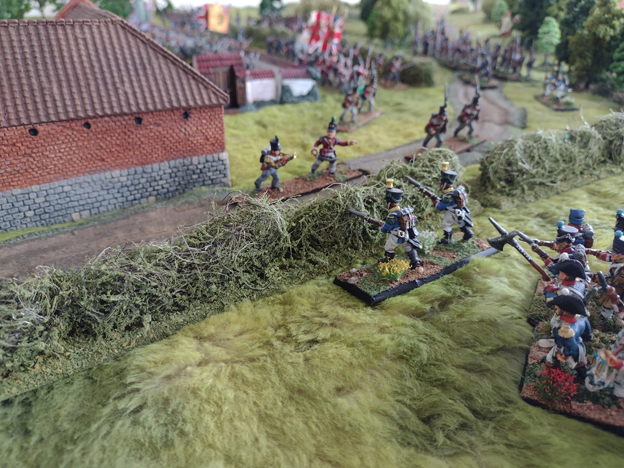
The Austrian left line the sunken lane's hedge.

Jaegers hold the sandpit quarry, having deployed their own skirmishers to aid at the farm.

Onward the cuirassiers! ... on the French far left.

The farm is becoming encircled by the many voltiguers

Having destroyed the landwehr battalion and artillery battery, the regrouped cuirassiers come under skirmish fire from the farms kitchen garden, more jaegers in the hedges.

Riflemen try to ho,d off the voltiguers by the felled tree roadblock.

The French take the orchard and cautiously advance on the barn, their objective. 


But, the French are in the barn and courtyard.

The Austrians heavies arrive, but too late this time. They can't retake the farm anyway.

The remnants of the 1st Cuirassiers (man of match to them), drive the jaegers out of the sand pit in a last gasp charge.


Friday, 5 August 2022

BATTLEGROUP: TORCH. CLASH ON THE THALA ROAD, TUNISIA, 1943

One of our occasional games in Tunisia using Battlegroup Torch, this time 800 pts per side in a Recce Screen scenario (for which I, the Germans, did not take enough recce). Set, vaguely, near the Thala Road as British armour fought to stop the advance of 10th Panzer Division out of the Kasserine Pass (towards Thala). Known as Gore Force, it included Valentines and Crusader tanks, against 10th Panzers III and IVs.

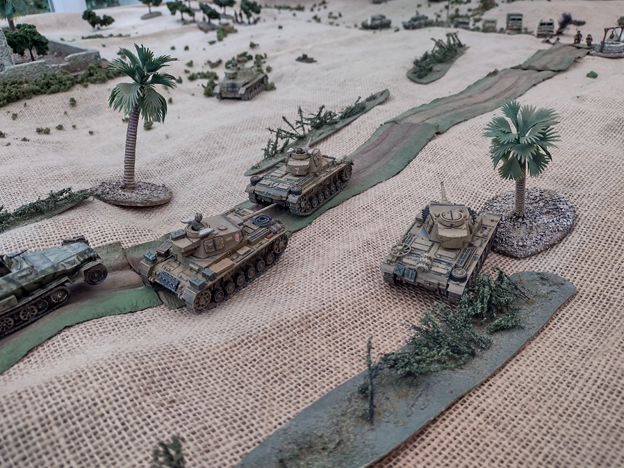
Lots of pics of this fight. The first 5 turns were the recce screen, something of issue for the Germans with their mere 2 recce units (Kradschutzen squad and SdKfz 222, both spotting for a off-table 80mm mortar battery), vs the Brit’s 5 (2 x Daimler armoured cars, sniper team, foot patrol and recce HQ in Dingo, spotting for off-table 25 pdr battery - ouch!). The recce battle was only ever going one way, as I lost my kradschutzen trying to prevent the British getting all the objectives early, and a handy mine-strike did for one Daimler as it moved to the central objective by the road (marked by a desert well). The 222 survived though, but was repeatedly pinned by incoming 25 pdr rounds at the farm. I gave up unpinning it until the army arrived. On Turn 6, it did, the first Panzer IIIs and supporting grenadiers in their half tracks, and the battle was on for real. The Brits had had the better of the chits in the recce phase though, so I was playing catch-up.

My plan was to go fast and hard at the objective on the ridge (to my right), take it quickly and hold it and prevent the British from having it. To this end the panzer grenadiers in the captured M3s would lead, with the tanks in support. That would be my main attack, with support to their left from more tanks, trying to get to the well objective and using their long guns here, including the tasty Pz IV F2 (and its unerring ability to mIss!). Behind woulD come the support stuff, FHQ, Luftwaffe forward air observer (come on the air attack chits, I was bound to get one right?), AA quad flak truck (on ambush fire against the RAF, resisting the temptation to use it for ground fire and get it killed, it is just a truck) and my supply truck waiting on reserve move for when the tanks ran low.

From the opposite corner the Brits would arrive, Valentines moving to their left to contest the ridge objective, crusaders and motor infantry platoon moving up the centre for the clash around the well. They had dedicated 25 pdr support, which I thought would hurt, but actually, repeated failed radio checks and some wild shooting, to miss the table, meant I got away lightly here, then my Stuka timed strike, by sheer good luck scored a direct hit on his observer in the Dingo. That was a Dingo in orbit then from a heavy bomb impact, and no more artillery spotter –fluke, but hey you take the smooth, because there is enough rough!.

My own mortars, spotted for by the handy 222 lurking at the farm, had that British ridge zero’d in and would harass it turn it after turn. Handy pinning was all that was required.

The attack on the ridge objective also went well, a timed 105 barrage pounded the ridge with harassing fire and by fluke (again) killed his sniper team holding the objective. My M3s (and 251s) pushed up fast, infantry piled out and took the objective, hiding amongst the rocks. They’d just hang tough, unable to harm the Valentines facing them, but they were distracted by the Pz IIIs in a gun battle that would not end. So, here we have two tanks that cannot hurt each other (much). 2 pdr guns bounced every hit. Short 50mm gun bounced off the Valentines front armour as well. Many hits, all for nothing. Clang, clang, clang… much ammo used. The Valentines also couldn’t easily shift the infantry, no HE shell and 1 MG.

In the centre, the British motor infantry moved a section up to take the well objective, but when they became pinned and their AT rifle team ran away (last man pinned), my third (reserve) grenadier squad raced up the road (reserve move again), then jumped out and assaulted them, wiping them out and taking the objective for me. Their MG team got the next British section (down in the scrub) head’s down too. The Germans were winning. Under attack, the British started to quick evacuate all those truck transports off the table.

That, of course, doesn’t last, things change. A Valentine finally scored a penetrating hit on a Pz III, first tank kill, and his second infantry platoon, on foot, was now closing in on the ridge objective, if under MG ambush fire from my grenadiers and their supporting transport, their pinning would keep the British counter attack struggling forwards for several turns. Taking a counter to remove that pinning resulted in an air attack counter, and the RAF did show up! Damn. A Hurribomber came buzzing in next turn, only to be shredded by quad 20mm flak rounds. Pinned and with 2 damage, only 1 point left, the Hurricane got a pasting. Quad on ambush fire, nice work!  The Hurricane would try 3 times to attack, getting pinned every time, be lucky not to get shot down and then give up and stay pinned. Too hot down there. I never took the counter for under air attack.

I also drew an air attack counter, hurrah for the air observation officer in his little 250. Then rolled a 1, so no Luftwaffe help… typical. Dice malfunction. Another Stuka would be so handy, and the British had no AA defence.

Oh well, we’d been at it for 3-4 hours and both side’s counter stacks were building, it was close. The Germans clung on their objectives, in the centre the panzers moved up, but one was hit by a Crusader and KO’d. One Valentine, pinned by HE fire, failed a morale test and the crew bailed, still no kills, but at least it was out of action. Another Valentine survived a second mine strike counter (man these things are tough). My tanks were low on ammo, mostly AP rounds although throwing HE to pin Valentines had become handy. The resupply track rumbled up as the first panzers fell back to meet it and rearm.

And that was about it… we had run out of time. The game had lasted all afternoon, but neither side had actual broken. We added up the numbers to see which side was closest to breaking. The Germans were, just. But (and this is something we did not realise mid-game), the Germans actual had all 3 objectives. A draw then? Slight German win on objectives?, but a fun fight. The tanks had really struggled against each other, and my veteran grenadiers had done great work in getting to those objectives and holding them. Good fun. 

Thala road, Germans moving on from the bottom, Brits from the top.

Kradschutzen moving up the road on a recce.

SdKfz 222 in support at the farm.

Daimlers of the Derbyshire Yeomanry lead the British recce force.

Foot patrol move into an olive grove, go on ambush fore, and get forgotten about.

Early timed Stuka strike, scores no hits, the Daimler it targeted was already dead from a stray mine.

Kradschutzen, on foot now, try to hold an objective.

25 pdr's open up on the farm.

First Pz IIIs move on.

Followed by panzer grenadier's half tracks.

Motor infantry platoon and supporting 6 pdr (dangerous gun in '43) deploy in the centre.

Grenadier squad takes the ridge top objective (marked with a KO'd gun).

Valentines move against them. Tough as old boots...

The F2 moved to cover the German left, if only it could hit a Crusader!

Flank covering force on the Thala rd. Ahead the Brits have the well objective. Not for long...

Used a heavy infantry gun, supporting direct HE fire from a captured 25 pdr. An ammo low counter saw it withdraw off the tabe. Not much in that limber then...

On ambush fire, bring on the RAF!

Pz III pinned by 2 pdr shells off the gun mantlet.

Ah, thr RAF is here... Hurribomber about to meet quad flak...

Attack up the road, and the Germans have the well objective too.

Rear echelon stuff, FHQ, air liaison officer's 250 and comms link armoured car.

British motor rifle platoon in trouble. Finally a Pz III got a Crusader.

The foot platoon try to attack the ridge, but 4 MGs on suppressing fire make it hard work getting anywhere.

The panzer grenadiers hold their end of the ridge.

More ammo please... supply half track moves up.

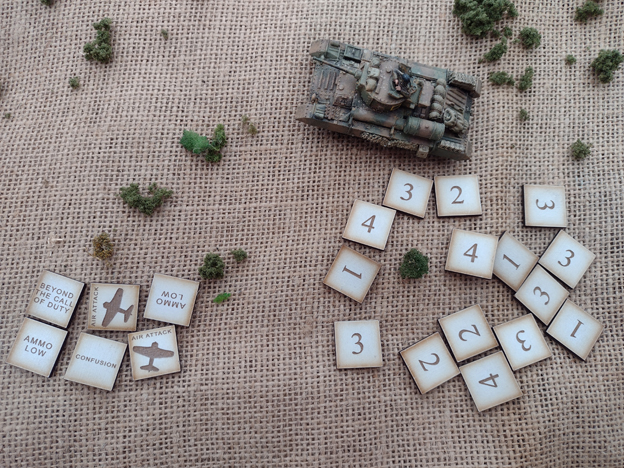
German counters... its 49 out of 54 BR

Brits, 39 out of 52.

Oh, give it up, even at under 10" these tanks can't score a killing hit. 
Good prolonged gun duel though...


Monday, 25 July 2022

SOLDIERS OF NAPOLEON, THE SUNKEN LANE

This was refight for a historical scenario, one of series of such that I’m working on and this was a play-test, to make sure I’m on the right lines with it and that they play as good, close games (not all historical battles make good wargames - in fact most don’t really). Here, I had to tweaked some aspects, including forces and timings and deployments (slightly), to try and make a more balanced scenario,

The game was a French attack against an Austrian defended position, along a hedge lined lane. Three French infantry brigades  would lead, with strong cavalry reserves in a cuirassier and light cavalry brigade, so 5 brigades in all. The Austrians would have a screening landwehr brigade out front, with a second landwehr brigade deployed behind to the left and a tough grenadier brigade deployed to the right rear, both with artillery close support. They also had a strong reserve of a cuirassier brigade waiting to arrive and counter-attack those advancing French infantry.

A simple set-up then, with French in all out attack and the Austrians defending.

We got the models on the tabletop, or waiting close by to arrive from reserve, and set-to with Turn 1. Drums beating, the French infantry began their advance. Here they come!

The cannons roared, his grand battery of guns behind doing damage to the grenadiers along their hedge, whilst my on table guns returned fire into the French lines. The screening Austrian landwehr, starting the game jittery and ready to run, advanced to use a handy ‘Withering Volleys’ and inflicted heavy damage on the first French battalions, but with no Rally card for Militia, one landwehr unit in the centre broke, the other only remained in place after the brigade commander rushed to join and inspire them. Out front and exposed, it seemed the screen would not last long… which turned out to be wrong.

The French advanced cautiously, with lots of skirmish fire, but two ‘Steady Lads’ cards kept the militia in the fight and volleying away, breaking a first French line, great work from what was only a delaying/harassing force. They then fell back to rally. The French advance had quiet reached halfway yet as turn 2 ended and the Austrians had a slight early lead in VPs gained.

Turn 3, and the French had rather stalled, bogged down with too much skirmish firing at the landwehr, who again withdrew and rallied, but it cost them casualties now, as the Disruption built-up. The landwehr then returned fire with another ‘withering volley’ that cut through the French. The screening job was all but done, time to try and save them if possible with withdraw moves. The screen had slowed the French right down and done a lot of damage too, sometimes even landwehr surprise you.

End of the turn and first reserves arrived, the Austrian cuirassiers. The French infantry had been hurt, so it was time to counter-attack. The cuirassiers used a lot of cards, moving up and through the grenadiers and the hedge and ‘at the quick’, closing in on the French infantry, before a ‘ride them down’ event saw one regiment charge and pummel an infantry battalion (already in disorder from various artillery and skirmish fire). The Frenchmen were butchered and routed, almost to a bloody massacre, even losing their colours (the eagle!) in the melee.

On the French far right, a far quieter area, the brigade got going at last, at the quick, maybe here they would fair better, with only landwehr to face and no charging heavy cavalry to counter-attack.  

Back on the French left, and the troubles came in battalions (regiments actually) and the Austrian cuirassiers rallied, reformed and charged again, smashing up a second infantry battalion, who fell back and also rallied, leaving their many dead behind. One aggressive cuirassier regiment had smashed up the left-hand French brigade. But all was not lost, the French reserve cavalry all arrived, and their own cuirassiers and lancers could now retort, as they galloped up to save the infantry.

The French cavalry rushed forwards at top speed and plunged through their own infantry, heedless of them, to get to grips with the Austrian horsemen that were doing too much damage. The blue cuirassiers charged and narrowly pushed back the whites, but it was a close fight. Both would Rally and reform to try again. The lancers met the other cuirassier regiment, in a counter-charge that saw the heavies just get the upper hand and drive them back, again over their own infantry, which was becoming a real mess. Into this swirling melee of men and horses came more cannon and skirmish fire and in the end phase another French infantry battalion broke… they had had enough of being ridden over by both sides.

That was it, the French attack had broken, sound the retreat, they must withdraw before the stolid Austrian defence and their heavy cavalry counter-attack (any similarity between this a famous part of a famous part is purely intentional).  A solid Austrian win. In light of the game I made some alterations to the scenario, and in the post-game brew and post-mortum the French decided they had made a few mistakes. Firstly, they should have been more aggressive against the landwehr screen, hit them with charges in turn 1 by moving faster, and not using so much skirmish fire, the cautious advance had been the wrong call - too slow (it also allowed the Austrians to easily claim their Hold the Line objective). The cards had favoured the Austrians, both well-timed ‘withering volleys’ had been horrid, and on turn 6 I used the ‘command confusion’ event and rolled a 6, striping 2 cards from the French, which again was a big factor in not being able to save his trampled infantry battalion. Still, the clash of heavy cavalry had been fun, call it draw there, but the white cuirassiers had broken 2 infantry battalions before then, so damage done.

Work on a series of historical refight scenarios continues apace. We'll test another one soon.  

Deployment, Austrians line the lane and hedge, with landwehr and skirmishers screening

French advance begins, in a strange formation (historical though), of lines, one behind the other. A lot of voltiguers out front.

More landwehr (Grenzer standing in) on the far left end of the line.

Heroics from the 7th Landwehr as their volleys pummel the French lines, and they steadily fallback. The brigade commander arrived to inspire them and keep them fighting. Very steady lads! Heroes of the day.

Ride them down! The white cuirassiers charge and break an infantry battalion.

Cuirassiers meet lancers and see them off, just. Note, all grey (Lipizzaner) horses, apt!

Cuirassiers clash sabre to sabre, and fight each other to a stalemate, but too late to save the French advance.


Monday, 13 June 2022

First assault on Hougoumont, with Soldiers of Napoleon

This would be historical refight, a pre-written scenario (by me) set during the first hour or two of the attack on Hougoumont at the Battle of Waterloo (in case anybody didn’t know where it was!). One of the most famous feats of arms of the British army (conducted largely by the Guards and, ahem, German units). I did the research, made a sketch map of the battlefield and got the units and strengths sorted into playable army lists for both sides, each with their break points. It made for an interesting match-up of a small, tough force for the allies, of excellent infantry, dug-in behind good cover and with the fortified building of the gardener’s house (part of the far larger chateau complex) to defend. The French attacked with, well, lots of infantry, mostly regulars and some battalions downgraded to reserves, but hugely outnumbering the defenders. Neither side had any cavalry and the guns were mostly off-table (except a single howitzer the French pulled up in close support).

I was keen to see if the rules would reflect the actual battle well, would it be ‘game-able’ and still have any sense or feel of the reality? Could the allies replicate their heroic feat of arms or would they just get crushed by weight of numbers?

We didn’t have the perfect models to play the game, lots of French infantry was fine (got that), but for the allies, no Nassau troops (the green jackets of the rifles would stand-in for green Nassaus) and the Hannoverians/Luneberg/Grubenhagen contingents would be made-up of more red jacketed Brits, as were the Guards (which is at least right, bar fancy epaulettes).

We set-up the tabletop and sorted our forces, rolled for the reserve brigade’s arrival and noted it down, rolled command points  and did the pre-battle prep, so were ready to go. At around 11.30 am, General Rielle’s Corps (the vanguard of it, 1st and 2nd Leger)) were advancing through the woods south of the chateau.

This is popular subject for Napoleonic wargamers (naturally, it’s a very famous action), and I thought it work well (as an idea). SoN recreates a part a larger battle and this what this is, the first assault (there were several) for an hour or two over just part of the wider Waterloo battlefield. It is what the game already recreates.  Second, I didn’t want the entire chateau complex on the tabletop, it’s huge and breaks the ground scale by its size, with many buildings (which few gamers have). Instead I went for the middle of the action, focused on the attack on the formal garden with its tall walls. Could the French overcome this obstacle? (on the day they couldn’t). 

Rough map of the tabletop battlefield. Gardener's house, walled garden, great orchard, the woods and hedged paddocks.


Turn 1, and the allies started with the initiative, German skirmishers in the woods and firing at the French columns for the first few points of Disruption. The French advanced en-masse, through the difficult terrain of the woods (slowing them down), getting their own Voltiguers forward to engage those skirmishers and shoot back at the Germans. Behind the screening light infantry, the Guards and Nassua troops held the gardener’s house and deployed along the formal gardens walls (it was well loopholed and had ad hoc fire platforms of barrels and doors/planks behind it). The French advance was slowed, fighting the underbrush or, for the flanks, the big hedges of the farm’s paddocks. The French held the ‘grand assault’ battlefield objective and I felt confident I could complete it (for once). The allies held the ‘Hold the Line’ objective, which we decided only counted for the formal garden and house, they had to keep the French out of their strongpoint to claim it.

Little action but skirmishing fire and French moving up in turn 1, a quiet one, with no artillery fire at all. Turn 2, and things heated up, the Guards detachments sent forwards their skirmishers into the woods too, as did the Nassua battalion and the place was thick with allied skirmishers, all firing away and starting to hurt the French. My own fired back, doing the first Disruption to the German light troops. Behind, along the wood’s track, I brought up the limbered howitzer, set it up and started the lob shoot onto the gardener’s house - but with no hits yet. At the end of turn 2, the French suffered the first set-back, the last card play saw ‘skirmishers harass’ special event and the guards and Nassau skirmishers opened a galling fire through the trees, scoring hits that broke the 1st battalion of the 1st Leger… drat… skirmishers hitting on 2+ hurts, and multiple hits ended the turn with 6 disruption on the 1st battalion’s 5 stands (1 deployed out as voltiguers, so thy don’t count). They fell back, broken, the first loss. Nice special event to get.

Turn 3, and the French columns pressed on, to the edge of the woods, deploying into lines at the hedgerow and opening up with volleys at the garden wall beyond. On the flanks, 2 battalions, one left, one right, closed in on the gardener’s house and into the great orchard (unoccupied) to get in and stop his objective being completed. The 3rd battalion, 1st Leger then suffered the same fate, another skirmishers harass card scored 4 hits as the French tried to scale the walls and, with no card to rally them (militia quality), that battalion also broke. Those guards were showing their excellent mettle. The 1st Leger was down to 1 battalion and its howitzer (still missing). To aid the French General Rielle did arrive to oversee General Baudin’s floundering attack. On the down side, Guard reinforcements arrived in the formal gardens. It was beginning to look very tough.

Turn 4, and the French assault, well the first wave, was approaching it’s peak. Volley smashed between the hedge line and wall and the howitzer scored its first hits on the guards in the gardener’s house. As French battalions close in for the coming ‘grand assault’, both sides needed to rally too.  Trading fire, with much skirmishing, but those walls were absorbing most of my firepower. The French had now moved all their battalions up and three were in place to charge next turn. One more was needed though to fulfill the Grand Assault, the early loss of two battalions was being felt.

Turn 5, and the French reinforcements had arrived, Soye’s brigade of 6 more infantry battalions, advancing up through the woods again (as quick as they could, taking the enforced Disruption for the full move). In went those charges, the first into German light infantry, winning and destroying the small unit that broke. At the gardener’s house only 1 of the reserve battalions charged, the other refused and volley fired instead (even with a command point re-roll). The single battalion were then in trouble, as the defending guards within re-rolled all their failed attacks, and the attackers re-rolled all their successful ones. Hammered, the guards drove the French off with 8(eek!) disruption, which had to be rallied with the loss of half the battalion as casualties. I still needed 2 more charges, and couldn’t get them. The battalions lining the hedge (base of volley fire) were just too far away to get to the wall. The grand assault hadn’t been completed.

By now, the VPs had stacked up, with the allies just ahead. But if I could somehow complete my objective, I’d be at the allied break point and win. So, to turn 6, and last chance to do it. The guards on the walls were being reinforced by more elite infantry and so, getting over that wall was looking impossible, until Soye’s many battalions took over. I did draw a new objective card, ‘advance through enemy lines’. I could go round, so did, and sent 1 battalion off past the gardener’s house, to seek another way in. But I couldn’t get the needed second battalion to them quickly enough. I failed that objective too, and the D3 penalty VPs for not completing the ‘grand assault’ pushed the French to their break point (just, rolled a max 3, of course). Drat, the allies had hung on and seen off the French first assault (just like on the day).

It felt close throughout, the allies horribly outnumbered and desperately rallying, trying not to lose some small battalions (3 stands detachments of guardsmen). The garden’s wall had been a fortress and the late (sneaky) use of the ‘skirmishers harass’ cards had been good play, breaking 2 battalions. Very happy with how it played out, a very historical result. French could have won it, but the guardsmen were just too tough in the melee and with excellent skirmishing skills. I’m thinking now to write a second scenario, for the afternoon’s main assault on the chateau, to re-jig the forces, fresh French troops (and some stragglers) and go again, over the same tabletop - Hougoumont, 2-4 pm?

From this, I can see a whole series of this re-fight scenarios, maybe 8-9 to cover the entire of the Waterloo battlefield, play them out in chronological order and you have re-fought the ‘crisis points’ of the battle. An idea of a supplement maybe, historical scenarios for Napoleon’s great battles (that can be the working title). 

Photos of the day's action...

Gardiner's house and walled garden beyond, from the 'kitchen garden' field. 

south of Hougoumont

General Baudin's columns, 1st and 2nd Leger, begin the advance. 


The single 5.5" howitzer towed up the track through the woods, just behind the infantry attack.

A battalion of the 2nd Leger cross the hedge into the kitchen garden paddock, heading for the gardener's house.

Skirmishers heavily engaged in the woods

Guardsmen and Nassua troops line the tall walls of the formal garden.

Hannoverian skirmishers at the hedge, as the French reach the edge of the woods and deploy into line.

Approaching the gardener's house, with guard skirmishers in the lane.

More guard skirmishers face the oncoming column of 3rd battalion, 1st Leger. It reached the wall, then broke under heavy, accurate, fire.

The French close in for the 'grand assault'.

Charge! the French smash the small German light infantry unit, but take heavy fire from the Nassau troops behind the wall, and fall back to rally. 

Soye's brigade arrive and begin to follow the first attack in, another struggle through the woods. Another turn and they could have taken over the assault with fresh columns.