Tuesday, 29 July 2025

'Road to Brussels' - SoN 1815 campaign, game 3 - Rearguard near Genappe

The third of our 1815 campaign series, and it is now day two, with the British now retreating north from Quatre Bras and the French in pursuit. This would be a rearguard action (handily thrown-up by the campaign system). So, somewhere south of Genappe, General Bond's division has been given the task of turning, standing and delaying the French (again aided by the remnants of the Hanoverian landwehr), with General Cheyrou's hard-fighting (rather weary) French division in the van, aided by an attached (weak) light cavalry brigade of chasseurs, trying to force passage up the Brussel's road (again). It was 3 brigades per side. 

The French attack plan was simple enough, a refused left flank, the most powerful infantry brigade would assault along the road on the right, supported from the centre by infantry to cover their flank. On left, the light cavalry, a distraction/harassing force only, to try and keep the bulk of the British infantry from the moving across to interfere in the main assault. It would another game were I found myself having to attack against an enemy with superior cavalry forces. How to neutralise them? (Maybe shoot them, a lot!).

The French infantry began their advance, in columns, at the quick, and the cannons opened up, do some early softening-up damage. The British response was to advance their hussars over the hill, and into a returning storm of artillery fire (2 artillery bombards events) and an intense cannonade, which soon had them in disorder (joys of being identified as a primary threat!). The French voltiguers would also rush out and add to the pian and the hussars found themslevs withdrawing and needing to rally (they did). Meanwhile, their horse battery was deployed and opened up into the French infantry. Behind their log barricades, the German conscripts ducked down and avoided the cannon balls whizzing overhead. The British infantry on their right moved up, and sent their skirmishers out (there are a lot of them, all Skirmish 3). The light cavalry sent some rushing back with their harassing attacks... some restbite. 

The French right marched on, the hussars being held off and closed in on the barricades, cautious advances and voltiguers doing excellent work. The hussars came back, but did not like the odds of the charge, especially as they were soon back in disorder. The covering French infantry where also using their voltigeurs and the horse battery was under threat. Meanwhile, the other hussar regiment had advanced into the central woods (it was dense) and got a bit stuck getting through it. Both sides rolled for senior officers to arrived, both rolled a 1, so no help from the big brass today. 

After 4 turns, the French where now close enough to charge the barricades and so tried, their veterans rushing in and smashing the landwehr at bayonet-point, which broke and fled. The shot-up hussars now had to respond and, sabres out, rushed into the fray, finally, but the veteran French column only just lost the melee and the hussars paid with incoming skirmish fire from all round, breaking and fleeing... their lack-lustre charge had failed to stop the French infantry, as they also overran the Hanoverian gun battery. This also stopped the British from claiming the bonus VPs for their 'Hold the Line' objective (part of the rearguard scenario). The French were ahead on VPs, but the British were soon back in it, when horrid skirmish fire broke a unit of chasuers and cannon fire broke a line infantry battalion in the centre. It was close, but the French momentum looked like sweeping the poor landwehr away, just 1 battalion left (4 stands) and the brigade would also be wiped out. It look desperate. 

On to Turn 6, the finale in a very close fight. The French infantry tried to press on, but the lead unit 'stalled' on a special event (second game that card has been crucial and painful) and the line regiment did not charge (no command re-rolls left for either side by now either). Their volley also missed, as did the supporting cannon fire from way back (and 3 orders to use). Somehow, needing just 1 Disorder to break them, the landwehr stood, through shot and shell. With just 2 cards left each, I used the 'command chaos' event to put a final nail in the British coffin... and rolled... a damn 1! That left the British a card to charge their 'lost' hussars, (having finally got out of the woods) into my chasseurs and rout them in the melee... the end of the French light cavalry brigade, and then rally his light cavalry to avoid any further costly routing. I couldn't do the same and so, as we added up the VPs, the British had amassed 19, needing 19 for the French to break. The French had 19, needing 20 for the British to break... aargh!!


So close, so close, and the British looked in big trouble, but the heroic charge of the 'lost' hussars saved the day. The French infantry had almost pushed through the road block, but had to be recalled, the road behind under threat of being cut. A cracker of a game, real drama at the end, and on Turn 6, my dice just deserted me... I literally could roll anything but 1s and 2s... the command chaos (1, grr 1!) would have changed it all... even breaking the last landwehr, but every shot missed or was saved... these redcoats are hard to beat!


For the campaign, General Bond's division has done its job (just). The French pursuit is delayed and they will now have to find another route around. We worked through all the post-game stuff (lost units, gained experience, etc), and the next game will be against the Prussians again, but again with Cheyrou's division (4 games on the trot, so Doubert's division will be completely fresh come the big end battle). Looking at a map, with the French diverting eastwards, it seems they might run into a Prussian flank guard somewhere around the village of Faux. That's game 4. Can General Cheyrou's battered vanguard (I assume Doubert is swanning along somewhere near the back, well in reserve), see-off the Prussians before we get the the grand finale in game 5?

A few pics, not many, as engrossed in the gaming...

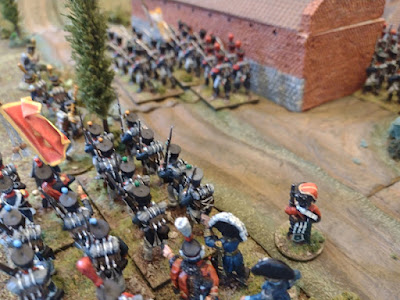
Open fields south of Genappe (randomly generated). French infantry assault up the road, as British hussars try to counter-attack, over the hill and through the woods. Chasseurs cover the French left, and try to survive (failing). It almost worked.

The French infantry columns begin their march up the road on the right towards the German landwehr position, manning ad-hoc log barricades thrown across the road yesterday.

von Kleb's poor German conscripts face the main French advance again. 2 weak battalion and 6 pdr battery, behind their logs, vs Napoleon's veterans in full cry.

Brigadier Fleming's light cavalry brigade, in the centre, to launch a counter-attack to spoil the French infantry advance, Hussars to the fore... and horse battery on limber to be towed up. The hussars advanced over the hill into a storm of cannon fire and swarms of voltiguers.

Out on the British right, somewhat out of the main fight, Price's powerful infantry brigade, their advance only faced the French light cavalry screen, just a harassing force. Here their skirmishers and attached riflemen clear the woods of French chasseurs... who's only task is to keep them from the fight for as long as possible (and survive).

The French in the centre supporting the main attack, by stalling the light cavalry and taking fire from the deployed horse battery. They are covering the attack's flank... hoping to draw in the British light cavalry and allow the main thrust to get to the barricades unmolested. Voltiguers doing good work vs the hussars. One battalion broke under artillery fire.


Storming the barricades, the French columns charge and drive the landwehr back, also taking their guns. Only one small battalion remains, it looks like being overwhelmed, but the landwehr show some mettle as a last ditched effort and did not break (a small miracle, and my crap dice!). 


Monday, 21 July 2025

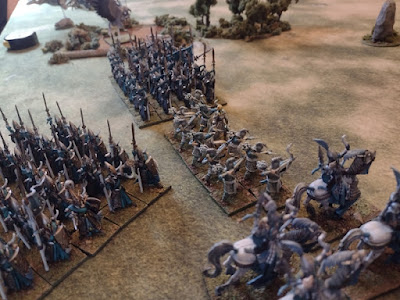
Battle of the Menhir - Warhammer High Elves vs Warriors of Chaos - 3,500 points

A 3,500 point Warhammer pitched battle, just for an rainy afternoon's fun and to get some models on the tabletop. The only scenario addition was special terrain feature, the 'magical menhir', which gained extra VPs for the possessor, but apart from that just - FIGHT!  

We used our own house rule additions, and trialed a new rule, for 'withdrawing' from combat. This involves a leadership test and a free flee move away if passed, which is automatically rallied. Units can thus attempt to escape bad fights, but frenzied troops can't do this (for obvious reasons). It only happened three times all game: the dragon-mage withdrew from fighting the warpfire dragon and chariot, to save itself, the prince withdrew from fighting the chaos warriors, to flap around and get a charge at the daemon-prince, and the Ellyian reavers rode off from a losing melee at the menhir stone, saving 5 of them (I don't mind fast cavalry escaping from infantry, it's sort of their thing). It worked fine, but the fear is of over-use... i.e, too much running off if losing. We might have to limit it somehow, maybe 1 withdraw move max per turn?

Also note, magic as well very nerfed throughout, by drain magic from the high elves and chaos' infernal puppet, resulting in few actual casts. Chaos got off 1 summoning and 1 steed of shadows all game. The elves got off shield of saphery, and several drain magics, but the dragon-mage cast zippo - despite trying).  In total, maybe 5-6 spells cast in 5 Turns.

On to the blood-shed, but first, here are the two rough army lists: 

Khorne's Slaughterers

Daemon-Prince with chaos runesword, might of khorne
Sorcerer-Lord (lvl 3 - daemonology, steed of shadows, daemonic vessel, the summoning) with the infernal puppet
Aspiring Champion with giant blade, master of mortals

32 Marauders with full command, shields, mark of khorne
20 Marauders 'cultists' with full command, skirmishers, mark of khorne
10 Chaos Warhounds
20 Chaos Warriors with full command, additional hand weapon, mark of khorne
8 Chaos Knights with full command, lances, shields, mark of khorne, sword of might
5 Marauder Horsemen with javelins

2 Chaos Chariots with mark of khorne
2 Chaos Spawn 'Gorbeasts' with mark of khorne
20 Chosen Chaos Warriors with full command, shields, mark of khorne
3 Dragon Ogres with champion and great weapons

1 Gigantic Chaos Spawn with mark of khorne
1 Warpfire Dragon (lvl 1, battle magic, hammerhand)

High Elf Protectors of the Stone

Prince on Griffon, with talisman of protection and star lance
Dragon Mage (lvl 2, battle magic, pillar of fire, arcane urgency), seeds of rebirth
Arch-Mage (lvl 3, high magic, shield of saphery, drain magic, walk between worlds), arcane familiar, power scroll

Handmaiden of Everqueen with bow of the seafarer

28 Sea Guard with full command
11 Ellyrian Reavers with champion, short bows, skirmishers

20 Swordsmasters with full command
11 Shadow Warriors with ambushers
8 Dragon Princes with full command
11 Archers of Avelorn with champion

2 Repeater Bolt Throwers
1 Giant Eagle


The action consists of an all-out attack by the Khorne worshippers, with the weight of it on their right, knights, chariot, warpfire dragon and dragon ogres, then the infantry up the centre, behind a screen of cultist skirmishers and a chariot, marauders and gigantic spawn on the left, behind the screen of warhounds (which broke and fled on turn1 after vanguarding first). They did their job, one turn of an elite archer unit not targeting the main combat units.

The high elves responded by stepping forward somewhat, (bringing all the war bows into range) and using their dragon princes and swordmasters aggressively. Bold, maybe foolhardy, but you don't have to just stand, wait and take it. By turn 2, there was melee, the dragon princes charging into the dragon ogres and just losing (some unlucky bad dice here), but the fight by the ruin continued after a 'give ground'. The dragon ogres would win it. The two dragons clashed (after a warp-firey breath attack - we allow these after a march move, just so they get some use) then the dragon-mage withdrew, only to fly back later on, with the angry warpfire dragon still in pursuit.

In the centre, the swordmasters clashed with the wretched cultists and just caved them to bits, but their prince didn't like the odds after charging the chaos warriors 'khorne berserkers' behind, leaving them to then do battle with the swordmasters, in attritional fight that the 3-attacks each berserkers eventually won, leaving just 2 fleeing swordmasters at the end of the game. This was something of a surprise, but it is landslide of attacks at S4.

On the Chaos left, the High Elves did better, seeing off the sacrificial warhounds with a stiff Avelorn volley, then killing the charging gigantic spawn with a block of sea guard, and defeating the chariot with the other, solid stuff. The Ellyrian reavers got caught by a spawn (need an 11 to reach them and did) and then marauders, but 'withdrew' and galloped off, with only 5 remaining. That left the marauders in possession of the menhir and its VPs, so the sea guard pressed on, and in another big melee, lost their champion to a challenge with the aspiring chaos champion (big hairy barbarian dude), and could not quiet beat the marauders in a stalemate (both blowing horns to break it). Still, the elves had held well.

The other flank was were the real disaster happened, the dragon princes sadly defeated, the big charge of the blood-thirsty Chaos knights hammered (and some) the sea guard line, killed the arch-mage on a lance, and shattered the unit, which fled and was ridden down... Only the wounded dragon-mage could save the day, but when the chosen warriors magical moved to intercept it, it then lost the resulting melee and was killed (taking a fair-few chosen Khornates warriors with it). But, there was little left now, and the High Elves had to thrown in the towel. The hammer-blow charges had shattered the line here, although the elf Prince survived (having star-lanced the daemon prince to death) and he could rally the right flankers and other survivors. 

So, the magical menhir of power was in Chaos hands, and they could dig it up and take it anyway for their own infernal/diabolic uses... solid Chaos win, and great fun. 


Khorne's followers in all out attack (what else?), but the high elves step-up (a bit) to meet it. In the end, the Chaos right/centre attack would crush the HE left/centre, whilst their right held out well, but the battle was lost.

The Chaos right, fast movers (knights, chariot and dr-ogres, not in pic), led by a sacrificial spawn (more attraction arrow fodder), and the daemon-prince and warpfire dragon can flap this way too if required.

Facing them, around the ruins, the high elf left, dragon princes, dragon mage, sea guard and the arch mage (with white fox familiar).

Chaos left-centre, first wave of warhounds and marauder (cultists) skirmishers, with infantry blocks and mega-spawn (first outing) behind.

Facing them, sea guard, elite Avelorn archers and their hand maiden, skirmishing Ellyrian reavers, which once they move, sea guard behind will march up to fill the gap on the extreme HE right.

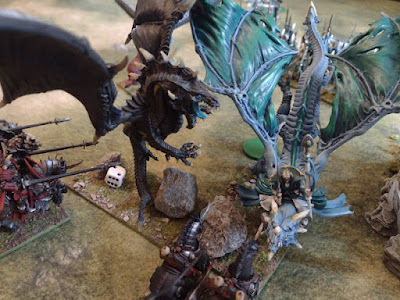
Raargh! The two dragons line up for an epic clash. Behind, the eagle intercepted the 'gorbeast spawn'... but lost the fight and fled! Rubbish eagle.

Swordsmasters and their prince hold the centre as the red-clad death-cultists lead the advance in the centre. They are supposed to absorb elf arrows and just die... but no archers facing them.


The forces both move to secure the magical menhir stone, for a few bonus VPs. Warhounds already broken and fleeing, tails between their legs.

First clash in the centre, as the prince over-flies the swordsmasters (as they massacre welcoming cultists), to hit the Chaos warrior 'berserkers' behind.

Dragon-rage... super cool, both deal 2 wounds to eachother, and the chariot impetuously joins in... for just 1 more wound, still, the dragon-mage is in trouble, and tests out our 'withdraw' rule (it's not running away, honest!). It is...

Fight at the menhir, reavers get caught by the spawny gorbeast (2 wounds taken from archery) and charging hairy marauders.

Mega-spawn begins to eat sea guard, after speeding across the table (they are quick). But that is a lot of spear attacks back (21). Sea Guard win, and begin the 'poke it to death' attrition that killed it.

On the other flank, more dragons meet - ogres and princes. Heavy casualties on both sides, but ogres get the best of it (some poor attack rolls from Caledor's finest). Dragon Ogres mulch heavy cavalry. 
 
The chariot arrived and charges into the sea guard block (HE extreme right here), and is well defeated by the forest of spears... and flees!. Sea Guard are such good basic infantry... just all round, good.

Over by the ruin again, can they stop this? The frenzied knights line up a crushing charge. A head, the lone spawn rampages on, and will attack the eagle-claw bolt thrower (and then fail to do much). The resulting frenzied knight charge would be carnage, seaguard blown away (15 dead!), arch mage also dead... the flank has collapsed.

Dragon Ogres beat down the princes, just 2 left, great axes slicing up the heavy cavalry (they are massive axes).

The Prince, sees a chance for glory, and charges the daemon-prince, general vs general. The star lances does the business and 'kebabs' the daemon before it gets to even swing its rune-sword back! Could this victory swing for the good-guys? 

No!. Another challenge, the aspiring champion cuts down sea guard champion... as the marauders hold the menhir stone and the elves try to take it back at spear-point, but can't drive them back.

The chosen warriors of Khorne finally get some action, having been magically transported, they face the wounded dragon-mage (and got a dose of fiery breath in the face first), but cut it down in revenge. Khorne is pleased, a mighty skull for the brass throne... and this decisively turns the battle, Chaos are well on top now. Glory to the Blood God! The High Elves sound the retreat...


Tuesday, 15 July 2025

San Salvo, panzer counter-attack, with BGI

The third of our San Salvo series of games, with the Germans launching their evening tank attack to retake the ridge and town after loosing it in the afternoon. In this scenario, the attacking Germans get 10 Panzer IVs and 3 StuGs in reserve, with a panzer grenadier platoon and 2 fusilier foot patrols in support, aided by off-table mortars and single 1st priority artillery request (and bits and pieces).

The Inniskillings will defend the ridge with 3 dug-in infantry platoons, with 2 6 pdr guns dug-in and off-table 3” mortars. In reserve are 2 more 6 pdrs and the carrier section (no tanks). The artillery support is 2 priority requests to help throw back the panzers. 

Overview, panzers come in two attacks, left and right. 'Skins hold the high ground (near edge) and town.

After deployment, we bombed-up the panzers with ammo (largely HE), selected PRTPs and were ready for the off. The scenario rules mean that after Turn 7 it can become a night fight (it’s evening), so no time to waste for the Germans. The panzers set-off, with two attacks, one aimed at the town on their right, the other the ridge, on their left, through the large olive grove. Both had tanks leading with the infantry moving up behind, having disembarked from their trucks and rushed up to find cover, over the stream.

The German fusilier patrols, forward deployed, hunkered down on reserve move, ready for a rush, but suppressing fire kept getting their heads down.

Early mortaring was wild (3 in a row!), and did little for either side. Some long range HE fire also had little impact on the ‘Skins lines, and so the first turns were relatively quiet. Then, the Germans got rolling, now over the stream, and pushed forward, calling in their only priority request of 2 x 170mm howitzers, crashing into San Salvo and wiping out a Vickers MG team with a direct hit and pinning the forward aid post at the back of town.

On the German right, the first panzer platoon traded fire with the dug-in 6 pdr and its loader team, but its return fire KO’d 1 panzer and next turn, scored 2 hits and KO’d 2 more, the whole attack stalled as the panzer burnt, medals all-round for those gunners.

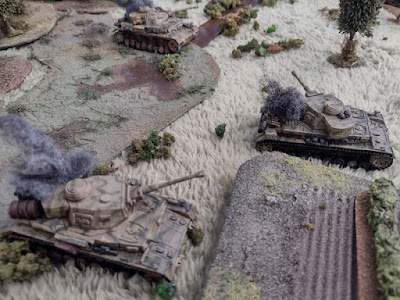
The left attack was going better, the panzers moving up and HE shelling, as the grenadiers crept up, using the trees and tanks as cover and not firing (best to stay hard to see, let the tanks do the work, until the final push into the assault). Mortaring added some pinning, and a big 25 pdr stonk of 4 guns when wild, and impacted well to the rear (phew!) but pinned some supporting stuff (the ammo truck, Pak-38 being used for HE support fire at long range). One Panzer IV was abandoned after being pinned, then hit by a mortar shell, but the three StuGs arrived and moved up to add to what had become the main attack.

On the right, three more panzers came across the stream (third platoon), via the little bridge (hope they checked it weight bearing capacity), to restart the action here, and the infantry, hiding behind stone walls waited on ambush fire for the fresh tanks, including the FHQ in his own PzIV, to lead. By luck, a HE hit on the deadly 6 pdr caused 2 losses and the rest of the crew ran for the rear (medals rescinded). Pressure was increasing, time to go, go, go!

The Germans launched their attack on the right, fusiliers rushing up (and 250 team), as MG-42s laid down suppressing fire into town. They assaulted the first building and took it, wiping out a rifle section, and the PIAT team, lurking on ambush fire to target an unwary panzer, was also lost. The edge of town was in German hands and the panzers rolled up behind, MGs blazing away.

The pressure was also on the right, the StuGs using a steady advance, rolling forwards with HE flaying the ridge, but the ‘Skins held firm and hit back at the German infantry, a few good spots and one MG team, then a rifle zug were lost… this main attack was short on infantry support now.

With the pressure on, the British reserves arrived in timely fashion, and raced for position, two more 6 pdrs towed in behind M5s and the carrier section, which raced to the front down the hill, to counter the German foothold in town. They did well, trading fire and driving the Germans out, until a second grenadier squad arrived and wiped out the small teams. A Panzer IV reached the main street, with 3 parked carriers as easy targets, but all three quickly fled the tabletop before the 75mm AP shells could wreck them. The ‘Skins send another section down the street and their fire wiped out the grenadiers at close quarters, it was getting bloody here, a hotspot.

On the ridge, a 6 pdr had been KO’d  and German accurate mortaring got another, so only 1 left, and a single PIAT, the AT defence wasn’t looking strong, but the German tanks were low (or out) on HE and their infantry support had  been largely destroyed. They could not get too close to enemy infantry with no support, so stalemate, which for the defender, is good enough.

Now, after 12 turns, night fell, and we checked the BR situation. Time was up, and the Brits had 10 BR left, with the Germans on 12… very close. We called it a draw (maybe a very marginal German win), the Brits had little left to stop the panzers, but in turn the tanks couldn’t close in… maybe they’d pull back, re-arm and come again, and then win it… but there was no time for that. Great fun… in fierce heat (actual weather), we’d sweated it out for an inconclusive result, draw!


San Salvo town.

German view, across the small stream and the road up to town.

Returning from photo-recce... no air power showing today.
German deployment, up to the stream, but with the recce already across. 
Fusilier patrol and 250 team, lurking in vineyards, ready to make the last push for town, when the tanks arrive.
Panzer Grenadier platoon arrives, using the farm as cover to disembark behind, this is as far as the bus goes, now walk. Third panzer platoon wait in reserve closeby.
Panzers Vorwarts! First platoon on the right, lead off, if slowly through the marshy ground.
Waiting for them, dug-in on the edge of San Salvo, the 6 pdr crew lines them up 'Wait for it!'.

On the left, second platoon roll through the big olive grove, the grenadiers will follow just behind.
First platoon is quickly destroyed by lethal 6 pdr shots... we need more tanks! First assault decisively defeated. 

Here come third platoon, as the grenadiers hunker down in cover, and let them go first.
View down the ridge from the 'Skins dug-outs, holding their right, with ambush fire.
The panzers and StuGs arrive, hammering the infantry with HE, but they are dug-in well, and hang tough, even as ammo runs low.
Reinforcements, new 6 pdr moving through the streets to aid the far side, passing the pinned ambulance.
Carrier section speed in and disembark, a counter-attack against the Germans now on the edge of town, just before the carriers all speed off again - due to, err, panzer coming with a big gun!

Here it is, reaching the edge of town, MGs blazing (out of HE shells, but AP ready for those carriers).
Germans in the first building, but not for long.


Sunday, 13 July 2025

'Road to Brussels' - SoN 1815 campaign, game 2 - Roadblock on the Chau de Namur

Afternoon of June 16th, and the French are advancing, attacking at Ligny and Quatre Bras. Between the two battlefields, General Cheyrou division has pushed aside the Prussian outpost (see game 1) and reached the Namur road. They advance through the small village of Marbais and find a British (Anglo-Allied) force blocking the road and protecting Wellington's flank at Quatre Bras. Cheyrou instructions are to attack and advance to aid Ney's struggle for the crossroads, 3-4 miles ahead. General Bond's instructions from Duke Wellington are to hold the road, stop them, and drive them back.

In our 3 brigade game, the forces are; Cheyrou's division of 2 good infantry brigades, with light cavalry riding to assist from reserve. General Bond commands a strong line infantry brigade, a German landwehr brigade and also has light cavalry moving up from reserve. With the terrain randomly generated and the main Namur road placed, on the far French right (British left), we deployed and set too the action...

The overview of the action, veteran French infantry press hard along the road to take the farm and then the hill (with windmill) held by the German landwehr. In the centre, the British infantry move up, to take the high ground, whilst their cavalry try around the flank, the British being very swift and aggressive, flying on from reserve at the gallop – hussar!


The British made a swift advance to take the high ground in the centre, as their skirmishers deployed to form a thick screen. They claimed the objective (lucky to get the right card on Turn 1), and the French advance hadn't started, in fact, any thought of taking that hill was abandoned, it was only a diversion anyway. The main French thrust was directly up the road, and it sped along, to the large farm, where skirmisher fire and a militia panic card saw the poor landwehr, sent to occupy it, break and run. The farm was seized, the French just needed that objective card now for the VPs (for the second battle in a row, it never came, - good grief!). Still the advance could press on, and a second landwehr battalion, sent to counter-attack down from the windmill, as facing heavy fire, and it too fell back in disorder. The push up the road was going well, and the sustained accurate artillery fire around the windmill was hurting another battalion of redcoats, they needed to rally to stand, but the grim-faced French veterans were coming! German return cannon fire took its toll too, but the French resolve remained strong after a quick rally.

 Meanwhile, the British light cavalry arrived, under Brigadier Price, and galloped hard into the open (and empty) ground on their right, deploying their horse guns as well. The British gallop carried them quickly to threaten the French flank, were a battalion formed square to stop the hussars, but was under cannon fire and skirmish (with added rifles) fire. It was shot into disorder, and the hussars launched a charge to try and break them. The ragged French fought well, but the hussars sabred them up badly, and a rally saw heavy losses leaving just a couple of stands on the field. The French left was in deep danger of collapsing, when, chasseurs to rescue, the French cavalry arrived to move up and threaten the now disordered British hussars. They fell back to rally and the two light cavalry lines now just eyed each other. 

Back on the French right, and the farm and road. The French advanced in columns up the hill, and the disordered and wavering/panicking landwehr when into full retreat. Their guns were limbered up and the infantry formed columns of march (just as another battalion broke under artillery hits) and then marched away at the quick. The windmill was abandoned and the French, seeing a chance (and holding a 'break through enemy lines' objective) marched on. One battalion made it off the far table edge along the road and second just behind, when a 'stalled' event halted them. Just checking to see if they should push on, whilst stood 1" from the enemy table edge and a big VP gain for the objective denied. 

Back in the centre, the British fire was hot and the French's last 2 battalions were push back by it, and forced to rally. More skirmish fire saw a second battalion break regardless. 

On VPs earned, that was just enough for the British to claim a win. Somehow, they had sneaked over the line, with the French so close to completing an objective and doing likewise... a very close call. The 'Stalled' event had saved the British position. General de Division Cheyrou sent a order to recall his lead infantry, the road behind was in danger from the British and couldn't be held. General Bond had done his job, but a damned close run thing. 

Great fight. So close, really good narrative-feeling action. The French had pushed up the road, off the far edge, hammering the German landwehr en route. In the centre, the British had their hill and would not give it up, and had cut the French infantry to ribbons. On the French left, the light cavalry had cancelled eachother out (a bit of skirmishing with one chasseurs regiment charging winning a melee by not much proved inconsequential). But the objectives had been crucial. The Britsh gettin 'take the high ground' early, and the French denied at least 3. First, no take a stronghold for the farm captured. Second, no hold the line when the chasseurs arrived, because 1 British Hussar stand was in the deployment zone. Third, te 'Stalled' event deny the 'Breakthrough enemy lines' by the French infantry... them's the breaks, but if some of them pay out, the result is different.  Still, it all makes for a great game...

The action...

Flemming's infantry brigade, move out for the central hill.

Du Plessis' infantry advance through/around Marbais, to push directly up the road. Go straight at 'em!

Du Plessis' supporting guns (and caisson) cause havoc in the landwehr's lines.

Von Kleb's landwehr, even if they just look like more redcoats. 'Hold this hill and windmill'. They had already had a few deserters before reaching the field (a campaign event).

The French reach the large farm halfway up the road, and fighting begins, the veteran voltiguers rooting out the Germans from the big barn. They panicked and broke.

The British crest the hill, led by a swarm of their skirmishers and extra green-jackets. Two French attack columns haven't yet got going.

Du Plessis' men thrust on up the road, and the Germans are melting away in panic.

Voltiguers rush to meet the heavy skirmish fire screening that hill, along with a line of light infantry.

Swift British Hussars swing round and force the French to form a square, which is also under 9 pdr cannon fire, combined arms at work.

The French take the farm as more landwehr break and run. On, for that windmill.

The Germans morale is wavering, but their guns keep banging away. This hill won't hold! Von Kleb decides on retreat. Run way!

General Bond intercepts the retreating Germans to admonish Kleb, but he only saved what he could from certain destruction on French bayonets. Still, the road behind them is open.


The French chasseurs arrive to face down the British hussars and light dragoons. Stalemate, and wary watching duty, will either try and charge? The odds don't favour either side by much.