Tuesday, 31 January 2017

Operation Foxtrot, FotR campaign weekend

Last weekend saw the third Battlegroup campaign weekend, this time at Battlefield Hobbies in Daventry, which provided a great venue. This campaign used the Fall of the Reich supplement and was set at the 'semi' imagined town of Mundenberg, a last Nazi redoubt somewhere in the Ruhr in April 1945. Operation Foxtrot would be the joint British and US attack to eliminate the pocket and open the town's transport network.

Players came either to defend Mundenberg, with a forces selected from the FotR 'Defenders of Reich' army lists, or take it, with either US or British Battlegroups. All were 500pts, and they could be changed between games if the player so wished. Day one would see the Allies attacking the town's surrounding defences, and trying to take a few key locations. The British had the north and west, and the Yanks the south and east, but a lack of available US forces meant that in the end, the Brits took part of the south too. Tommy Atkins would be required to do the heavy lifting here.

Day two would see the last of the husbanded German armour unleashed in the final counter-attack. With only enough fuel for one day in battle, the tanks were not present (much) on day 1.

The players rolled into Battlefield Hobbies around 9am on Saturday for their morning briefing and allocation of sectors (tables). Key to the morning attacks would be the Backsenberg coalmine (for the Brits) and the bridg over the Holtzbach stream (for the US, but now handed on to the Brits). Game winners would earn their side bonus campaign victory points, 1 for a narrow win, 2 for a solid win, 3 for massacre and an extra bonus point if it was a key objective. So, on with game 1 as the guns cut loose.

The Germans deployed their defenders and their defences, and it was a frightening site. Trenches, gun dug-outs, 4 Panthertern and 14 88s, why the town had held out so long was now obvious, it had a Luftwaffe Flak Regiment holding it, it must have been a bomber route further west...

The Allied armour had no choice but to press the offensive and by 10am the games were underway.

By 12.30 the results were in... it wasn't pretty, but not disastrous either, 5 German wins from their fixed positions, and 4 Allied wins. The Brits had won at the Backsenbek coalmine too, but the Germans still held on the Holtzbach stream, and its bridge... due to three 88s covering it! With bonus points for those locations, and +1 bonus for any player that provided extra terrain (whether we needed it or not), the campaign score was Allies 16, Germans 18.

After a brief pause for lunch the attack was to resume. New sectors for each player and a new opponent. The bridge was no longer a  key objective (it had now been blown up), so the key to the south was now the Schelkwerks factory, again the Brits would take over the attack here. To the north, the key location was now the MundenbergstraBe, the main road into town. The morning pressure had obviously taken its toll on the defenders, and things started to crack. With the US players putting in especially good results, and Allies were pulling ahead. But the Schelkwerks proved a very tough nut to crack and saw a German massacre victory, the British Churchill armour failing to break-in in a concerted effort in this 'little Stalingrad'. The British did clear the main road though. It was 4 o'clock and the second round of games was over... the scores at the end of day 1 read, Allies 29, Germans 27. Close, but the Allies had the slim advantage. We'd return tomorrow for games 3 and 4... when the panzers would come out to play.


Day two of Operation Foxtrot, could the Allies push on to victory in the face of the German's last hurrah of the panzers. Key to the German panzer counter was the Backsenbek coalmine again, having lost it yesterday, they wanted it back today, also the Allies would try again to clear the Schelkwerks, where the Germans had handsomely won both games on day 1.

It was bad morning for the Brits, the German armour pounced and mauled them... and they managed only 2 marginal victories. It was the Yanks that saved them, winning all three of their games, the Pershings and their artillery firepower telling... as well as some extra air support. Of 11 victory points won, the US accounted for 9 of them. Thanks Uncle Sam. The Germans had won some games, but not many games by much of a margin, and scored only 9 points... so all close run things and proving the German armour struggles to dominate in 1945. The score going into the final round of games stood at Allies 40, Germans 36. The lead had grown, and it might be enough to force the town's surrender.

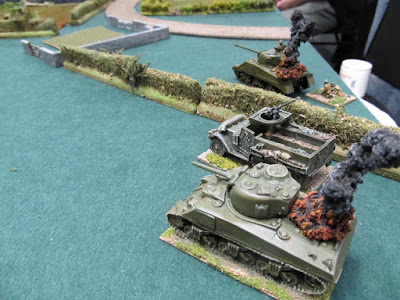
Sunday afternoon, and the player's girded themselves for the final push, make or break in game 4. 2.5 hours left to decide the outcome. The key objectives were now the Schelkwerks and the village of Seidenkirchen (soon to be Seiden-no-kirchen, after a British AVRE target the church and brought it crashing down). The US attack on the Schelkwerks was a disaster, their Pershings smashed by a lurking King Tiger in the ruins... they were well routed in a massacre win. But in the neighbouring sector the US won a solid victory in a brutal armoured clash near the Neulandhoffl Farm, that left the lane choked with burning tanks and half tracks, and 3 Pershings wrecked by Nebelwerfer strikes.

So, the results started to roll in, and it was still tight. With just 3 games still being played it could go either way... the first was a British win, a narrow one, but at the key village of Seidenkirchen. They had it, except that the next result was a solid German win, the last game would decide it. That too went to the Germans. Final scores, Allies 52, Germans, 53. Mundenberg would not surrender until the rest of Germany did.

It was a brilliant time, with great players enjoying their hobby, meeting new opponents and playing in a spirit of friendly competition, it's not about the winning, that just a nice side effect. The award for most victory points earned by the Allies went to Carl Hellicar again, he also won back at the Kursk event (including beating me). His US force of Pershings and armoured infantry had taken 4 out of 4 games, the only player to do so. The German winner, with 3 victories from 4, was part of the 3-man Finnish contingent for the Germans (foreign volunteers). Juuso Sepalla took the round of applause and certificate. His closest rivals were the two other Finns, who had provided 26 points to the German cause between them.

Here are lots of pictures of games in progress. Enjoy. I thoroughly recommend these weekends, its gaming like it should be (well to me), with a strong theme, with objectives at stake (but not too much), a drive to win, but not overly competitive and no rules lawyers in sight. In the end, the real prize is having a great time with your hobby, enjoyable games against new opponents... and knowing you did your part in the team's effort (or at least tried).

We shall do it all again at Battlegroup South at Bovington Tank Museum in the summer, with a desert campaign weekend, better get the book finished first (very close now).


Battle commences over 10 tables

 Brits line up for the advance into the Schelkwerks... well, to try

Little Stalingrad, the Schelkwerks, the German's rock, against which most attackers would break

 RAD Flak Regiment in an emergency ground role... dug-in and fighting hard.

 Backsenbek coalmine, scene of 2 early Brit victories. 

 Trenches around the coalmine, but the infantry within had little fight left in them

MundenbergstraBe, held by Pak43 dug-out. Minutes later a direct hit from a Tempest's bomb smashed the gun, with not a shot fired in anger. 


Volksgrenadiers in the hedges, doing brisk business with the Panzerfausts

US heavy tanks on the roll

More Flak troops, more dug-outs...  where the Allies expecting a cake walk?

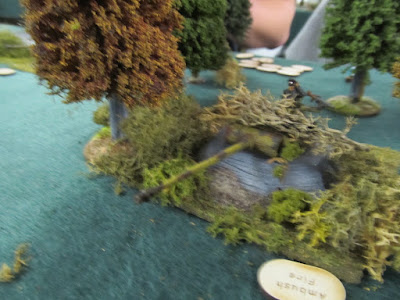
Equally nasty surprise, Panthertern, hidden in the treeline, and executing 3 Shermans in short order.  Need to get that pinned with some arty stonks... oh., no arty support, then that would mean trouble.

British infantry lead the way in the first attack on the Holtzbach stream, to be repulsed. 

US armoured troops attack at the ruined Schloss Neuhoffland... take the castle!

Trenches, more trenches, dug-in guns, the Germans were doing it right. 

British armour taking a beating outside the village of Siedenkirchen

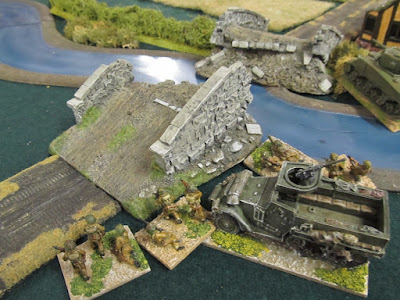
 The bridge, destroyed after game 1, but the Germans are still dug-on along the stream.

 Game 2, the Flak Regiment haven't gone away. 

 British Kangeroo-mounted platoon storming up the road to the coalmine and taking it.

 Churchills flounder at the Schelkwerks

US infantry have the castle ruins, and used  bazooka to knock out that 88 below them with AT fire. It's what archery slits were made for. 

US troops having more luck at the stream than their British allies. Pershings might held in that. 

British armour crosses the town's railway line

Churchills still rolling, the only Churchill-based battlegroup this time.

The counter-attack is on the way, and the ever popular Puma's were out front (amongst other recce). here, one guards the cross roads at Seidenkirchen.

Heavy armoured cars on the contested Holtzbach stream.

US armour meets the counter and deals out some of the German's own medicine, like US armour usually doesn't... 

Battle at Rabatz Farm, held by the Germans, until flamethrowered by a Wasp.

Cromwells provided the tank of choice for the Brits...

British recce, taking another look at Siedenkirchen

 US' turn at the Schelkwerks

Churchills, lots of Churchills, but they ended up in cautious stand-off with a lurking King Tiger. 

 That one in fact, and his two little Hetzer friends

Old faithfuls, and still the go-to tank for the Germans.

Challenger in cover and on ambush fire. Its shots scored its first kill, a Panther...

On rushing to meet the Challenger, and 17 pdr shell...

Counter attack at Rabatz Farm, now back in German hands. 37mm Flak doing stirling work keeping the Jabo's away (well pinned). 

 Sextons bring the farm under direct fire, aid tent and supply truck close by.

Oh dear, they didn't far from the start line. 

Kangeroos up to it again. Impressive performance for the armoured infantry. 

Coming the other way...

 Games 3 in progress

Scores on the doors (wall), after game 3.

Schelkwerks, counter-attack and big win...

 Churchills at Seidenkirchen

 Shermans at Backsenbek

Sextons on the Holtzbach

The wrecked bridge in British hands

Big cats roaming the fields

A familiar battle, against these US Shermans.

Recce takes a hit

Cromwells follow the railway line into town

To meet the Churchills at Seidenkirchen, but these last panzers were enough to hold the village

Rolling since 1939, a supply wagon arrives at the Schelkwerks.

Bring up ammo for the StuG

Nebelwerfer strike...ouch, but the US still won it.

Graveyard of the Pershings, not so hot now, facing a King Tiger. 

US armoured infantry do great work with their bazookas on the Neulandhoff farm track, and smashing that counter-attack. Another US win...

Monday, 2 January 2017

ROGUE STARS. A BRIEF REVIEW

A long time ago, in a galaxy (not) far, far away, there was game called Laserburn… this has a very similar premise, a new take on space-opera skirmish gaming. Having just played through my first game of the new ‘Rogue Stars’ game, I thought I’d write down my thoughts in a mini-review.

Our game scenario was an attack by my mercenary squad, breaking into a spaceship to steal some of its high-tech cargo from its security detachment of ‘Star Cops’. It all took place inside the ship, represented on floor plans. 1 floor plan square equaled 1” in game terms.

The book itself is in the now established ‘Osprey-style’, nothing very flash from a graphic design POV, rather small font size and a lot white space’ left, which makes me think these books are written to fit a set format, which in itself can be limiting. It feels lightweight, no real meat on this bone, just the rules and a short (one page) on the campaign rules. The artwork is nice in a cartoony style, I’m more a ‘gritty reality’ man myself, but each is just an image of single character, so not much for establishing a look or feel for the universe. There is no background at all, its just generic ‘far future’ space opera, which is fine, players can create their own, or just use a ready made one from Star Wars, Star Trek, Buck Rodgers, 40K, whatever they fancy and floats their boat.

The miniature photography is rather uninspiring, nothing here in the way of eye-candy, nothing to get the creative juices flowing or inspire a player to do something cool themselves. Each picture is almost the same, 3-4 miniatures on a bit of generic sci-fi terrain. The same miniatures reappear often. Meh! I’d like to have seen something that got me really wanting to play ‘games like that!’. These photos add very little and just fill some space.

On to the rules then. Well, the game scores well for its activation/turn system. That stood out as the best part of the game, acting, reacting and passing the initiative back and forth. It feels like you can you do a lot with a little, if the dice favour you, and that there is a nice ‘to and fro’, both sides are always very involved in the game. There is never a predictable pattern forming of who will get to do what when. This kept both the players thinking, planning and re-planning throughout as the game progressed. I enjoyed that.

The downside, well sadly, is the rest of the rules. The shooting combat I found very dull, and this should really be the heart of the game, laser-blasts flying. Its a D20 system, and the problem is that a D20 allows a lot (too much) of detail and flexibility. The long list of ‘to-hit’ modifiers had my eyes rolling - 24 in all! More that 3 or 4 modifiers don’t stick in the head, so you have to look it up each time. -1 on a D20 is a tempting prospect for games designer, the lovely detail it includes, but makes such little difference and slows the games down a lot. Rogue Stars has fallen into this pit trap.

Second big negative point for me was all the counters. It’s a skirmish game, so with just 5 men to control each, you can have some bookkeeping, but here the counters stack up to crazy levels. Stress markers, Pinned markers, Wound markers, and then other types of wound marker too, Staggered, Lightly Wounded, etc, it all made for a messy table and felt inelegant. At one point the stack of Pinned counters on one of my mercenaries was as tall as the model itself. All these counters have -1 effects in various places and need tracking, which is slow and fussy.

The final part of the game is the squad creation system. Again, it feels very light weight and a bit ‘tacked on’, but the detailed required for each character, their abilities, arms and armour, makes it a lengthy process to run through pre-game. You really need to pre-generate these before hand and have a right models painted, which is a lot of work for a small ‘pick-up’ skirmish game.

In our game my Mercenaries took a good kicking. The Star Cops captured 4 of them and killed 1, for only 1 badly wounded cop in return. Of course, that now suggests a follow-on game for a rescue mission to recover the four prisoners, but if this was an on-going campaign then my squad would be decimated already, and the 5 miniatures I’d bought and painted up would be useless and require 5 new ones. Here is a problem with the whole genre of ‘narrative skirmish games’ (Inquisitor being a classic for this), there is are no grunts to just get killed, everybody is a detailed character and specific to their model. Their loss is a massive loss and means a miniatures is now useless (unless you replace the loss with the same model, which sort of defeats the object of the narrative - a character dies only to be replaced by almost exactly the same person doesn’t happen much in books or movies).

Rogue Stars has its good points, but it leaves me a bit disappointed. I’m not hankering for another go at it. I enjoyed the game as a learning/testing experience, but it took over 3 hours to play which, even with this being a learning experience and checking rules etc, seems long. This from a man who used to play Phoenix Command (the big-daddy of ultra-detailed firearms combat rules), but times have moved on.

I’d play again, but I can’t see it becoming a regular in my gaming circle. As with all these small Osprey games, they feel flimsy, never really getting into the meat of the hobby. The rules do the minimum and that’s about it. More ‘play it twice and throw it away’, not sure I like that… for me my hobby is about longevity (having been at it 30+ years). In our world where your PC or phone or washing machine is redundant after a year, I like that my model soldiers remain in use for 20+ years and never grow old. Osprey just seem to want us all to move onto to the ‘next thing’ all the time.

Overall, Rogue Stars gets 2 stars out of 5 from me.


 Game in progress, as the firefight in the ship's cargo hold begins. My Mercenary leader is down, shot whilst leading the way. The rest of my men are still making their way through the engine room. Note those counter stacks.

A grenade goes off in the doorway as the Star Cops try to get through, knocking 2 prone, but only injuring the lead guy. Not sure the rules on grenades are well explained - how do you do damage to multiple targets hit by 1 attack?

Counters everywhere! To illustrate, my down leader has Stress counters (brown), pinned counters, a dice for wounds and his gun is empty. All could be written down on paper, but a visual reminder helps, especially in a first game when you don't know what these things mean.


Sunday, 1 January 2017

FALL OF KONIGSBERG, GAME 1.

STRONGPOINT ASSAULT, ON FORTRESS Va ‘LEHNDORF’

So, for 2017s first tabletop entertainment, I’ve planned out an 8 battle mini-campaign for the final offensive to capture Konigsberg, East Prussia, from April 6th to 10th. The city had already been surrounded for 4 months, but the Russian launched an offensive to eliminate the pocket (and the final German held parts of the Samland Peninsula) in early April - a fine subject for a series of Fall of the Reich games.  So, armed with some initial reading and research, the campaign will play- out those last four days as 8 battles, each using a different scenario and allow me to get my recently re-vamped Russian on the field. The German defenders aren’t much to write home about, 4 badly burnt-out infantry divisions, with about 8000 Volkssturm and some SS police units, and about 50 SP guns as armour. Outside the city the defenders can look to the aid of 5th Panzer Division, but after its early hard fighting, I can’t imagine they were anything but a badly burnt-out panzer division with a few tanks and armour carriers left. They certainly didn’t achieve much in the actual fighting. I need to find some better information on 5th Panzer’s strength in April 1945, but I think I can guess it wasn’t pretty.

The first campaign game would be an assault on one of Konigsberg’s 12 surrounding forts. Originally Napoleonic defences, them were formidable even in 1945, mostly buried under metres of soil, with hidden embrasures and firing positions, and encircled by more trenches, barbed wire, minefields and an anti-tank embankment. Much of these exterior defences were smashed by the 4 day long preparatory bombardment, including by 203mm and massive 305mm siege guns. Before the attack began the embankment was flattened, the trenches filled in and the wire cut.

I would be playing a morning assault on Fort Va, called ‘Lehndorf’, held by the 1094th Volksgrenadier Regiment’s men, and positioned north-west of the city, close to the village/suburb of Juditten. My opponent would be the fort’s defenders and their few reinforcements (an alarm force of bicycle-mounted grenadiers and a Marder - woo-hoo!). Late war fighting and not a single King Tiger or such in site… how it really was most of the time.

My assault force was selected for the mission of clearing those bunkers and pillboxes, so twin ISU-152s for bunker-busting, assault engineer platoon with flamethrowers and demo charges, a screening rifle platoon (err, cannon-fodder) and T-34s, including a lurking OT-34 flamethrower tank hidden amongst them. For artillery, I wanted off-table 203mm guns (who wouldn’t?), but the points ran out, so I went with an on-table Katyusha battery, to saturate the fort under 132mm rockets. After that there were a few odds and ends, supply truck, sniper, etc.

The Germans held the fort with a Volksgrenadier platoon, 2 sMG-42 pillboxes, a Pak-40 and loader team in a bunker, a command bunker, 2 minefields, 30” barbed wire, trenches and a dug-in 88 (with loader team) lurking at the back. His reserves were more bicycle-mounted grenadiers, a Marder, resupply wagon, etc. Off-table he had only 80mm mortar fire (all artillery being under heavy counter battery fire). His BR was far lower than mine, but almost everything had a 3+ or 2+ cover save.


It was raining on the morning of April 6th, so all aircraft were grounded. No air support for either side, except timed air strikes. Air Attack counters would be worth 1 BR instead.

With both sides deployed, it was time to begin the battle. My plan was to soften up the defences with the ISU-152s and Katyushas whilst I awaited the flanking force of 3 T-34s and the 3 tank-riding veteran assault pioneer squads to arrive from my right flank. They would conduct the main assault at speed, to get onto/into the fort with their flamethrowers and seize the objective with lightning speed. Battlegroup’s Strongpoint Assault scenario allows a flanking force, but as the fort was historically close to large lake (effectively roughly the left edge of the table as I looked at it), it couldn’t really arrive from the left except by boat, so the flanking force had to be on the right, which gave it further to go under fire, but seemed to be .

So the first turns passed, my Katyushas hammered the fort to little effect (2+ cover saves, urgh!), my first ISU-152 shot did score a direct hit on an sMG-42 pillox and vapourise it, crew and all, nice job. The second pillbox proved harder to hit, even for my sniper hidden in a shell crater, who had the embrasure in his sights. In return came German off-table mortar fire, harassing my infantry and causing some pinning. The 88 took some very long pot-shots and missed. The PaK-40 in its bunker on (actually under) the hill, lined up an ISU-152 but the first shots clanged off the frontal armour.

Initially, the main fight continued on my left. An ISU targeted the pillbox and again missed, whilst the other one reloaded (ammo 2!). The sniper hit one German within the pillbox and his death pinned the rest of crew - result. Meanwhile, my Katyushas reloaded as fast as they could.  The Germans hung tough, holding position and mostly going onto ambush fire. The PaK-40 fired again, aided by its loader team and scored all 3 hits on one ISU-152. First shot - clang! Second shot - clang! Third shot - kaboom! The big SP gun was a-goner… damn. That PaK was a big problem. 

Turn 3 and the Russian flanking force arrived, to immediately be targeted by the 88, waiting for them. Its ambush shot hot but glanced off, phew! But, the tank riders had to jump clear. The softening up hadn’t really done much, to launch my main assault now would be suicide, so I had to re-think. I wasn’t going to directly attack a dug-in 88 with loader team over open ground with four T-34s. They would last, well, not long. So, as I had no way of pinning it (a few T-34 HE shells so far hadn;t cut it and my katyusha’s observer team had no line of sight), I decided to change my plan. The main assault would swing around to take the fort head-on, out of the 88’s sight. First, for this to work, the PaK-40 had to die! The T-34s gunned to full speed and raced around to the centre, more 88 shells flying high as they did. My last ISU-152 targeted the PaK-40 bunker for ‘the treatment’, but again failed to dent the fortifications. I called up some off-table artillery from Front-level support, using my dispatch rider, and four 152mm guns hammered down fire on the fort. They did little, beyond pinned the infantry and command squad within, no doubt with ringing ears, but that bunker-PaK was still free to shoot.  Which it dually did, taking out the lead T-34. Argh! This wasn’t going well, the German were so deeply dug-in it seemed unlikely I could shift them.

German reinforcements were now also arriving, the Marder and a few guys on bicycles. Soon the fort would be reinforced with more men to winkle out. Desperate measures were required.

When one of my infantry squads came under MG fire, the 3 survivors got a lucky beyond the call of duty freebie order and so double moved at the Pak-bunker, next turn they would assault it with grenades and try and take it out. I failed to notice that in the charge they ran across and minefield, and so lost another man. Just 2 left, but when the defending MG then failed to spot twice it seemed they might get their chance for glory - go boys go! But an ambush firing second MG did not fail its spotting test and cut the two brave boys mad dash short in hail of bullets. Drat! Almost a very heroic moment.

My ISU-152 was reloading (again) so I unleashed my now reloaded Katyushas for another mega-strike. The screaming rockets smashed down and scored multiple direct hit, including on the bunker-PaK. 1 gunner was a casualty as the roof threaten to come in, and the resulting morale check saw the Volksgrenadiers abandon the gun… yeah! The fort was giving way. My last two T-34s immediately broke cover and raced for the fort, pioneers jumping off them as they advanced on the objectives. My sneaky sniper scored another kill, on the fort’s MG team and the resulting morale test left the last man running. Suddenly, the fort looked like it might well fall.

The last Germans put up a heroic fight, shooting down a few pioneers as they came through/over the barbed wired. The grenadiers on bicycles jumped from their transports (?) and ran for the fort, but too late to reach it in time. The my pioneers closed in and shot down the last of the infantry squad within, grenades and PPSHs blazing, whilst my OT-34 rolled up to the embrasure of the command bunker and poured on the flaming death. That flamethrower shot wiped out the forward HQ within. The human torches costing the Germans 4 counters - 2 for the senior officer, 1 for the flamethrower attack and 1 for the objective. The Germans drew the counters and the defenders broke! Time to pullback towards Konigsberg. But Fort Va ‘Lehndorf’ was gone. The first step towards the city had been taken…

Great game. Not a scenario I have often played, an assault on a strong point position, but it was great fun and a first outing for my ISU-152s (that I can remember). They did well, but the OT-34 won it, its final surge onto the objective winning the day. The poor Volksgrenadier had but up a good fight, but the Red steamroller is tough to stop in 1945 (as it was). So, I take an early lead in the campaign victory points. 3-0 up with 7 games to play (each battle is worth different amounts of campaign VPs, and bigger wins give a bonus too).

The next battle will be 5th Panzer Division putting in an emergency counter-attack on the Samland peninsula, just west of the city, on the afternoon of April 6th. On the day, the weather also cleared by then, so the VVS should be able to put in a strong appearance. After that, game 3 will be the Volksgrenadier rearguard fight in Juditten on April 7th, a delaying action to buy time for the retreat into Konigsberg’s suburbs. After that, we’ll be into the gritty business of street-fighting.

Here are some shot of the game in progress. Mostly of my stuff, as I’m too always involved in the game to wander to the other side of the board (read lazy), and really you just want to get on with playing.

The battlefield, to the right the fields across which the Russian assault will come, over-looked by the Fortress bunkers. The T34/85 wreck is marking an objective.

'Lehndorf', before the German deployment. The bunkers represent the hardened positioned 
under the hillock.

The Russians arrive, visible through the morning rain. ISU-152 lines up a MG pillbox, much needed supply truck in close attendance.

Kaboom! Bye-bye pillbox with the ISU's first shot. Eat 152mm HE shell, direct hit.

 Stalin's Organs begin to play, targeting the fortress hill. Smoke marks them as fired.

The fortress takes it first pins, but little damage. White smoke 'puffs' are for ambush fire. 

 Pak-40 scores multiple hits and takes out the ISU, even needing 10s to penetrate. 

Flanking reserves arrive on the right.

 Second MG pillbox, concealed in the wood line, under fire but taking a pounding and fighting back. Behind are dug-in grenadiers in their trenches, back from the wood line, meaning I'd have to get into close contact to target them. They await on ambush fire.

 A feint on my right, drawing mortar fire and 88 shots, but not a serious attack, just something to draw fire from the main assault.

The reinforcements race round into the centre, pioneer tank riders still aboard. 

88 finds its mark at last, the T-34 supporting the diversion is knocked-out. 

 The offending gun, dug-in behind the fortress (entrance bunker in the background)

 Grenadiers await in trenches, on ambush fore

 Two surviving riflemen try a crazy lone assault on the Pak-bunker. They came close, but, like most heroics, it ended in death. 

Behind, the screening riflemen hunker down, sniper continues to harass from his shell crater. 

T-34s move up towards the fortress, and one catches a Pak-40 shell and brews up. Pioneers now off and readying for the charge, but they need their targets pinned first.

T-34s move up again, the assault is on, HE flying. The OT-34 has just crashed through the barbed wire and is closing on the command bunker.

Wreathed in smoke from Katyusha fire, the OT-34 is almost there. 

Meanwhile, pedaling like mad, the reserves can't reach the fortress in time to save it. 

 Burn baby burn! Pioneers are there and the OT-34 hoses down the command bunker, a crushing lost that broke the defenders. The pioneer's flamethrower wasn't required.


Friday, 2 December 2016

CRETE LANDING, SOMEWHERE NEAR PIRGOS

May 20th, 1941
On the edge of the village Pirgos, near Maleme airfield, Fallschirmjager (FJ) forces are dropping onto Crete, the invasion has begun! The paratroopers objective (that's me) is to silence a Bofors anti-aircraft gun, part of the airfield’s defences, and clear the area of defenders. The defenders, all New Zealanders, must hold their positions and defeat the paratroopers on the ground.

This was a small play-test game, running through the basics of a new Airborne Assault scenario, which allows games to be played with paratroopers (and those in gliders) landing on the tabletop in a directly opposed landing… a messy business, but a different and fun game. Not many tanks though…

Here are the two battle groups for this ‘platoon’ game.

7th Flieger Division Force
FHQ -   3 men
Luftwaffe Air Liaison Officer - 2 men
Comms Relay Team - 2 men

FJ Platoon    - 6 men PHQ, 3 x 6 men, 3 x 3 men with MG-34 (vets)
HMG Team  - 3 men with sMG-34
80mm Mortar team - 3 men, plus a loader team

2x Snipers

FJ Pioneers Squad - 6 men with a demo-charge and flamethrower, 3 men with MG-34
Counter Battery Air Strike (3+)

Totals        380 pts, 27 BR, 3 officers , 2 scouts


Creforce Defenders
Infantry Platoon - 5 men PHQ, 3 x 8 men with a Bren LMG, 1 x 2 men with 2” mortar (regs)
HMG team       - 3 men with Vickers HMG
AT Rifle team   - 2 men with AT Rifle

Sniper
Vickers MkVI B Light Tank (unreliable)
Carrier Section - 3 x 3 men in 3 Bren Carriers

Artillery Observation Post
Fortified Building (in the center of the table)
AA gun dug-out with 40mm Bofors

Battery of 2 x 75mmL30 guns (off-table)
Totals        379pts, 21BR, 2 Officers, 1 Scout

In blue, landing areas and FJ moves. In red, NZ moves. The objective was the small hut in the centre.


Turn One and the action started with the first wave of FJ dropping in and randomly scattering all over the place. The Platoon HQ hit first and, by luck landed right next to one of the objectives (marked by a drop canister) in a vineyard, they immediately came under Ambush Fire from the dug-in Bofors on the hill top, with a commanding view, but the first rounds flew high and missed. It was a good start, that rapid went more pear-shaped. One squad landed fine (but pinned) but their MG team was lost in the drop, hit by ground fire or scattered to the winds… another MG team landed in rocks and the resulting casualties that caused, and also being pinned, meant they were lost too. The platoon’s other squads hit the deck, mostly pinned, and that ended the turn. Some unpinning (finding drop canisters) later, and it was the defending New Zealander’s first go.

They set about inflicting some damage, mostly more pins though as they didn’t have many orders (4), the Bofors gun went onto Ambush Fire again. Dug-in, it as going to hard to take out or get near enough to assault. Two other New Zealand units scurried off to grab the drop canister objectives from where they had randomly fallen. The AT rifle team grabbed one, whilst a Bren Team, detached from a rifle section set off to get the other - all worth counters on the FJ, like normal objectives.

Turn two, and the rest of the FJ dropped in, including the FHQ, into the vineyard, as well, and his air liaison officer, who unfortunately landed in the open about 6” in front of the Bofors gun and was immediately turned into meaty-chunks by 40mm cannon fire. The mortar team and loaders hit the vineyard too but, best of all, the pioneer squad’s drop deviated them right towards the central building (an objective and a fortified building, containing the New Zealander’s Platoon HQ, nice and safe). Well, until the pioneer’s perfect landing left them unpinned, ready to go and with their flamethrower in hand. Eek!, they immediately rushed up to the building and gave the PHQ a whiff of hot flammenwerfer, wiping them out, and costing 3 counters(!): unit destroyed, under flamethrower attack, captured objective (even if it was now rather scorched). The FJ were back in the game after the initial counters had seen them rapidly race up to 16 BR lost, with the New Zealanders only on 3 (from being out scouted and one objective grabbed).

The third FJ MG team was wiped out by rifle fire, leaving me very ‘MG light’, but a lack of orders meant that the NZ observer team in their dug-out couldn’t call in the off-table 75mm rounds this turn, a small mercy for the struggling paratroops. As well as that break, none of the defender's reinforcements arrived this turn.

Turn 3, and the FJ were all down now, but mostly pinned. They did what they could, the mortar team was ready to go, but the PHQ failed the required comms test, even with a re-roll for the comms relay-team, now set-up in the vineyard that, by default, had become the command post. The pioneers took the fortified building (3+ covers save, yeah!) and shot up the rifle section in the field outside, pinning them down. The pioneers were winning this single-handed it seemed. Their squad MG also got into the action and added some extra pinning too, game on.

In the New Zealander’s turn, well, the scampering 2-man Bren team grabbed a drop canister and the Bofors opened up again, hosing down that vineyard where the FJ kept landing, and luckily killing one of the FHQ with its suppressing fire. Also, reinforcements arrived, the Vickers MkVI clattered up the lane, with a Bren Carrier team behind -  Actung Panzer! My FJ had almost nothing to fight that with, except  suppressing fire at close range and hope it broke down (it didn't). The Vickers sprayed a lot of MG rounds but managed to pin nothing… the Bren team behind de-bussed and headed into the vineyard, to see what they could mop up, and managed to kill one man from the comms relay team, but his surviving mate wasn’t pinned and would fight back.

The BR count looked bad for the FJ, but this turn the pioneers wiped out the squad outside with two aimed fire shots which massacred the poor NZ guys pinned in the open at short range. The PHQ also took a drop canister objective as well, and the the two snipers managed to keep some enemy heads down too, all good. The paratroops also got the mortar into action for the first time, spotted for by the PHQ, they tried to hit the Bofors gun, but failed to pin it, even with the help of their loader team's extra shot. The sMG-34 team then pinned the Vickers light tank, bullets ricocheting everywhere, but it was the best they could do to stop it. Unpinning, the FJ were now at 25 from 28 BR, but the counter was an Air Attack, hurrah, the Luftwaffe, except my Air Liaison Officer was very dead and my roll failed, no show from my Stuka… drat! The counters inflicted on the enemy made it closer again though, and both sides where furiously doing the maths, checking their counter stacks.

New Zealander’s go, and finally they had enough orders to try and fire their artillery, and got through on the radio, and avoid the counter battery air strike (damn, the Luftwaffe was failing me today). The 75mm shells plunged in and did, well, not much - phew! 1 pinned unit in the orchard was it, well worth waiting for (and cost 3 orders). Oh well, the fire fight continued, the Vickers HMG fire pinned the heroic pioneers in the fortified building, but that was about it. The Vickers light tank was pinned on the road (and now just 2 BR points from breaking, it wasn’t going to get unpinned anytime soon), and the carrier team in the vineyard failed to spot the last FJ signals man, hiding under the vines twice, a lucky break. It was so close, but that Bofors was back on ambush fire, looking menacing.

German turn, and they had big problems, they were also just 3 BR points from breaking. Their orders also deserted them and, with so few, I tried to cause a counter or two - somewhere! Anywhere! But, the mortar failed to hit or pin the Bofors again (dug-in, very tough). It then returned fire, luckily spotted and then hit the FJ FHQ calling in that mortar fire, and killed them all (well, both). 2 counters for a lost senior officer… and game over. The FJ had lost, but it was very, very tight in the end. If only that Stuka had shown up.

The scenario was great, some tweaks needed, so it was not quiet so harsh on the attackers as they land, and to make gliders look a bit more attractive as a way of getting onto the tabletop. Also, I'm not sure the defender’s reinforcements will show up fast enough to take part in the battle, but overall the balance was good. The FJ lost a lot of BR (and units) at the very start, but they have sky high BR totals as veteran and elite infantry. The defenders lower BR total meant that once in the fight, they looked very dodgey. The horror of the flamethrower attack cost them dear (11 BR out of 19 lost in all). The Vickers light tank was frightening, not often you can say that, but on this table it felt like a Tiger tank…

Here are some shots of the game in progress.

Crete army lists and airborne assault scenario will form part of the next BG book ‘Tobruk’ for North Africa (and Crete) in 1940-41. The airborne assault makes for a very different battle and has a chaotic feel from the desert tank fights, and I really like that. Next time, some glider landings too I think… best paint a DFS-230. Hmm, who makes one...?

The mighty Bofors, in its dug-out. In front, a drop canister objective marker has randomly fallen. A detached Bren team ran over and grabbed it.

PHQ hit the vineyard and another drop canister objective.

 
 Defenders become alert, PHQ in the central objective, unaware of a fire fate awaiting them.

Vickers HMG team and AT Rifle team on the edge of Pirgos.  


Landing in the lane, pinned, then diving into the walled orchard for cover. 


Up that same lane comes reinforcements - serious armour(!). Well, on this table, it is.

 The Vickers MkVI gets pinned down by the HMG-34 team blazing away at it, from about 4" away.

Meanwhile, the Bren carrier team de-buss to investigate the vineyard. 

Across the table, 3 last survivors of second squad shoot it out with a 2-man 2" mortar team, that ditched the mortar in favour of their rifles. 

The Vickers team hosing down the objective building and pioneers, pining them down. Nothing dared come up that lane...

Last reinforcements arrive from Pirgos, another carrier team, but too late to get involved. They can just help mop up the surrendering paratroops.